Zipper
If you want your bag to be 100% waterproof, you don't need to read any further.
Zips are always a weak point through which water can penetrate under unfavourable conditions.
There are zips (Tizip) that are truly waterproof and airtight and are also used in professional applications. However, these are very expensive and not the first choice for a DIY project.
However, if you think about it beforehand, consider your requirements and check where and how you want to position the zips on your bag, you can achieve satisfactory results very easily and cheaply.
The trade offers various types and qualities of zip fasteners, which are often advertised as waterproof or water-repellent. The teeth or the spiral of the zip are covered with sealing lips. Only a few of these models indicate whether they are weldable. However, all types of this type that I have used so far are very good and resilient and can be welded to TPU-coated fabric. But this is not a general recommendation, you should always test it beforehand in individual cases.
If a zip is sewn in with a sewing machine, there are three problem areas with regard to waterproofness:
The seam, the teeth (or spiral) and the ends (stop and end part).
If, on the other hand, you weld in the zip, the seam is no longer a weak point if you work thoroughly.
As the teeth and the spiral are covered, this area is also relatively well protected from splashing water, light rain and the like. However, it should not be subjected to more stress. Here too, if possible, you should test what the zip can withstand beforehand. In my experience, zips with teeths perform better here, as they give way less under load.
The ends of the zip are most susceptible to moisture penetration, mainly the stop part, i.e. the area where the slider is parked when closed. Due to the design, water can always penetrate there. The only thing that can help here is a cover that is positioned and dimensioned in such a way that rainwater can drain over it.
Of course, a cover for the entire zip provides even more protection. In general, this solution should be considered and used if possible.
I usually use zip fasteners by the metre for bags. It's cheaper and you can design and work more variably.
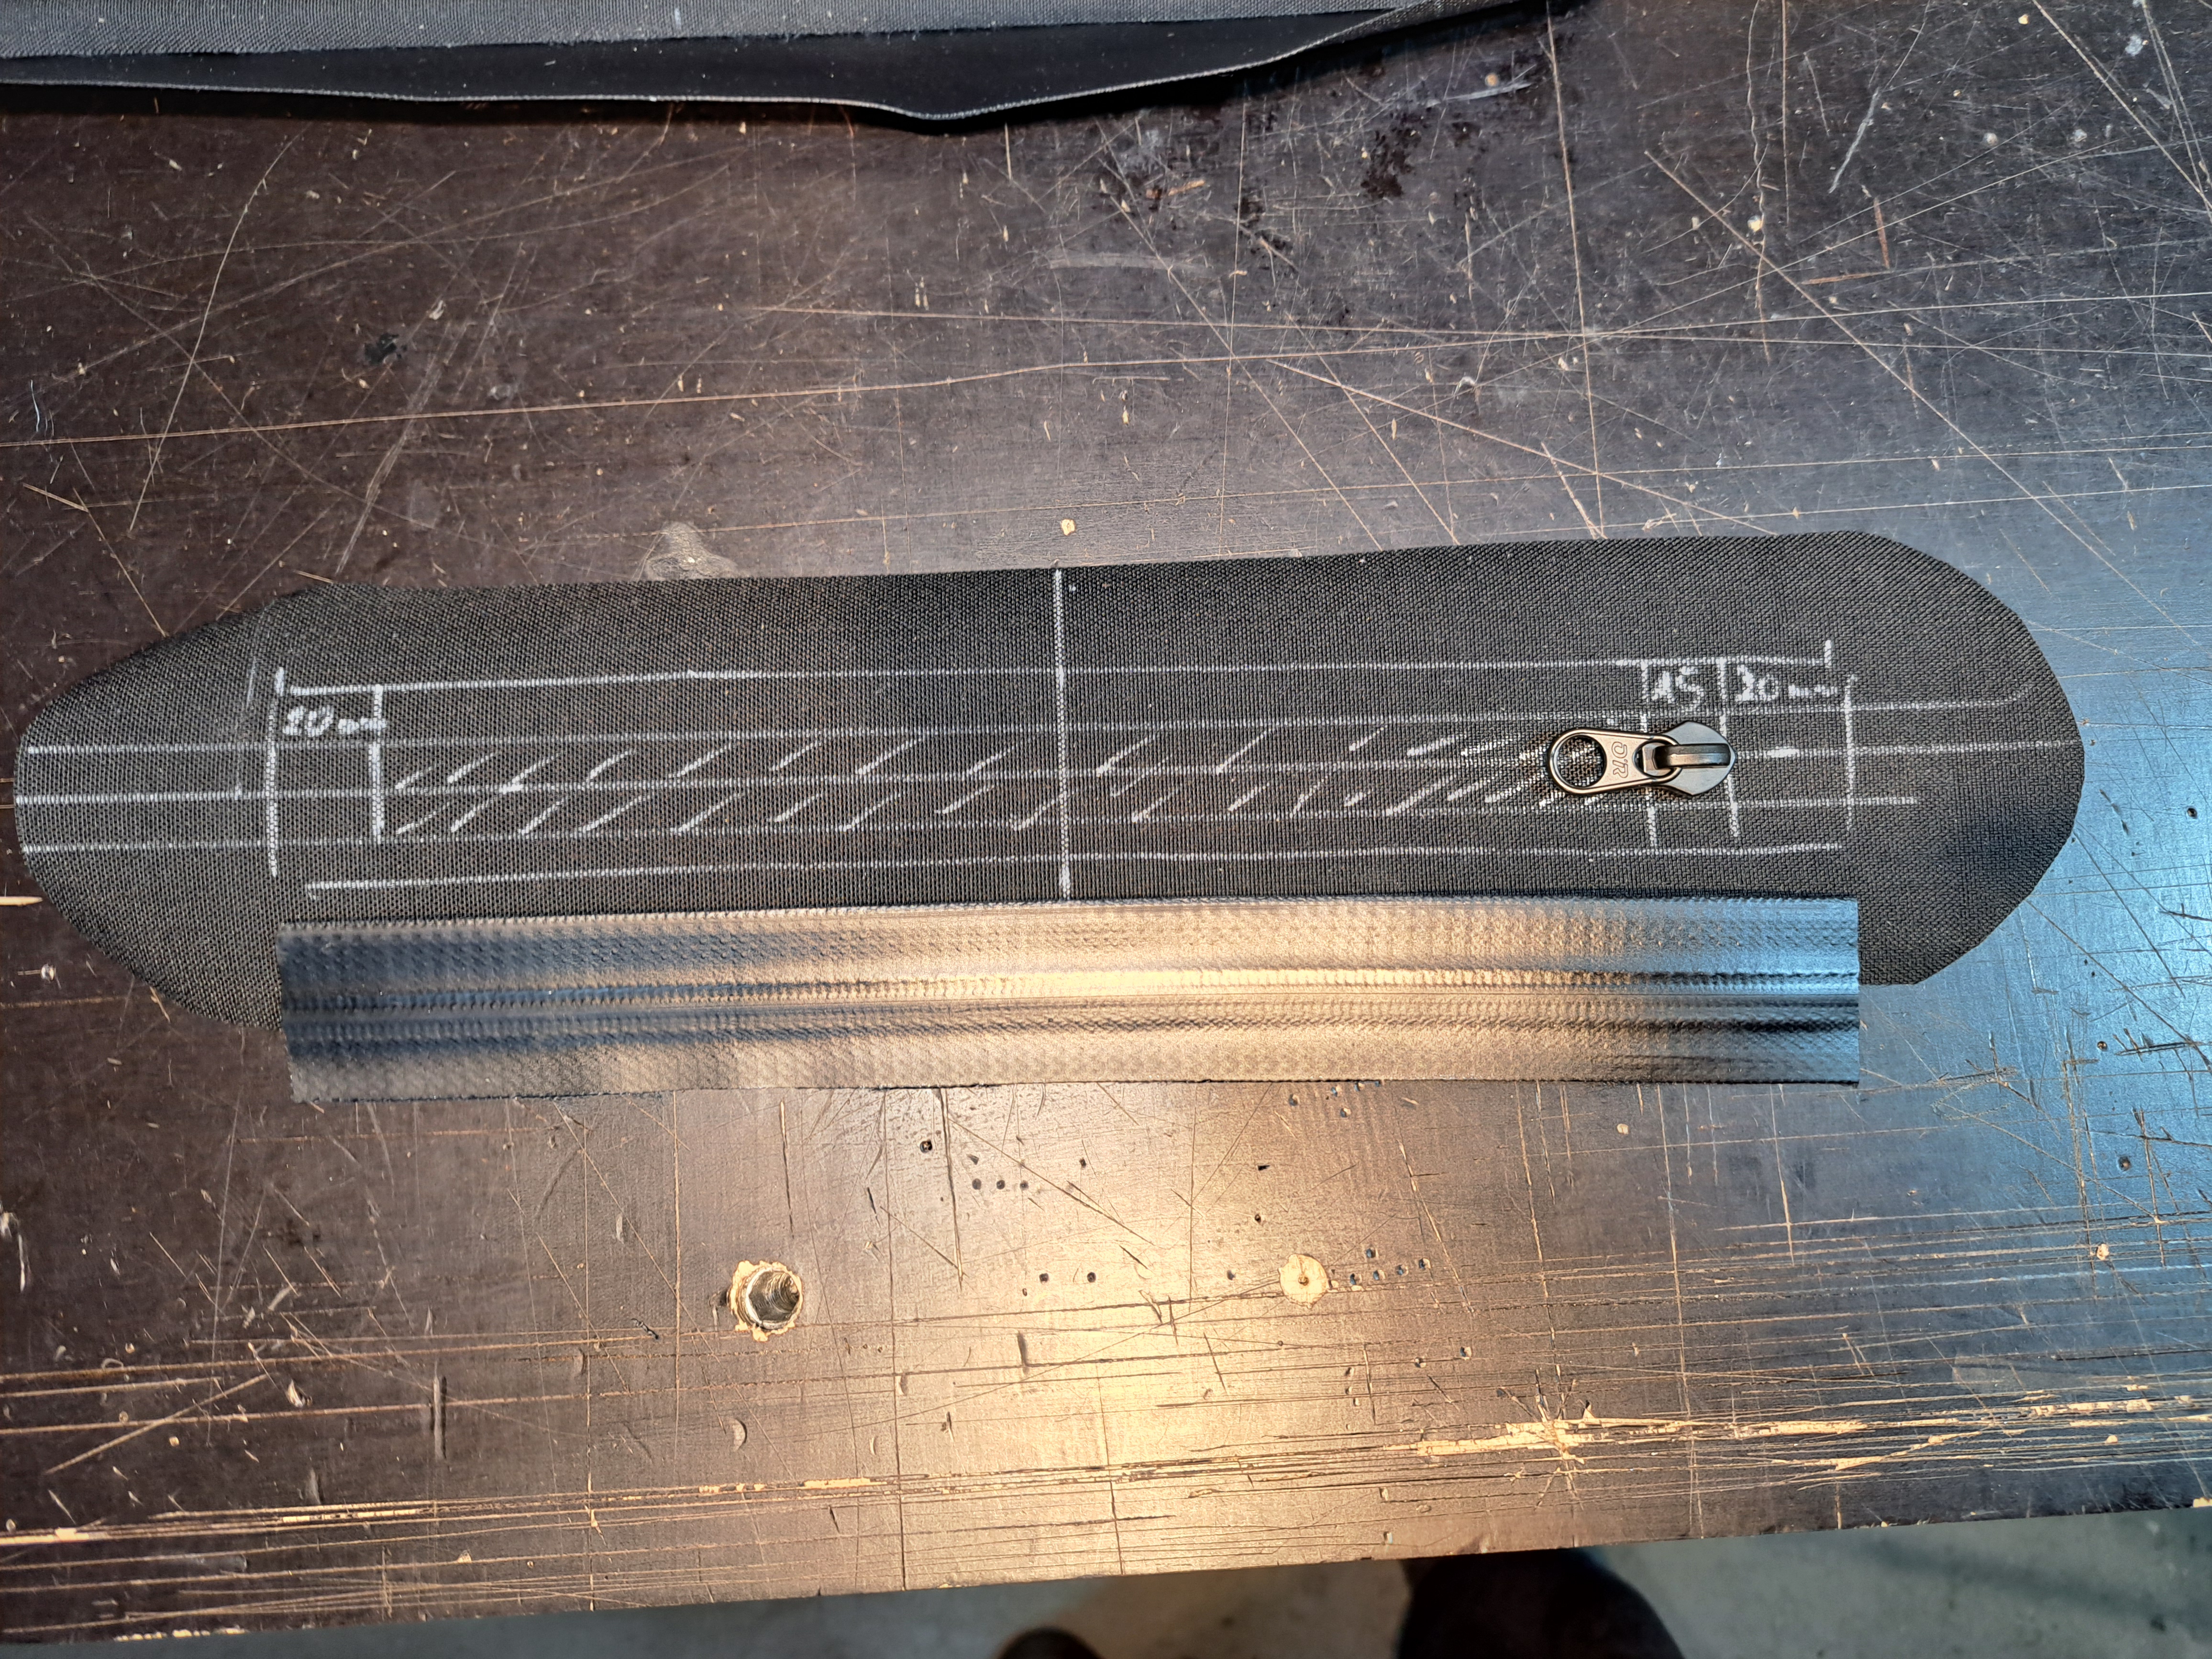
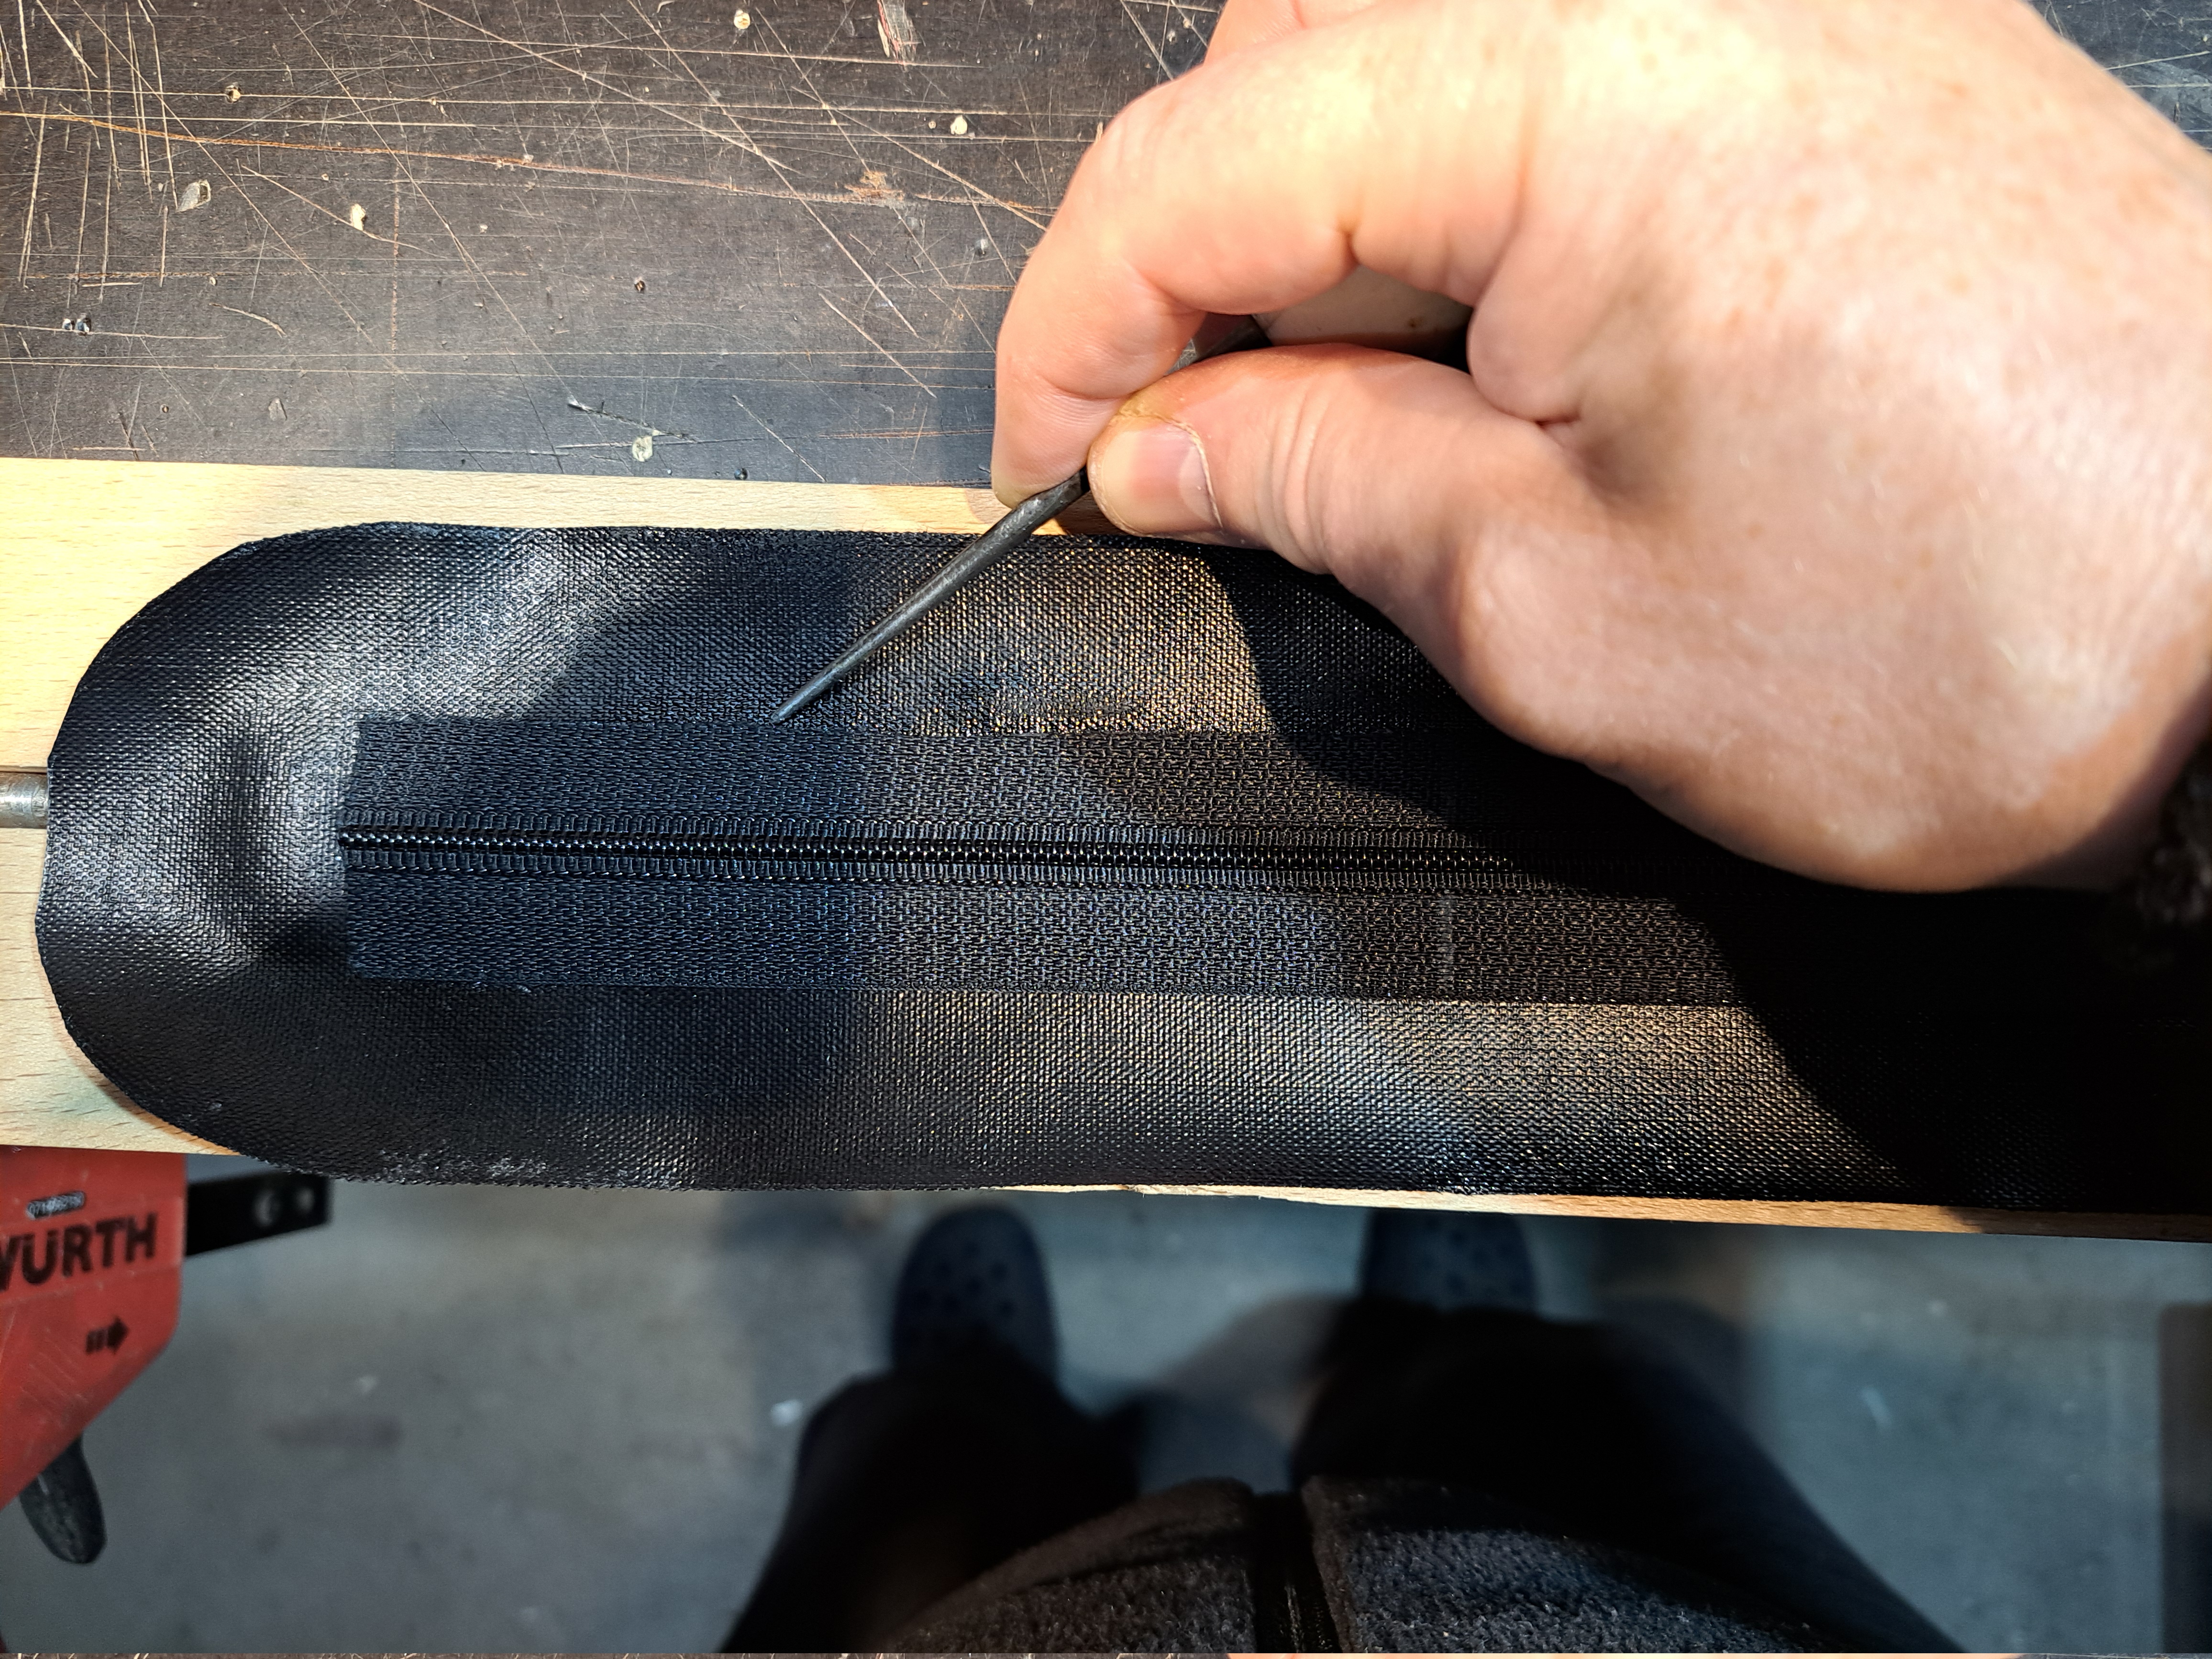
First, we mark the area where the zip is to be inserted.
The hatched area is cut out.
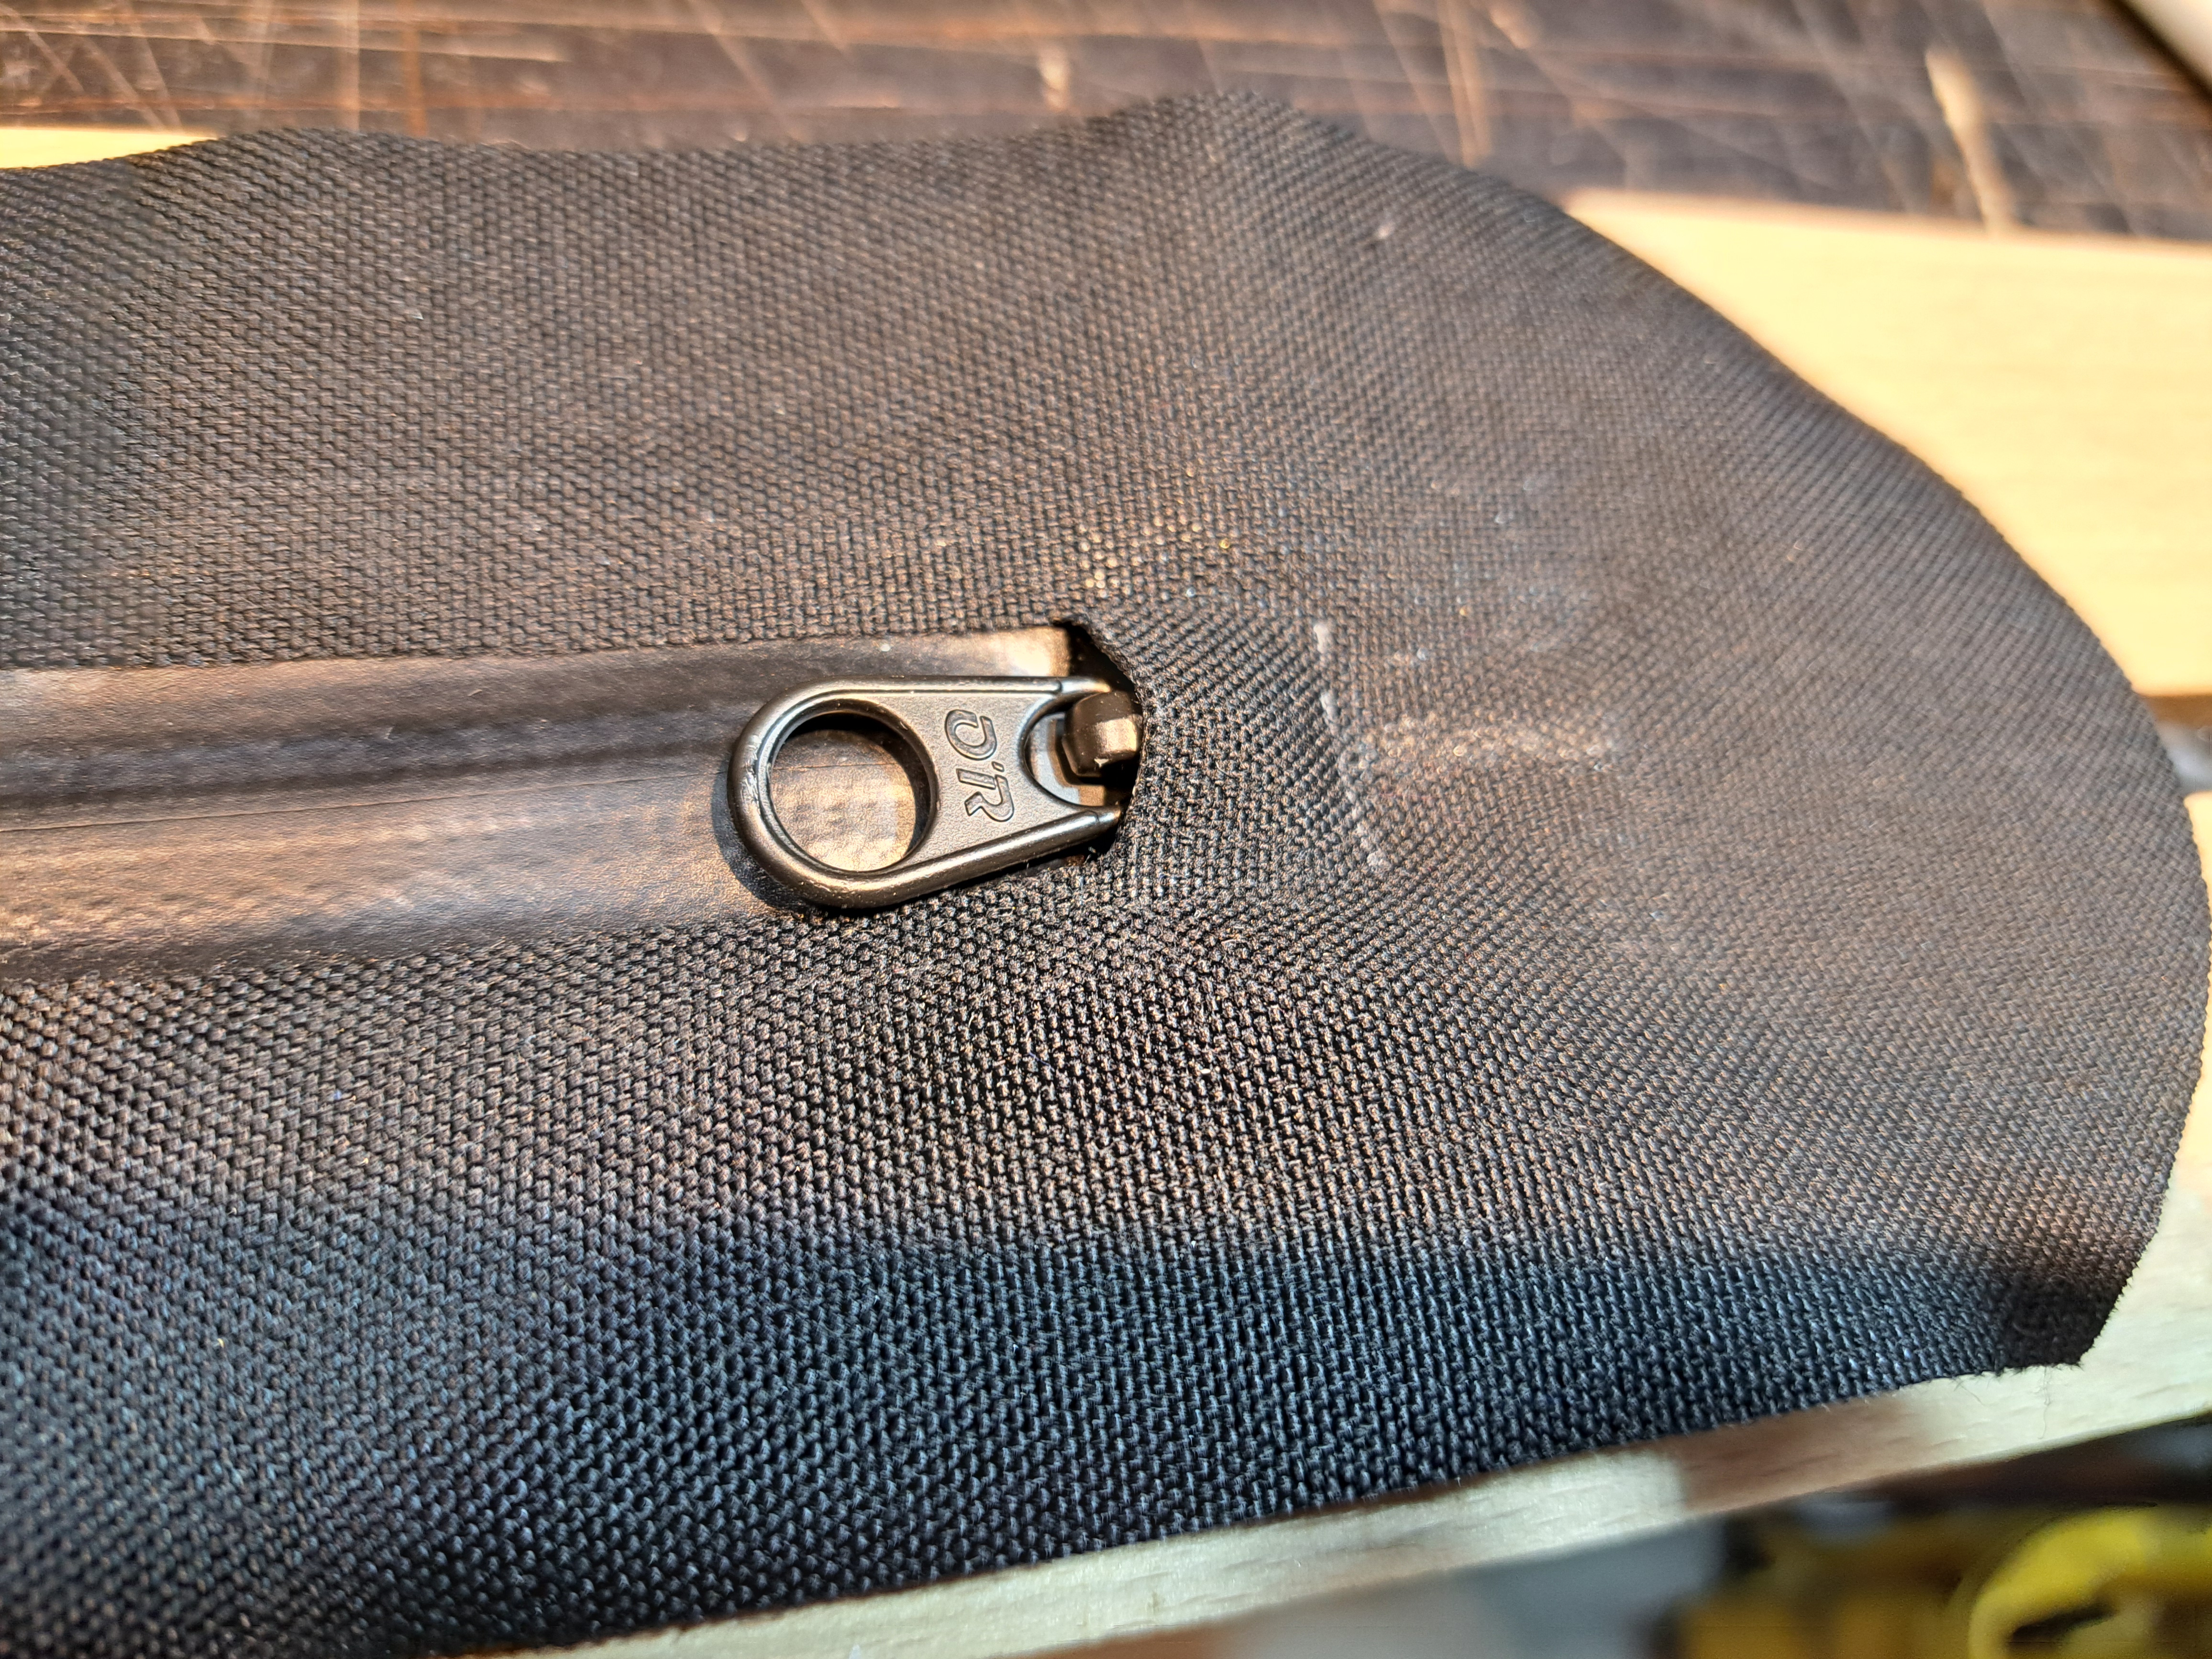
The width of the opening depends on the width of the slider. If it is too narrow, the fabric will always pull into the slider and jam it. You can also simply make a cut. However, water that has penetrated into the resulting pockets cannot drain away quickly and can penetrate at the ends under unfavourable conditions.
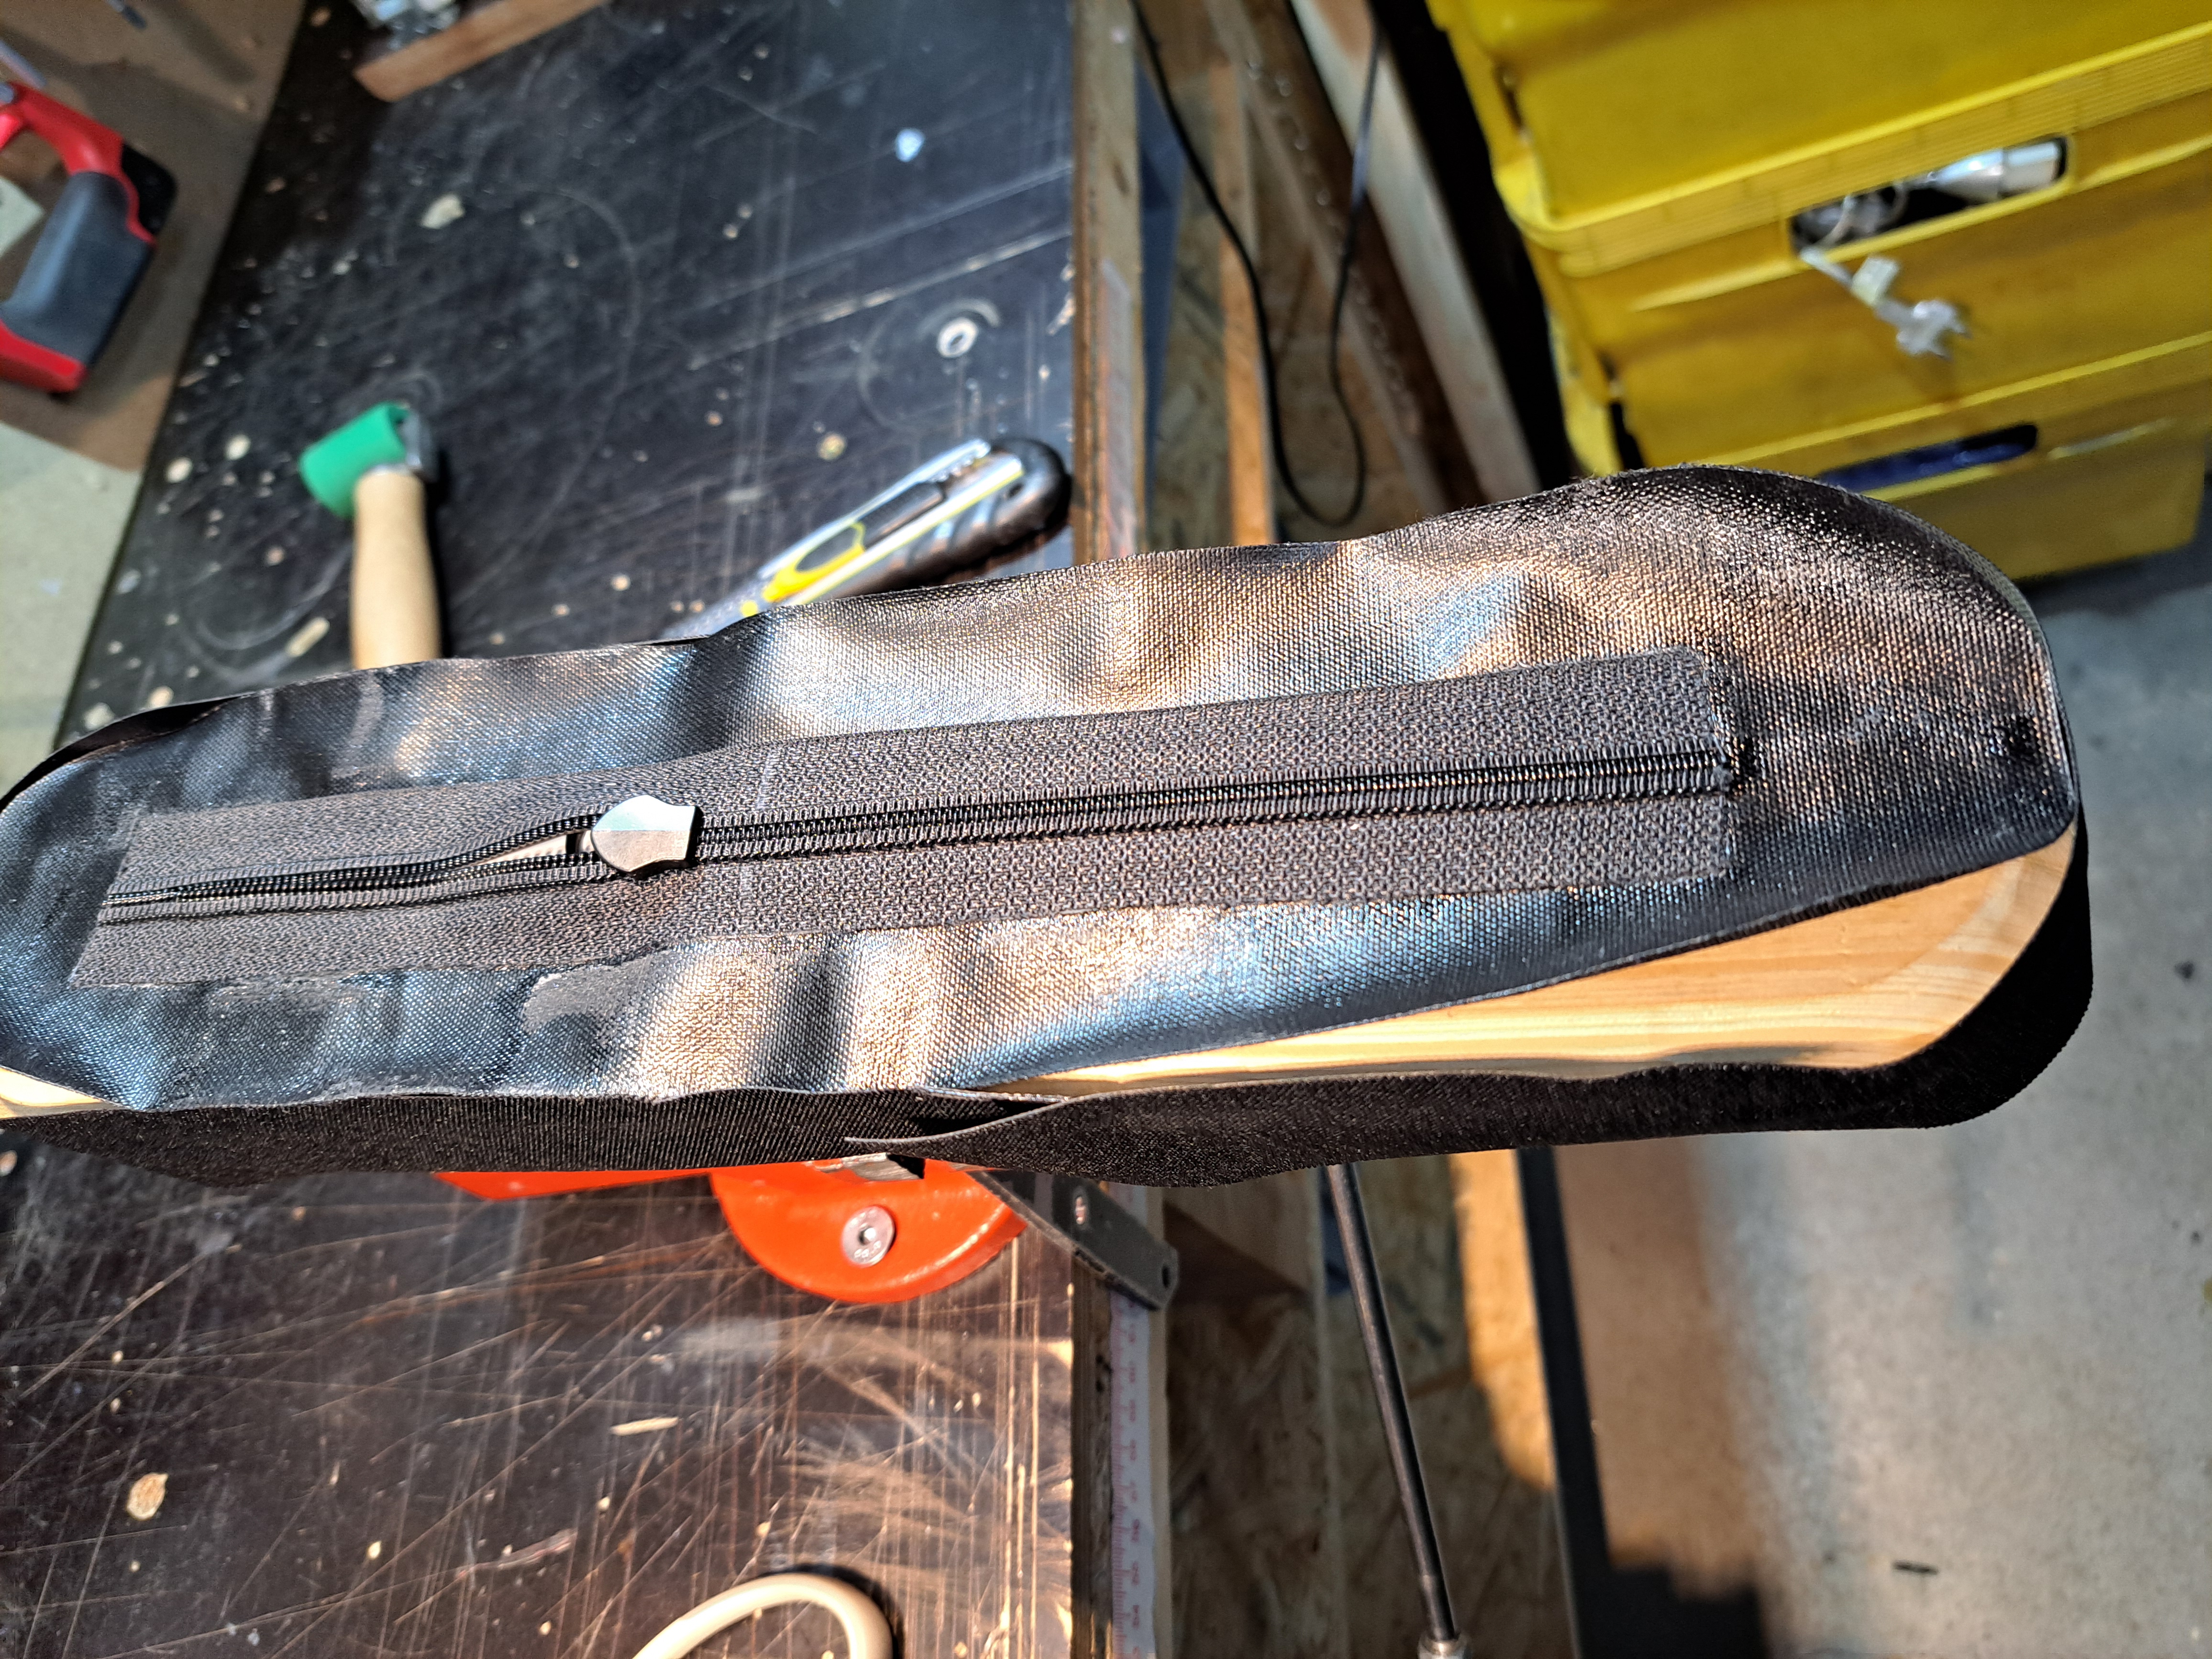
There should not be too little zip overhang at the ends. These areas are subject to high tensile forces when opening and closing and should therefore be tight and stable. 3/4 to 1x the width of the entire zip has proven to be optimal..
To cover the slider, we also leave enough material on the stop section to ensure that the slider is well covered. More is fine, but you should still be able to get a good grip on the handle in the park position.
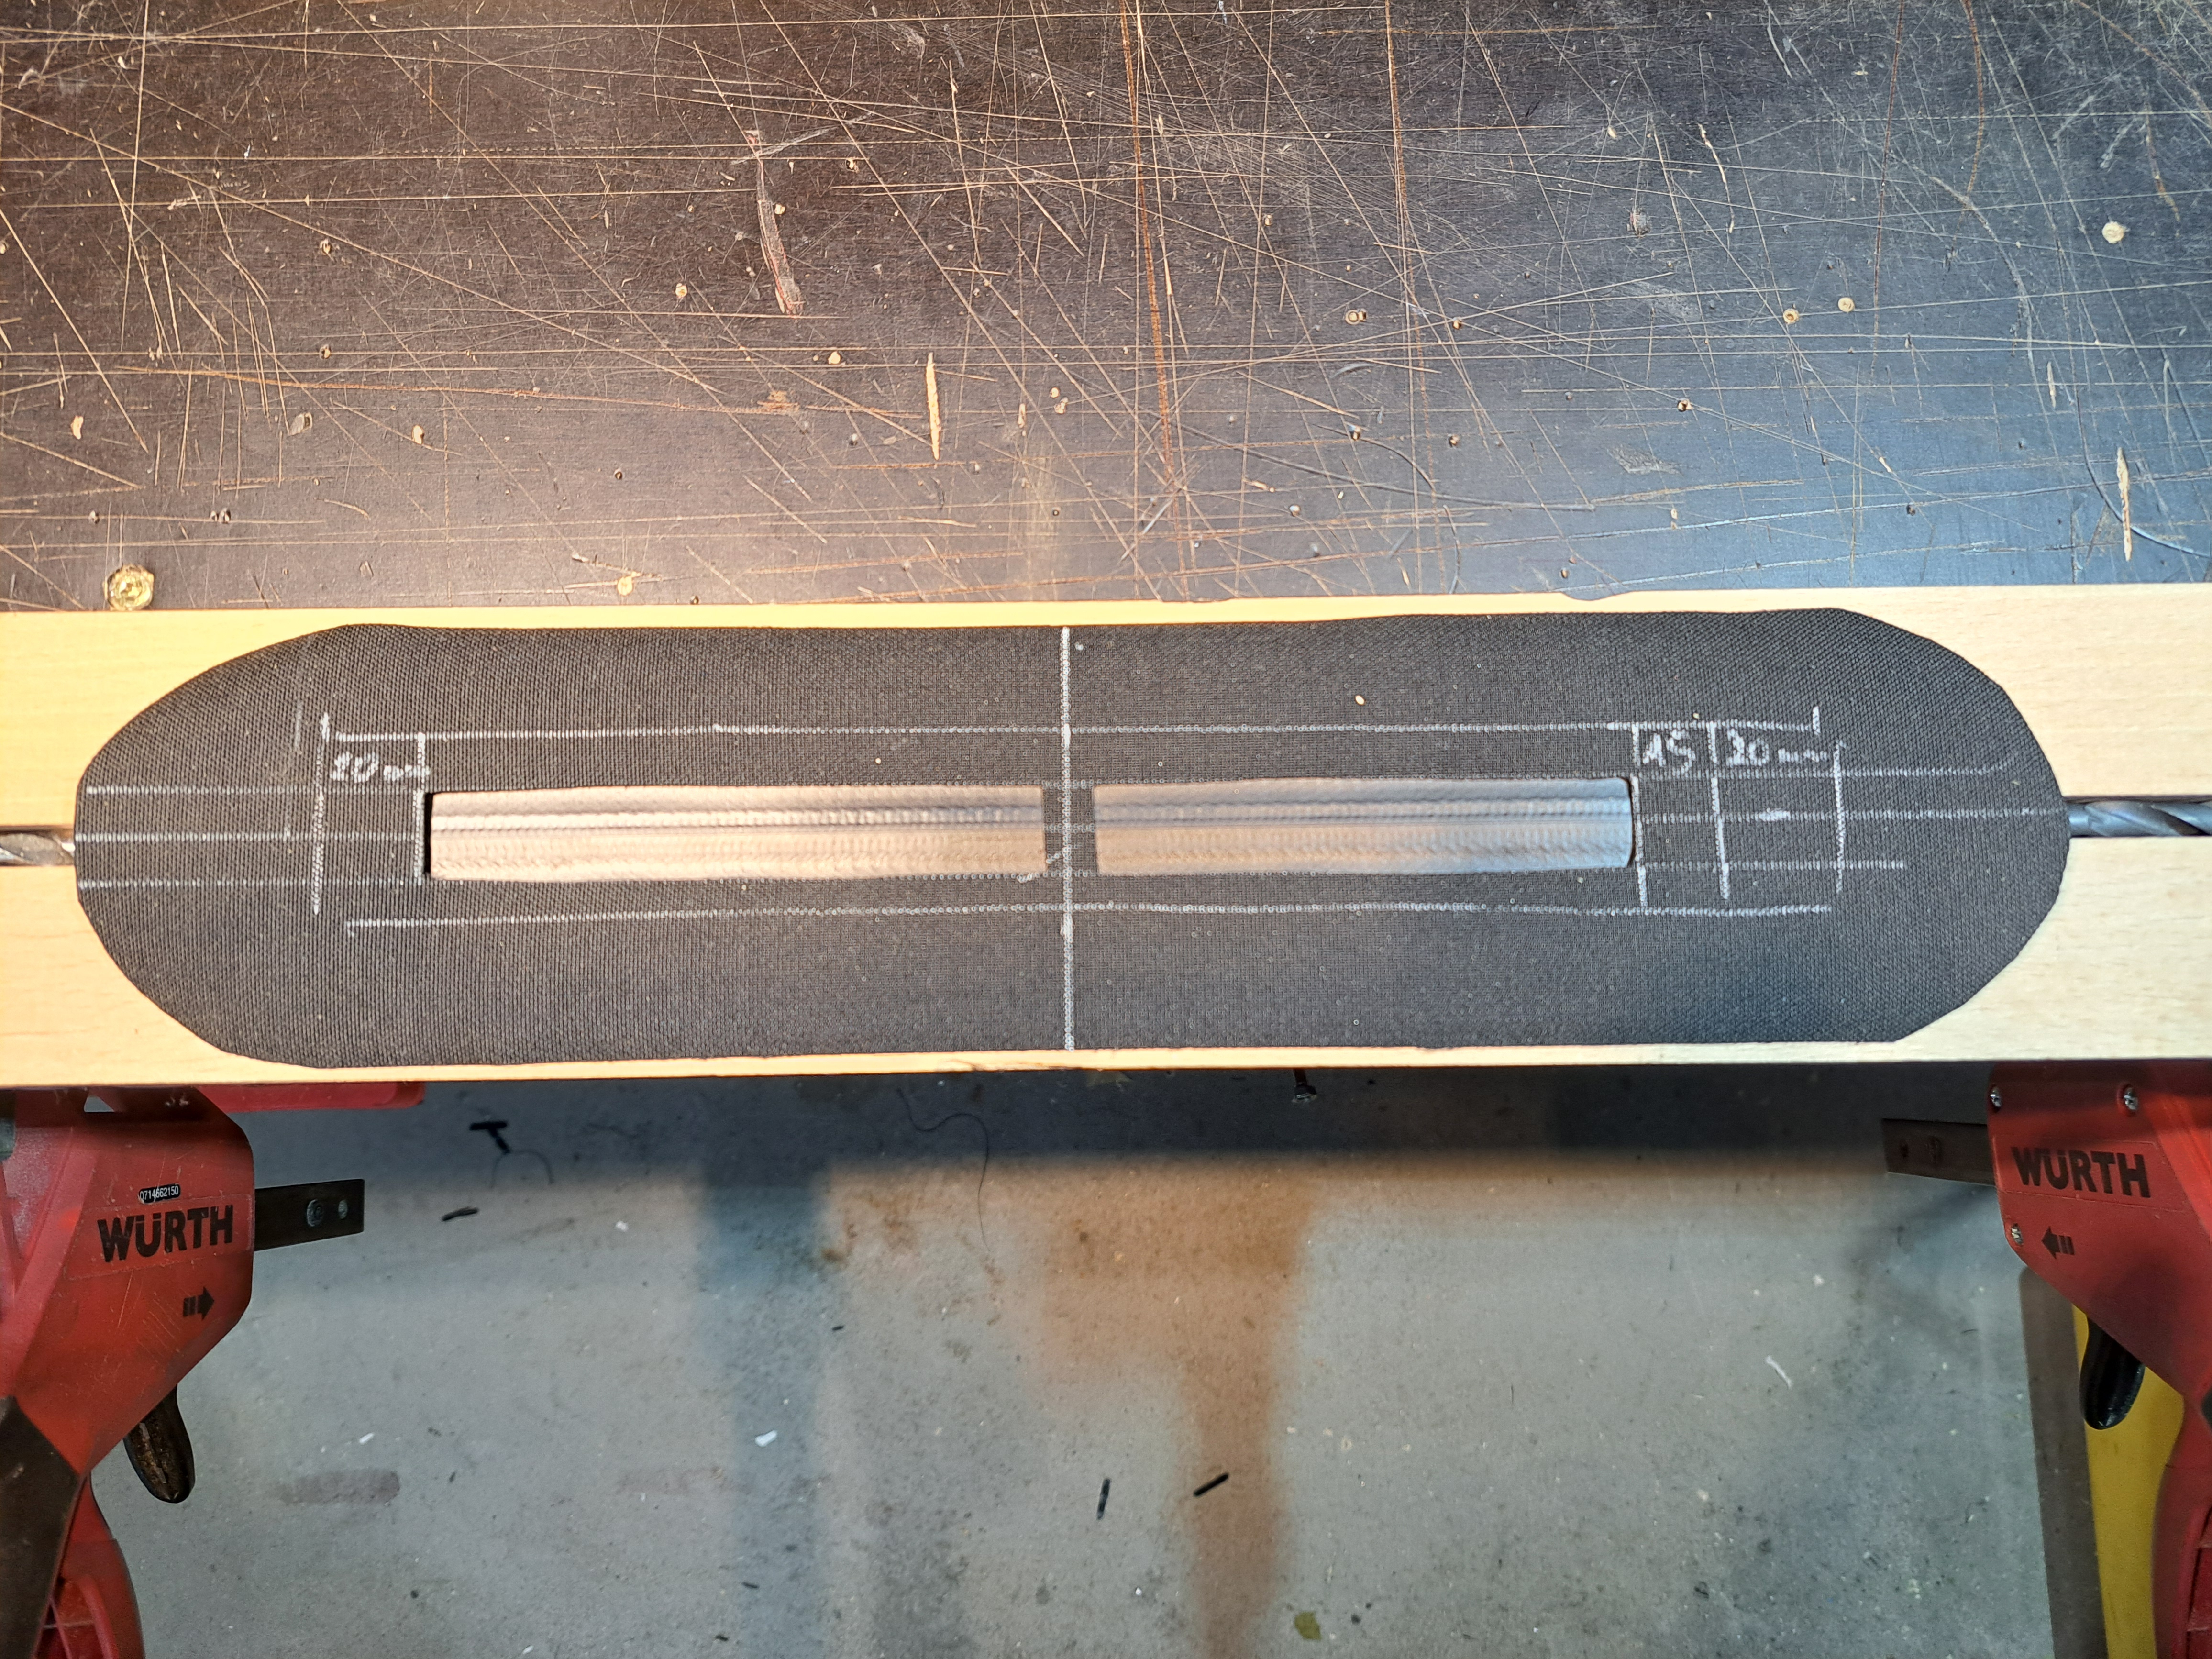
I like to leave small bars not too far apart at the cut-outs.
This prevents the opening from spreading unintentionally. These bars can then be removed after tacking or welding.
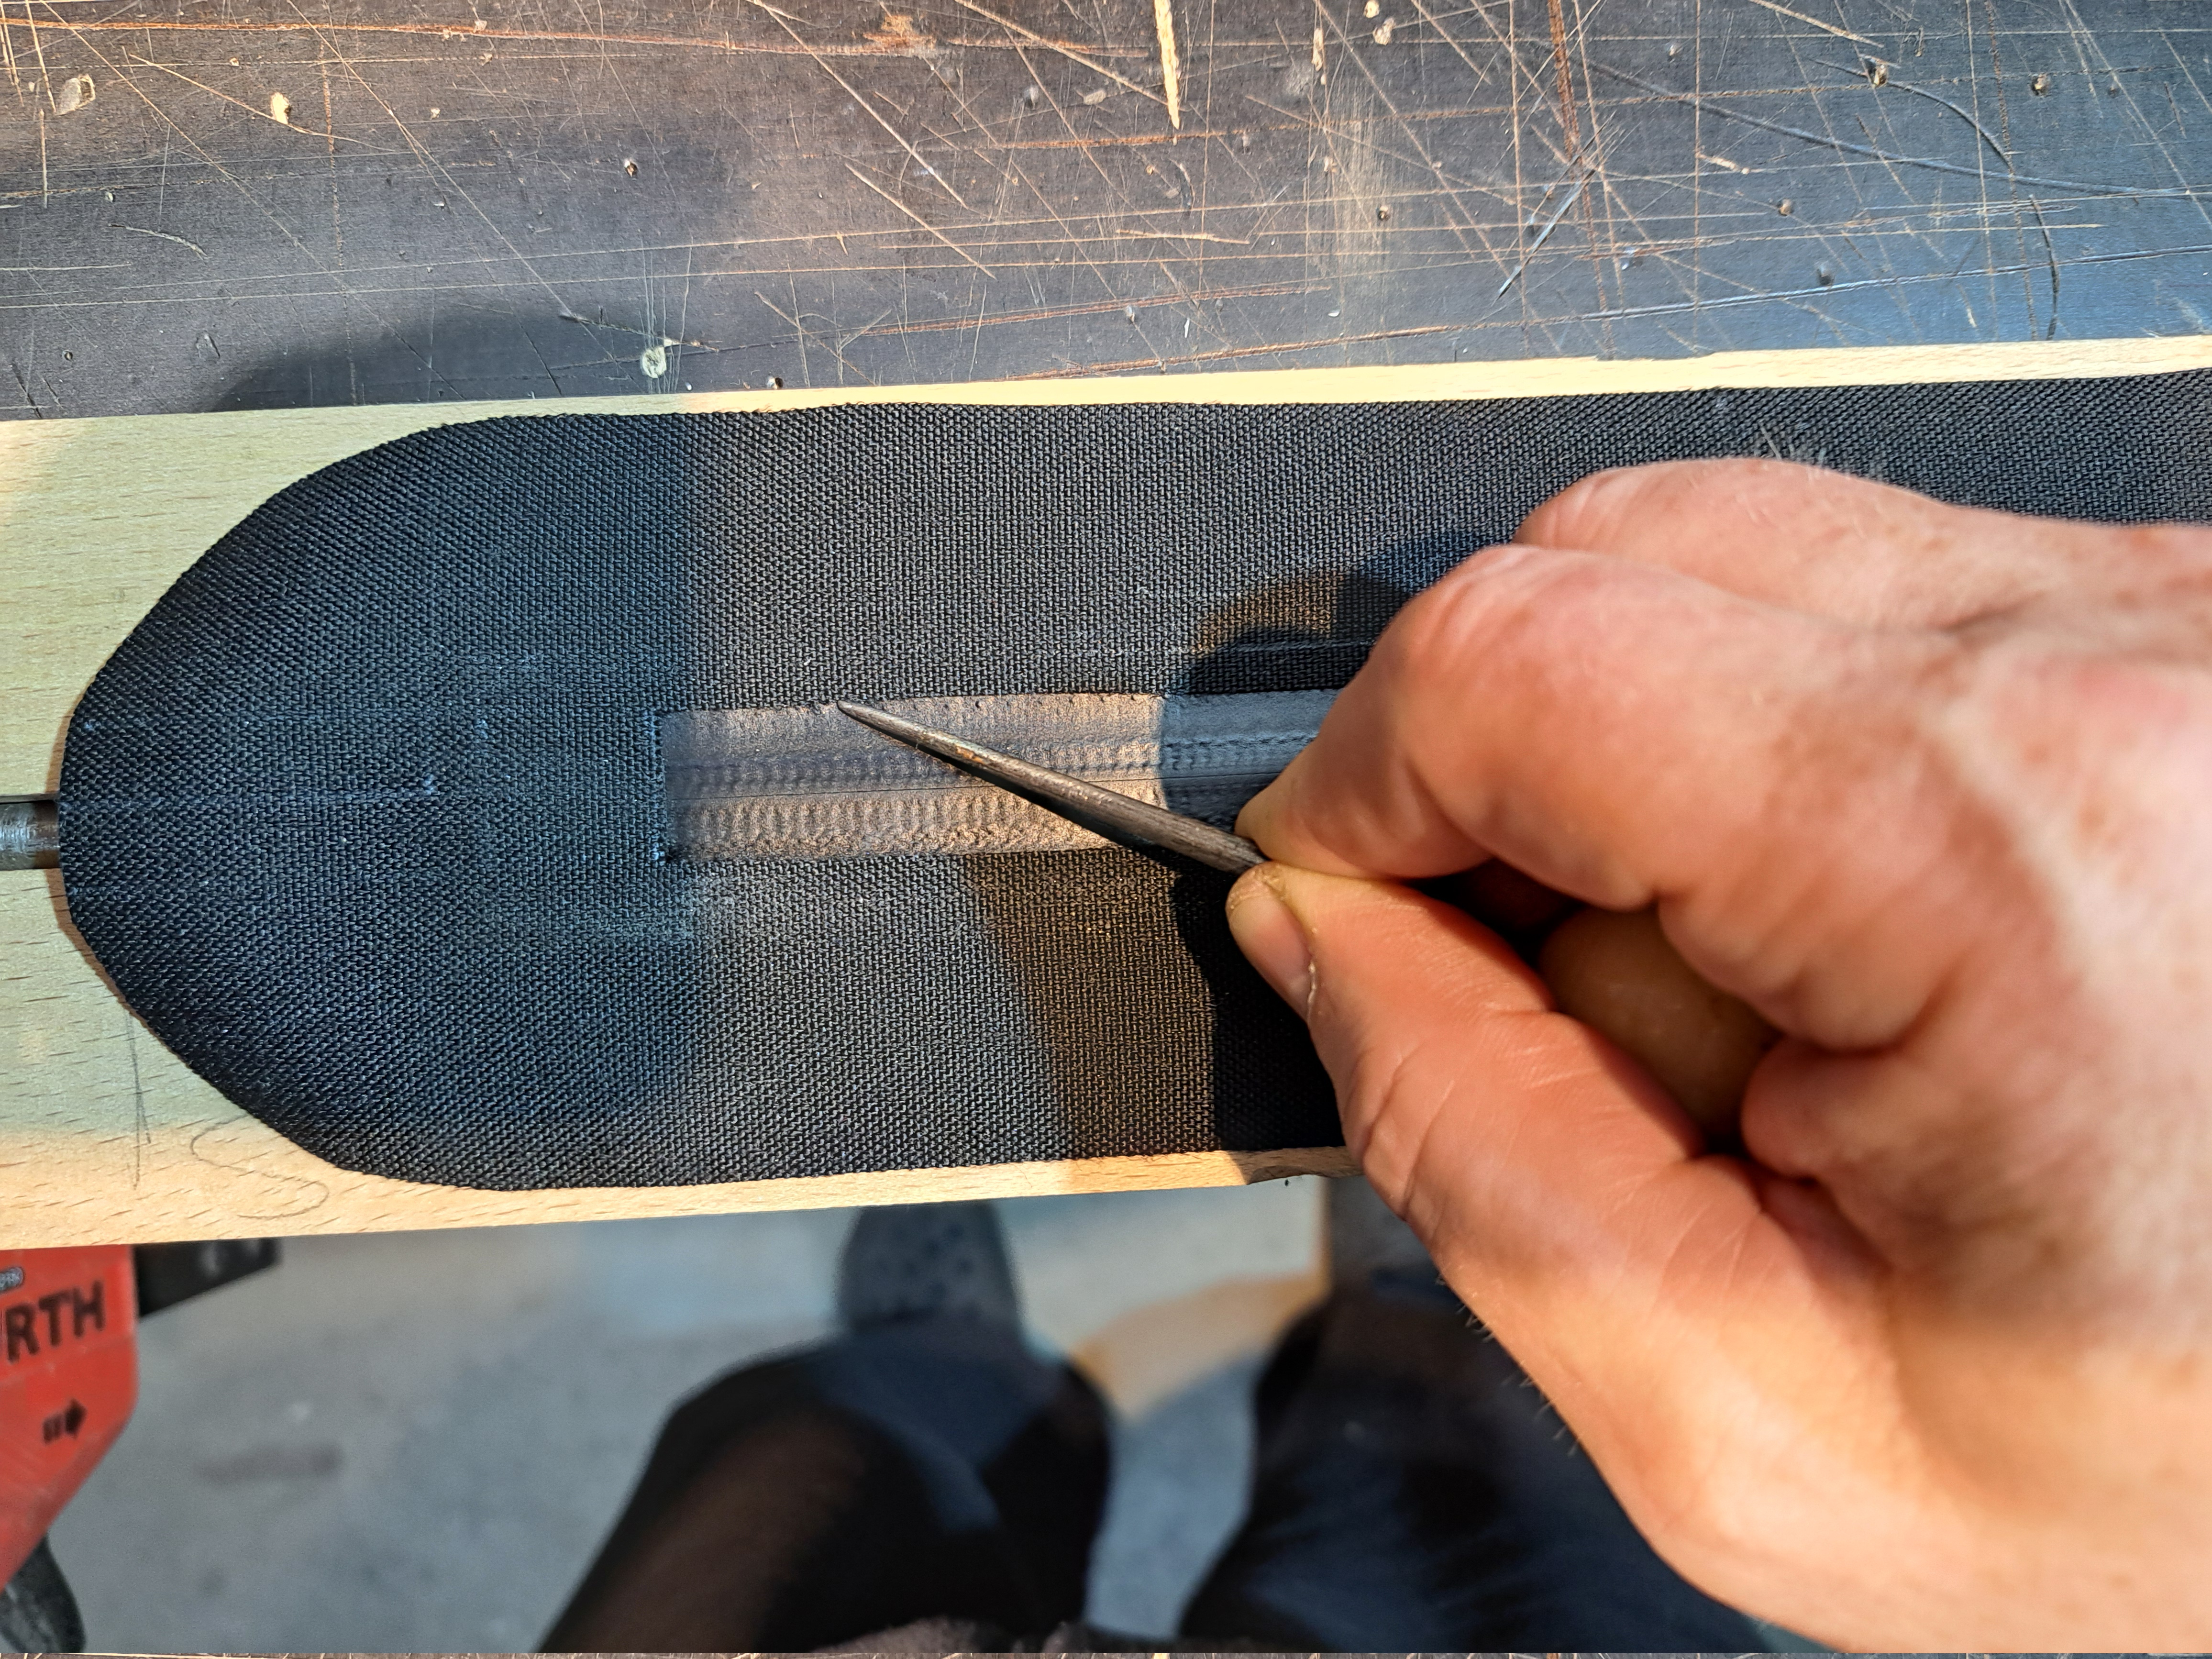
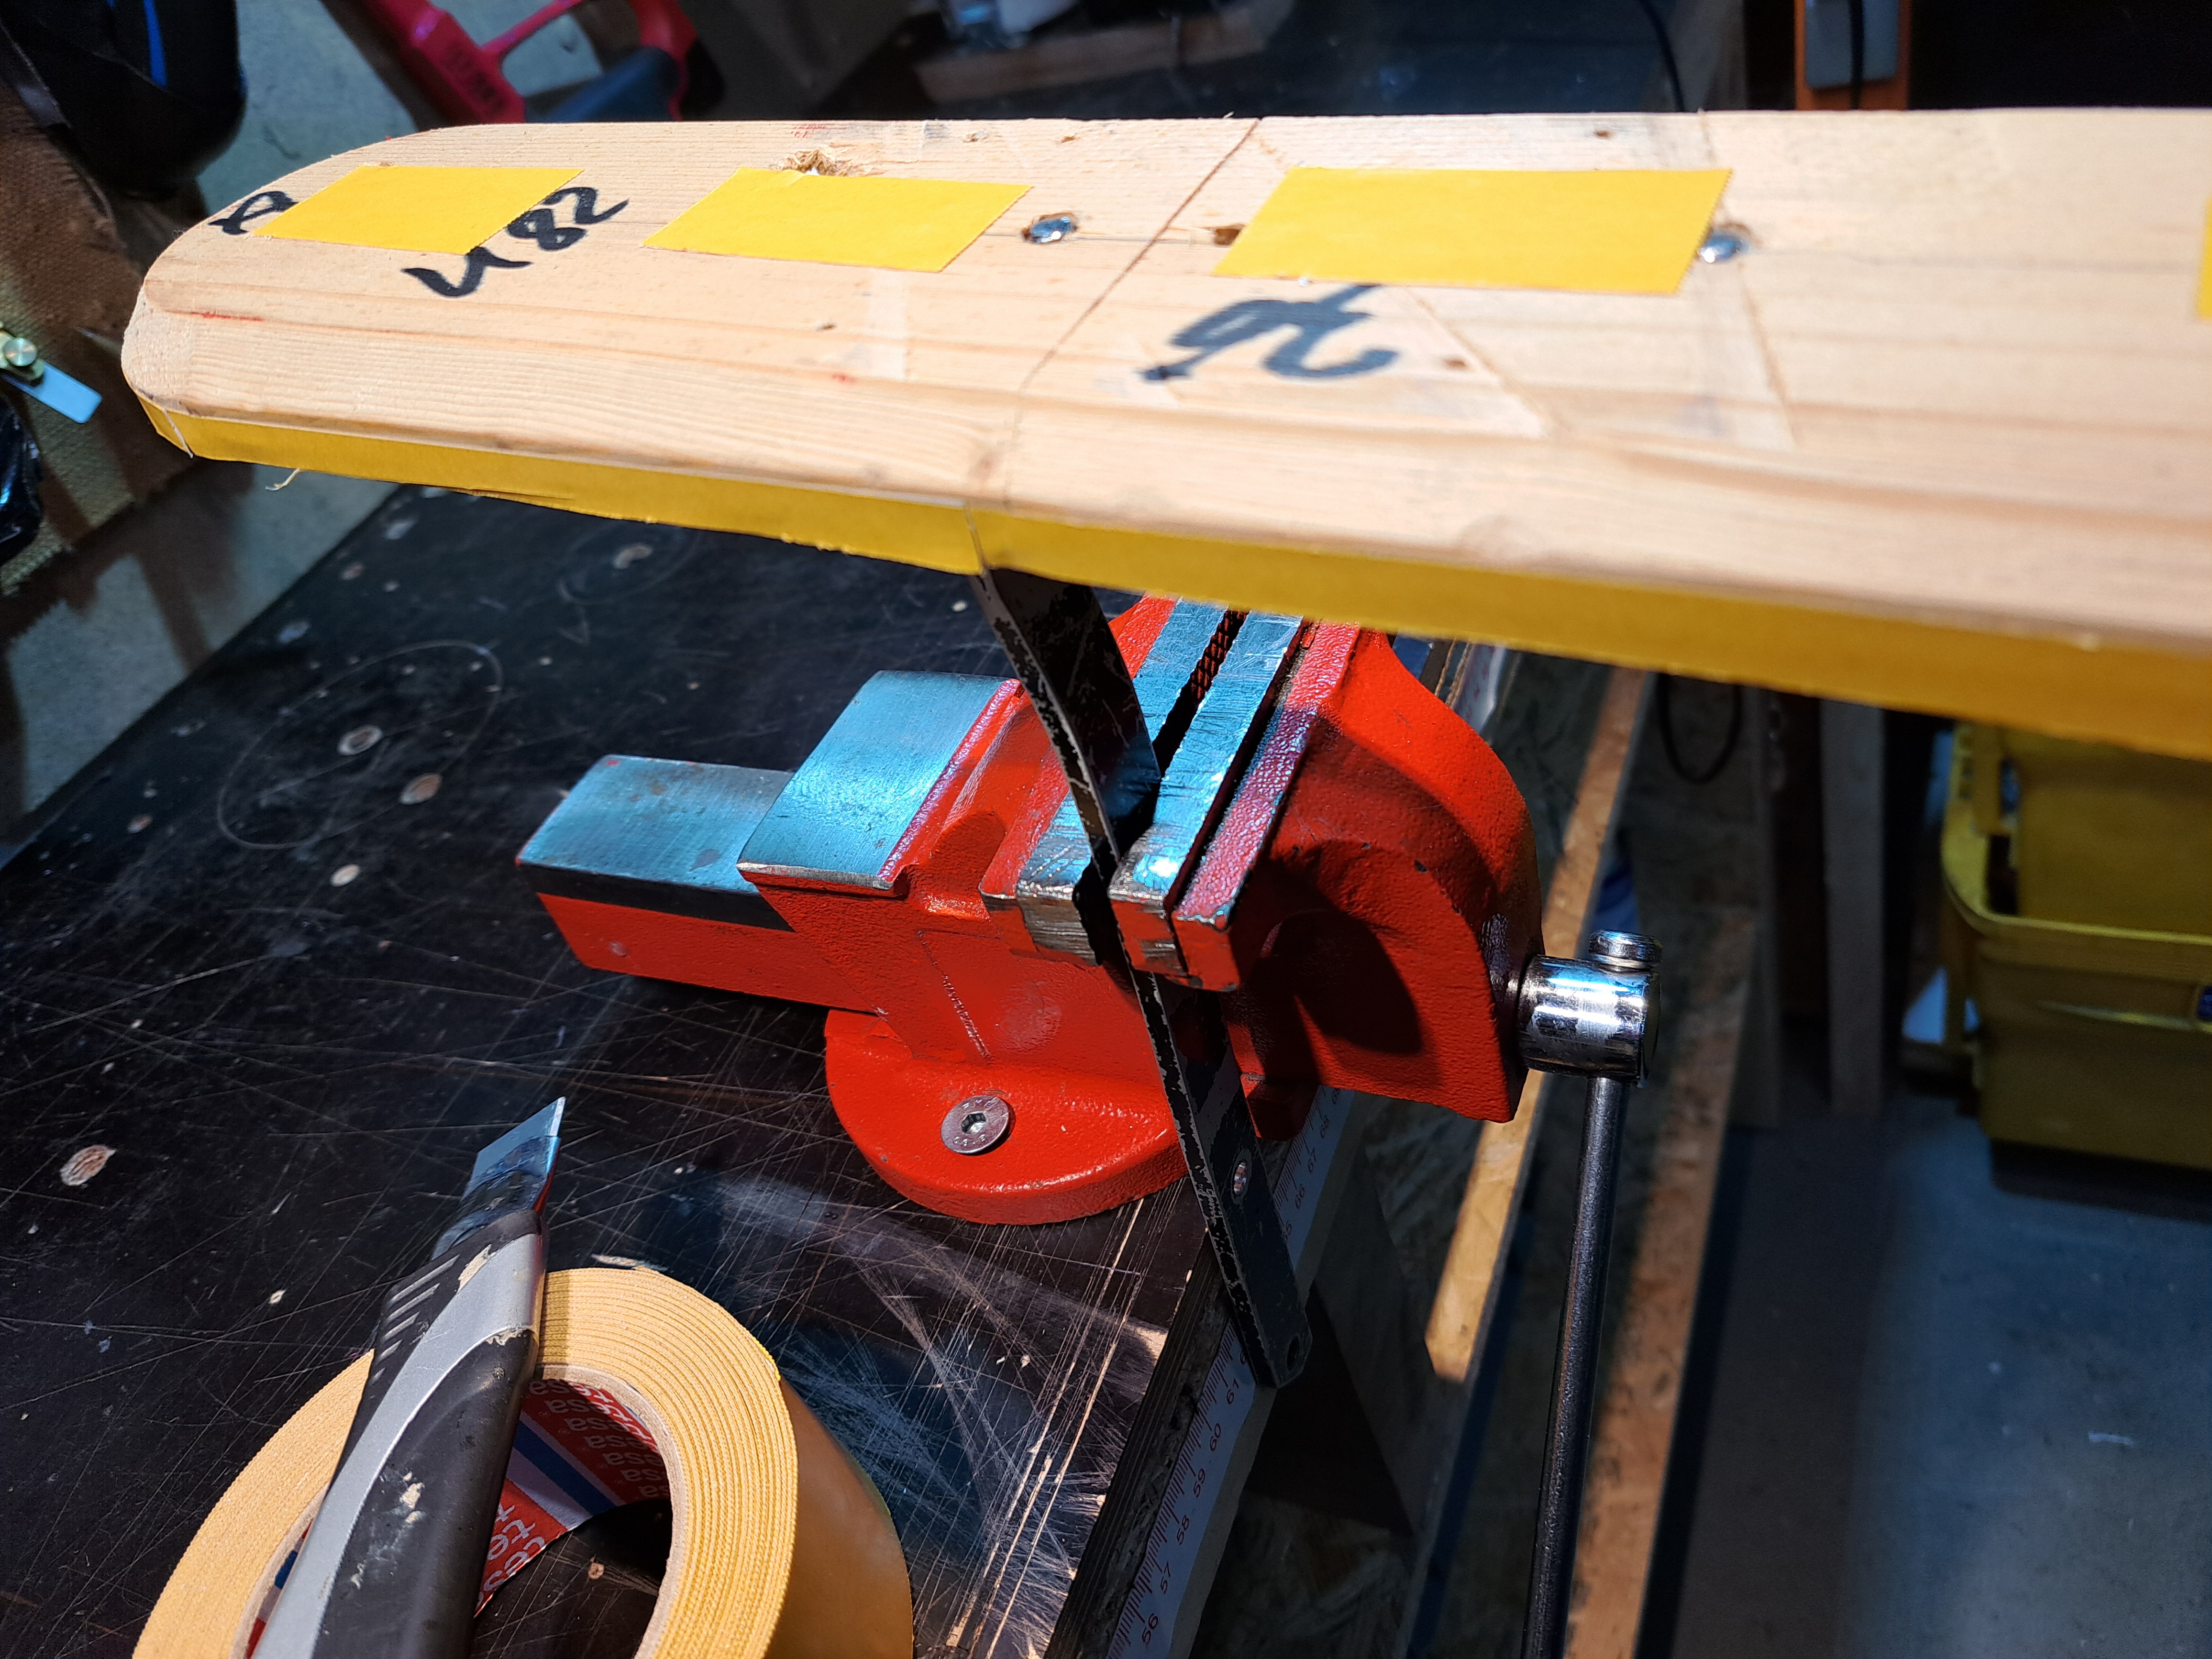
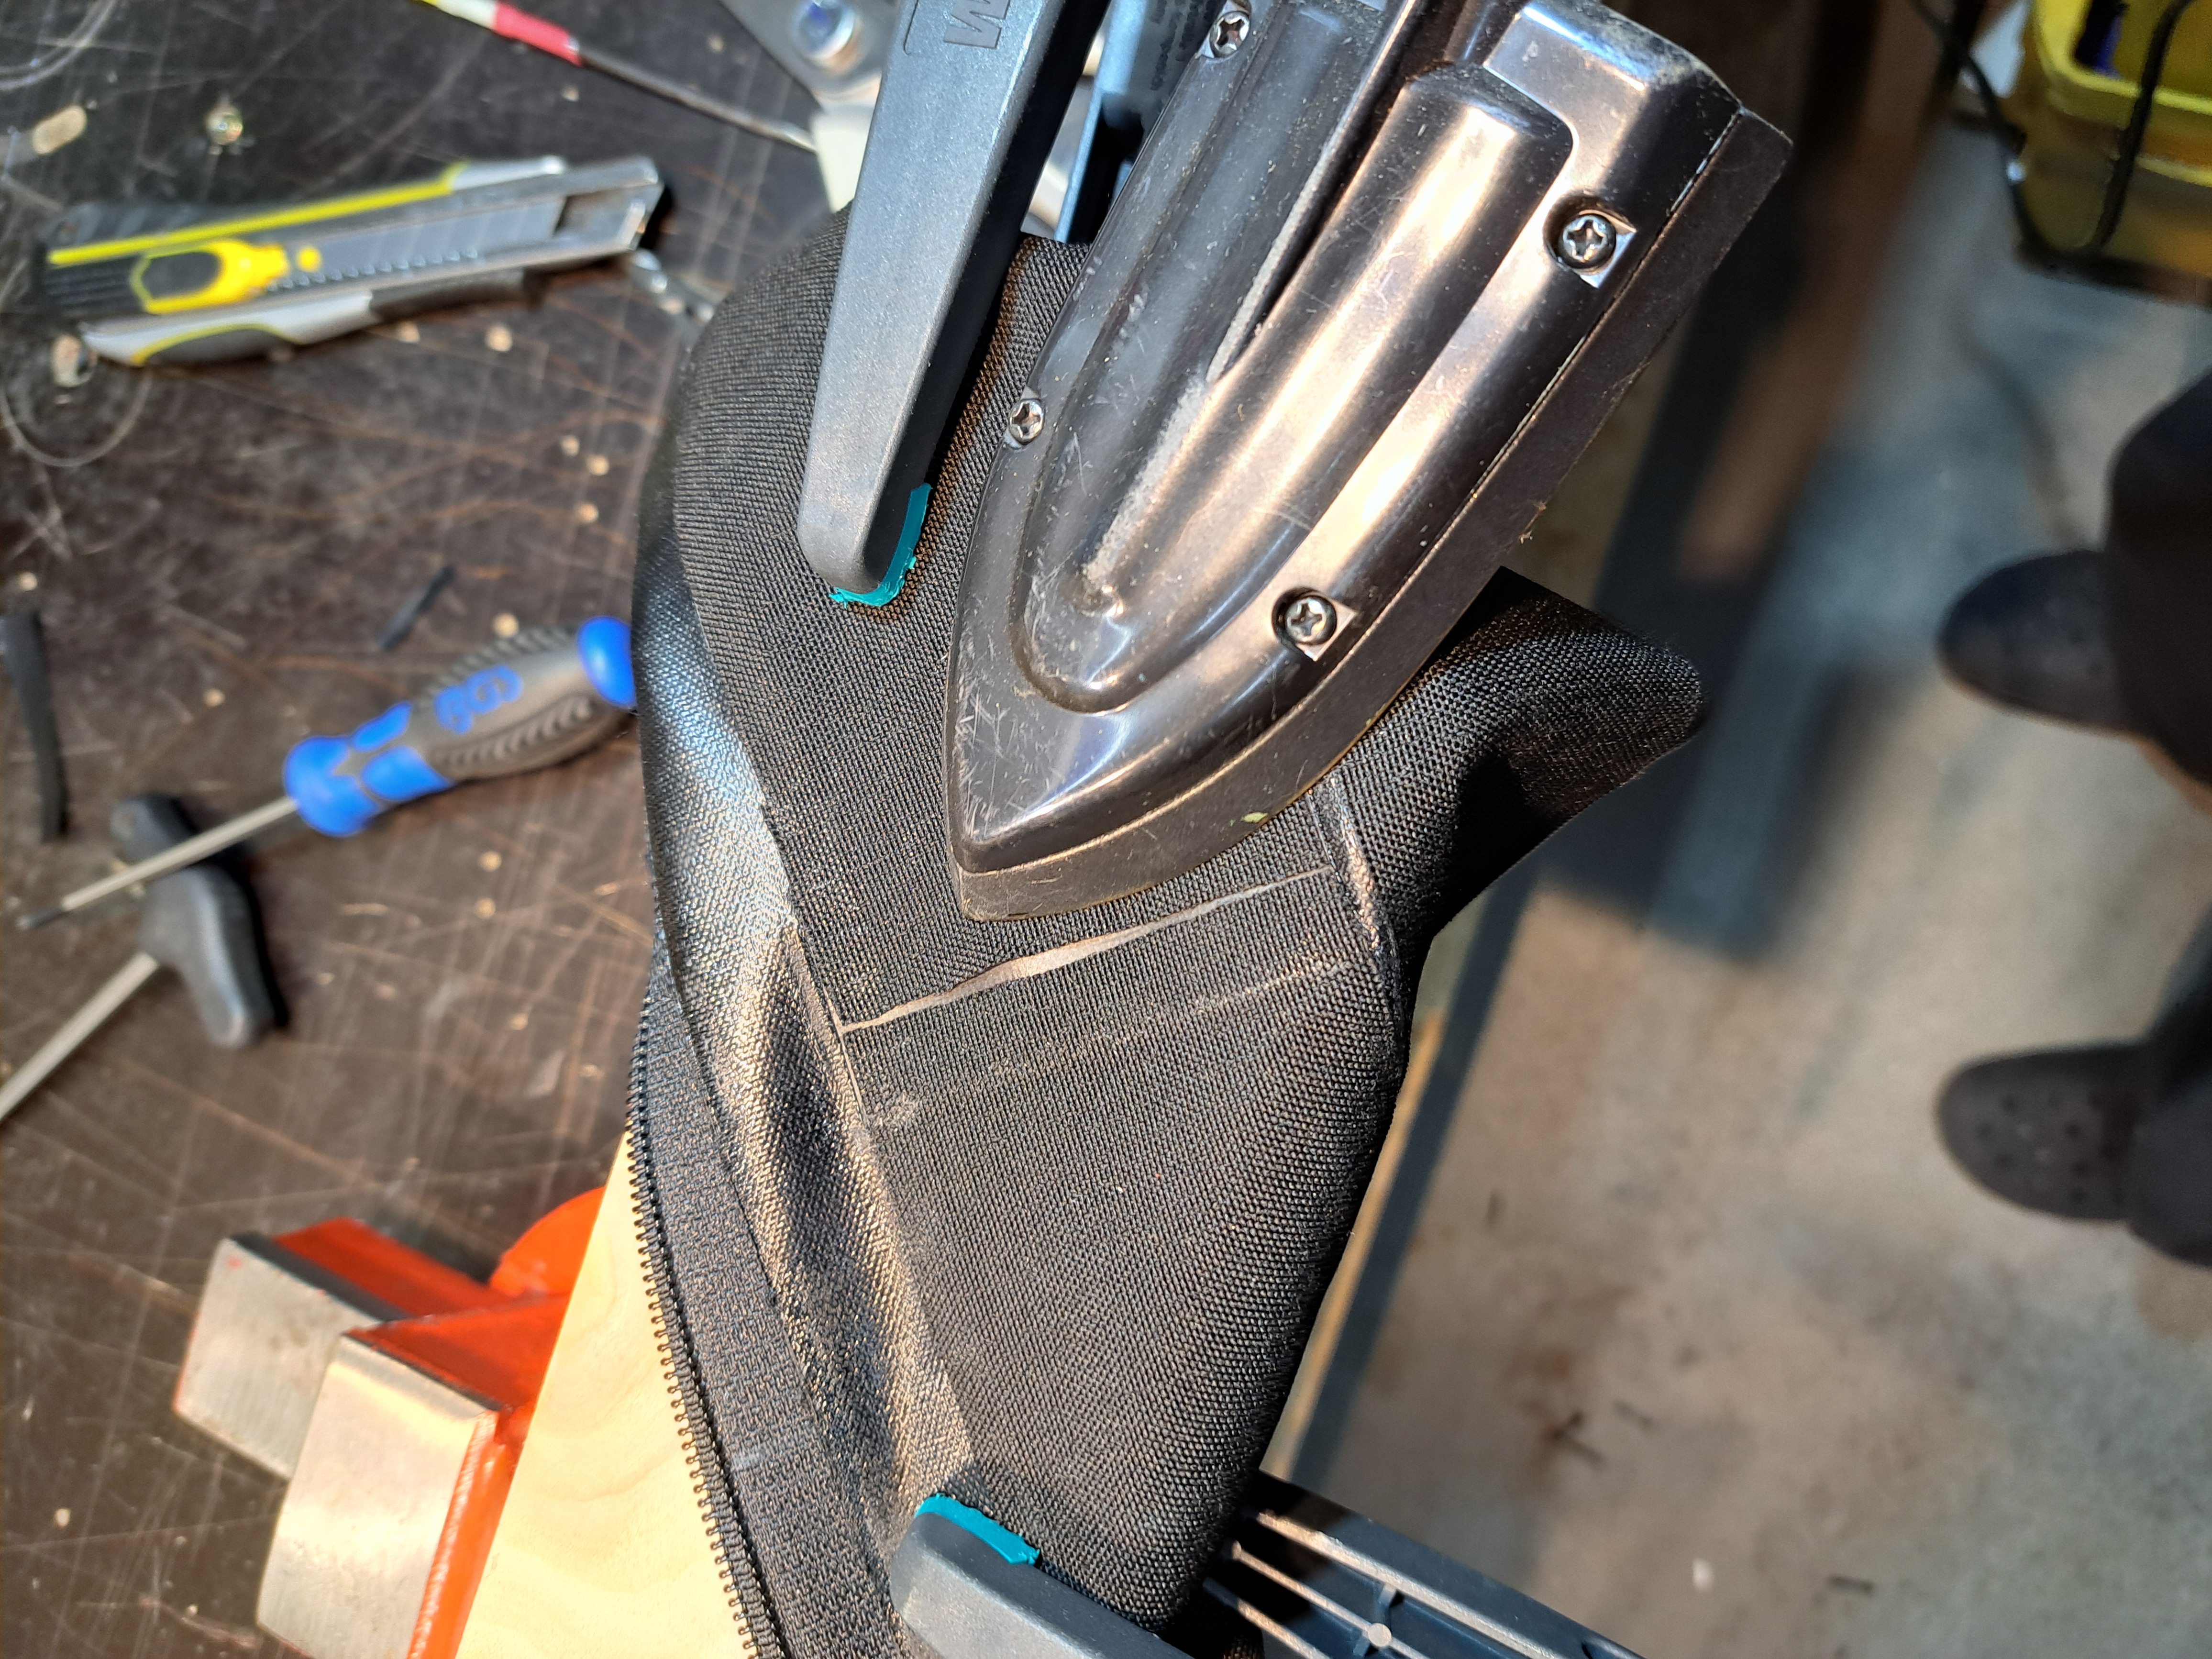
I use two wooden strips of a suitable size as a base for welding. A gap is left between the strips. The width of this gap depends on the width of the spiral or row of teeth..
Two drill bits with a suitable diameter are useful here as spacers.
Fix everything in place, insert the zip and align the fabric piece precisely.
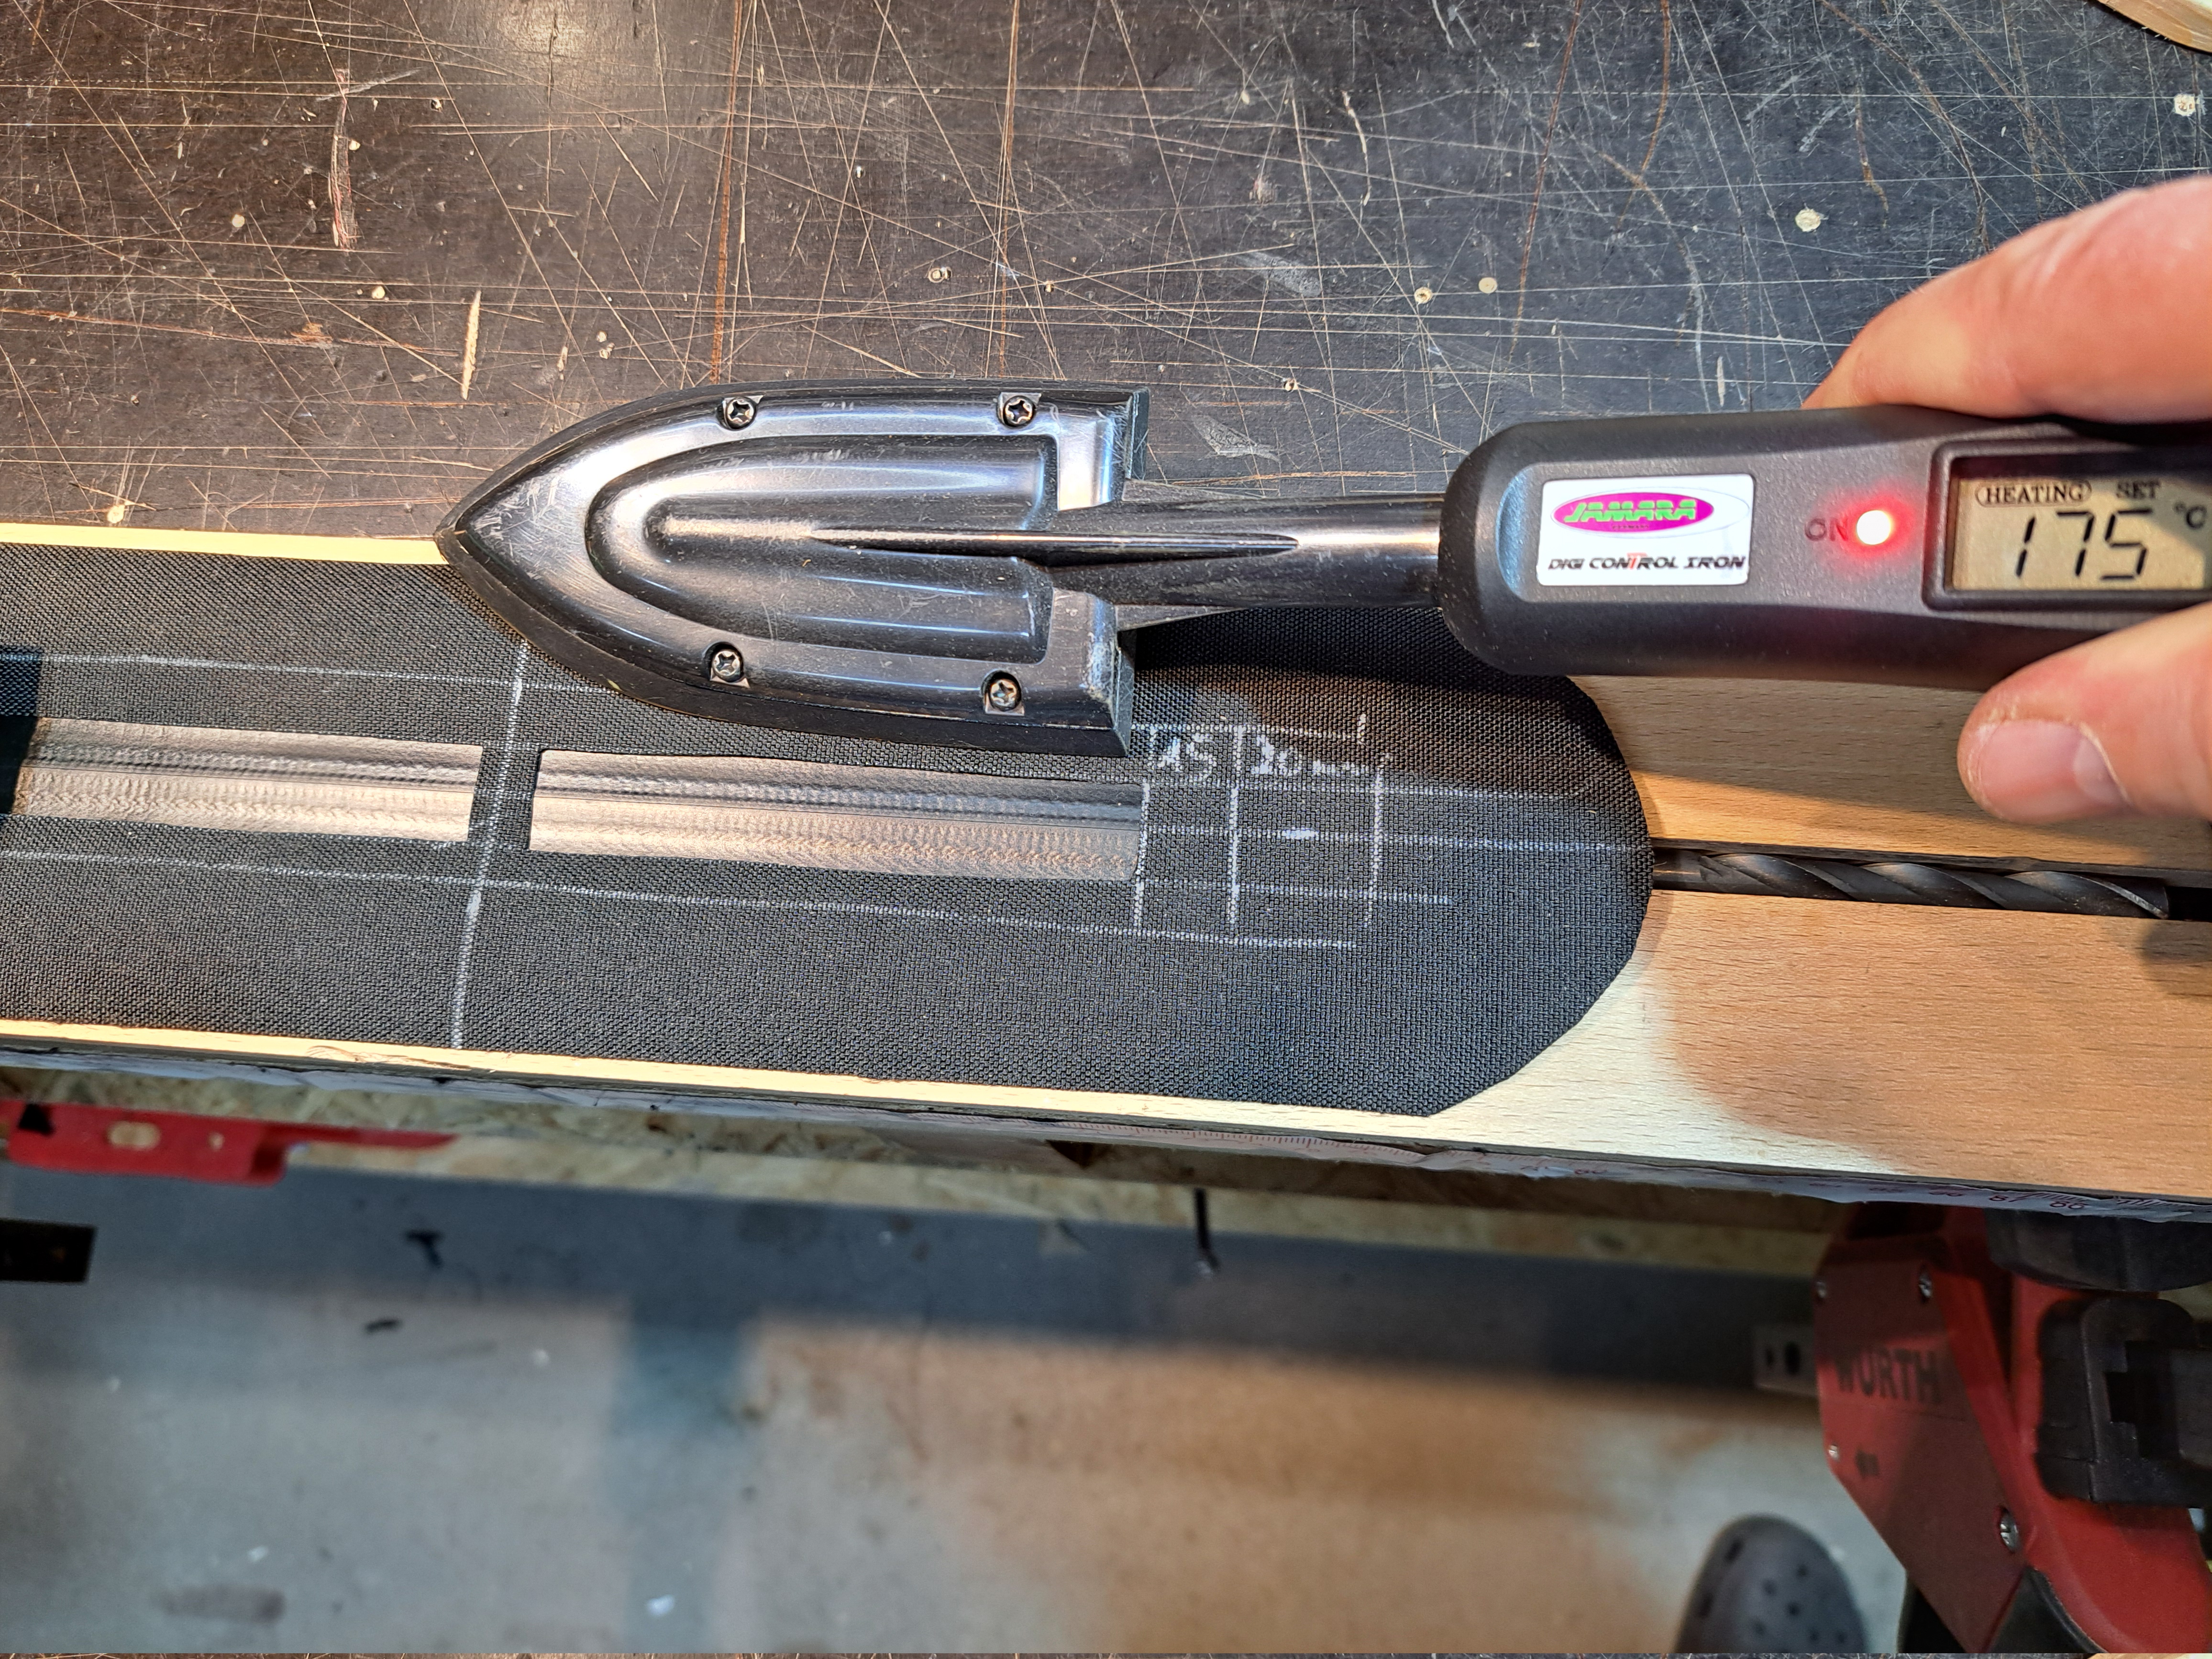
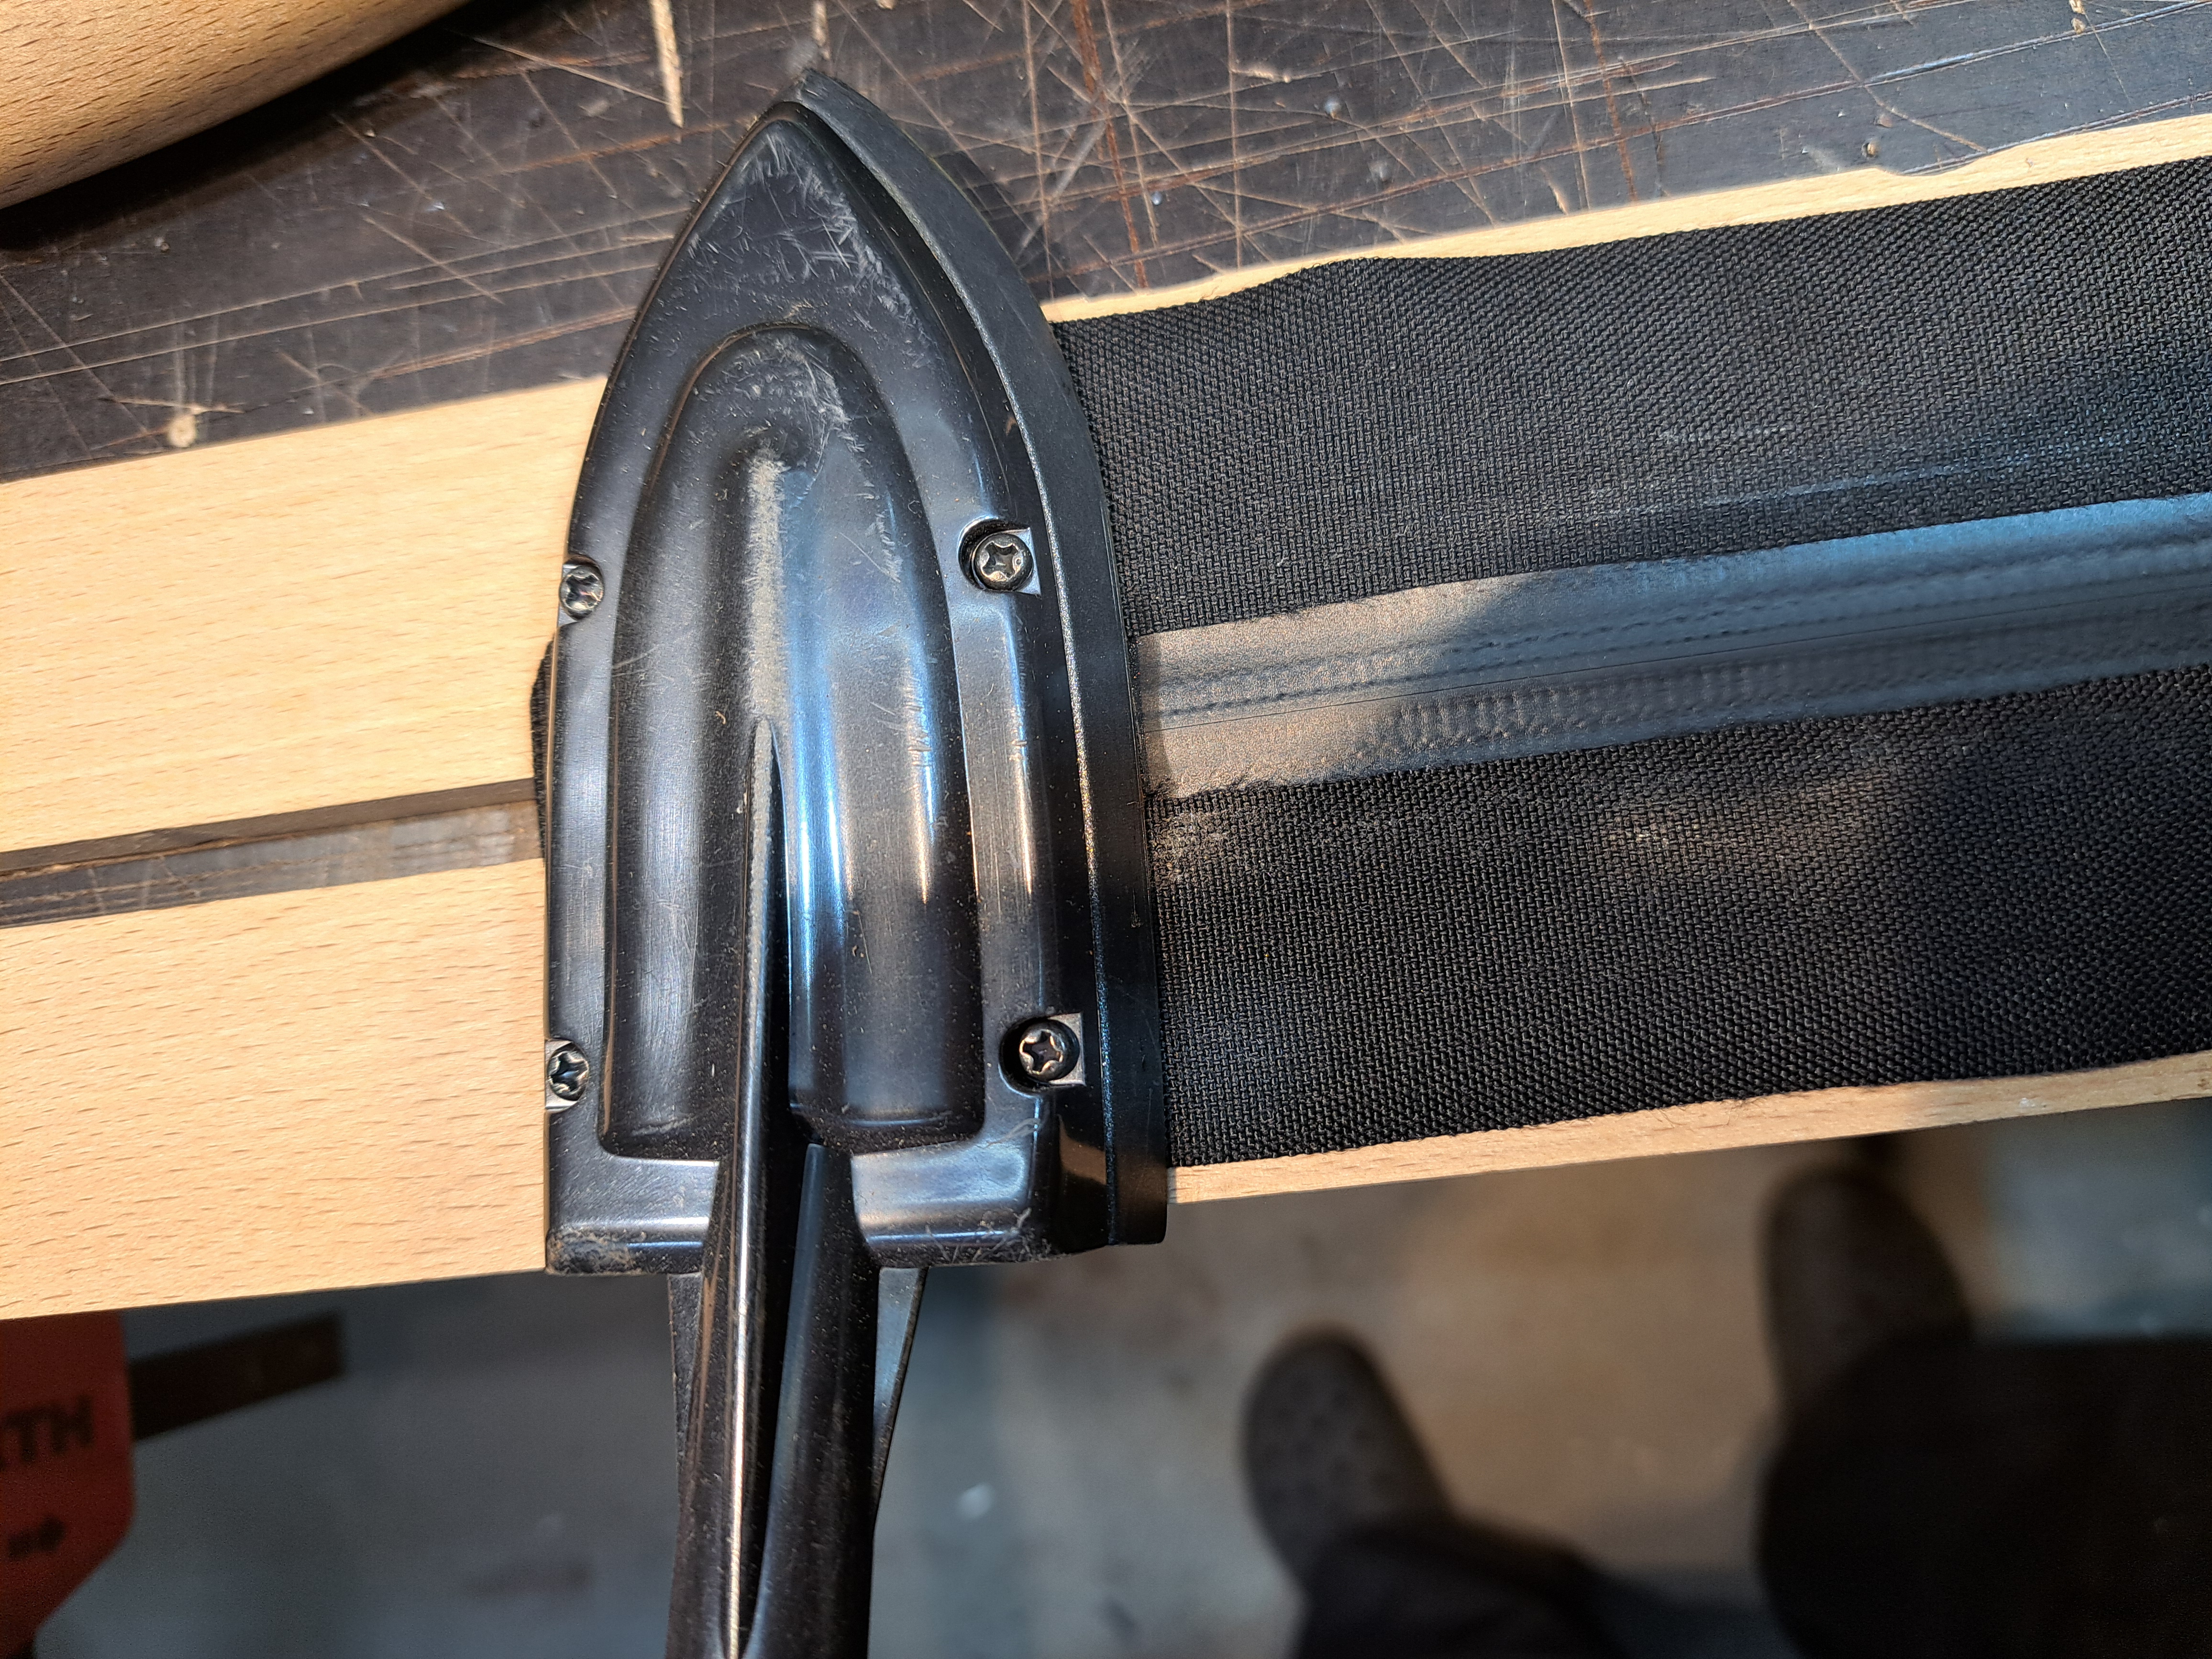
Now pin the zip with the edge of the iron.
Then remove the markings with a damp cloth.
This is very easy with the Prym Aqua-Trickmarker. However, if you simply iron over it, it is much more difficult to remove the marks. That's why you should do it now.
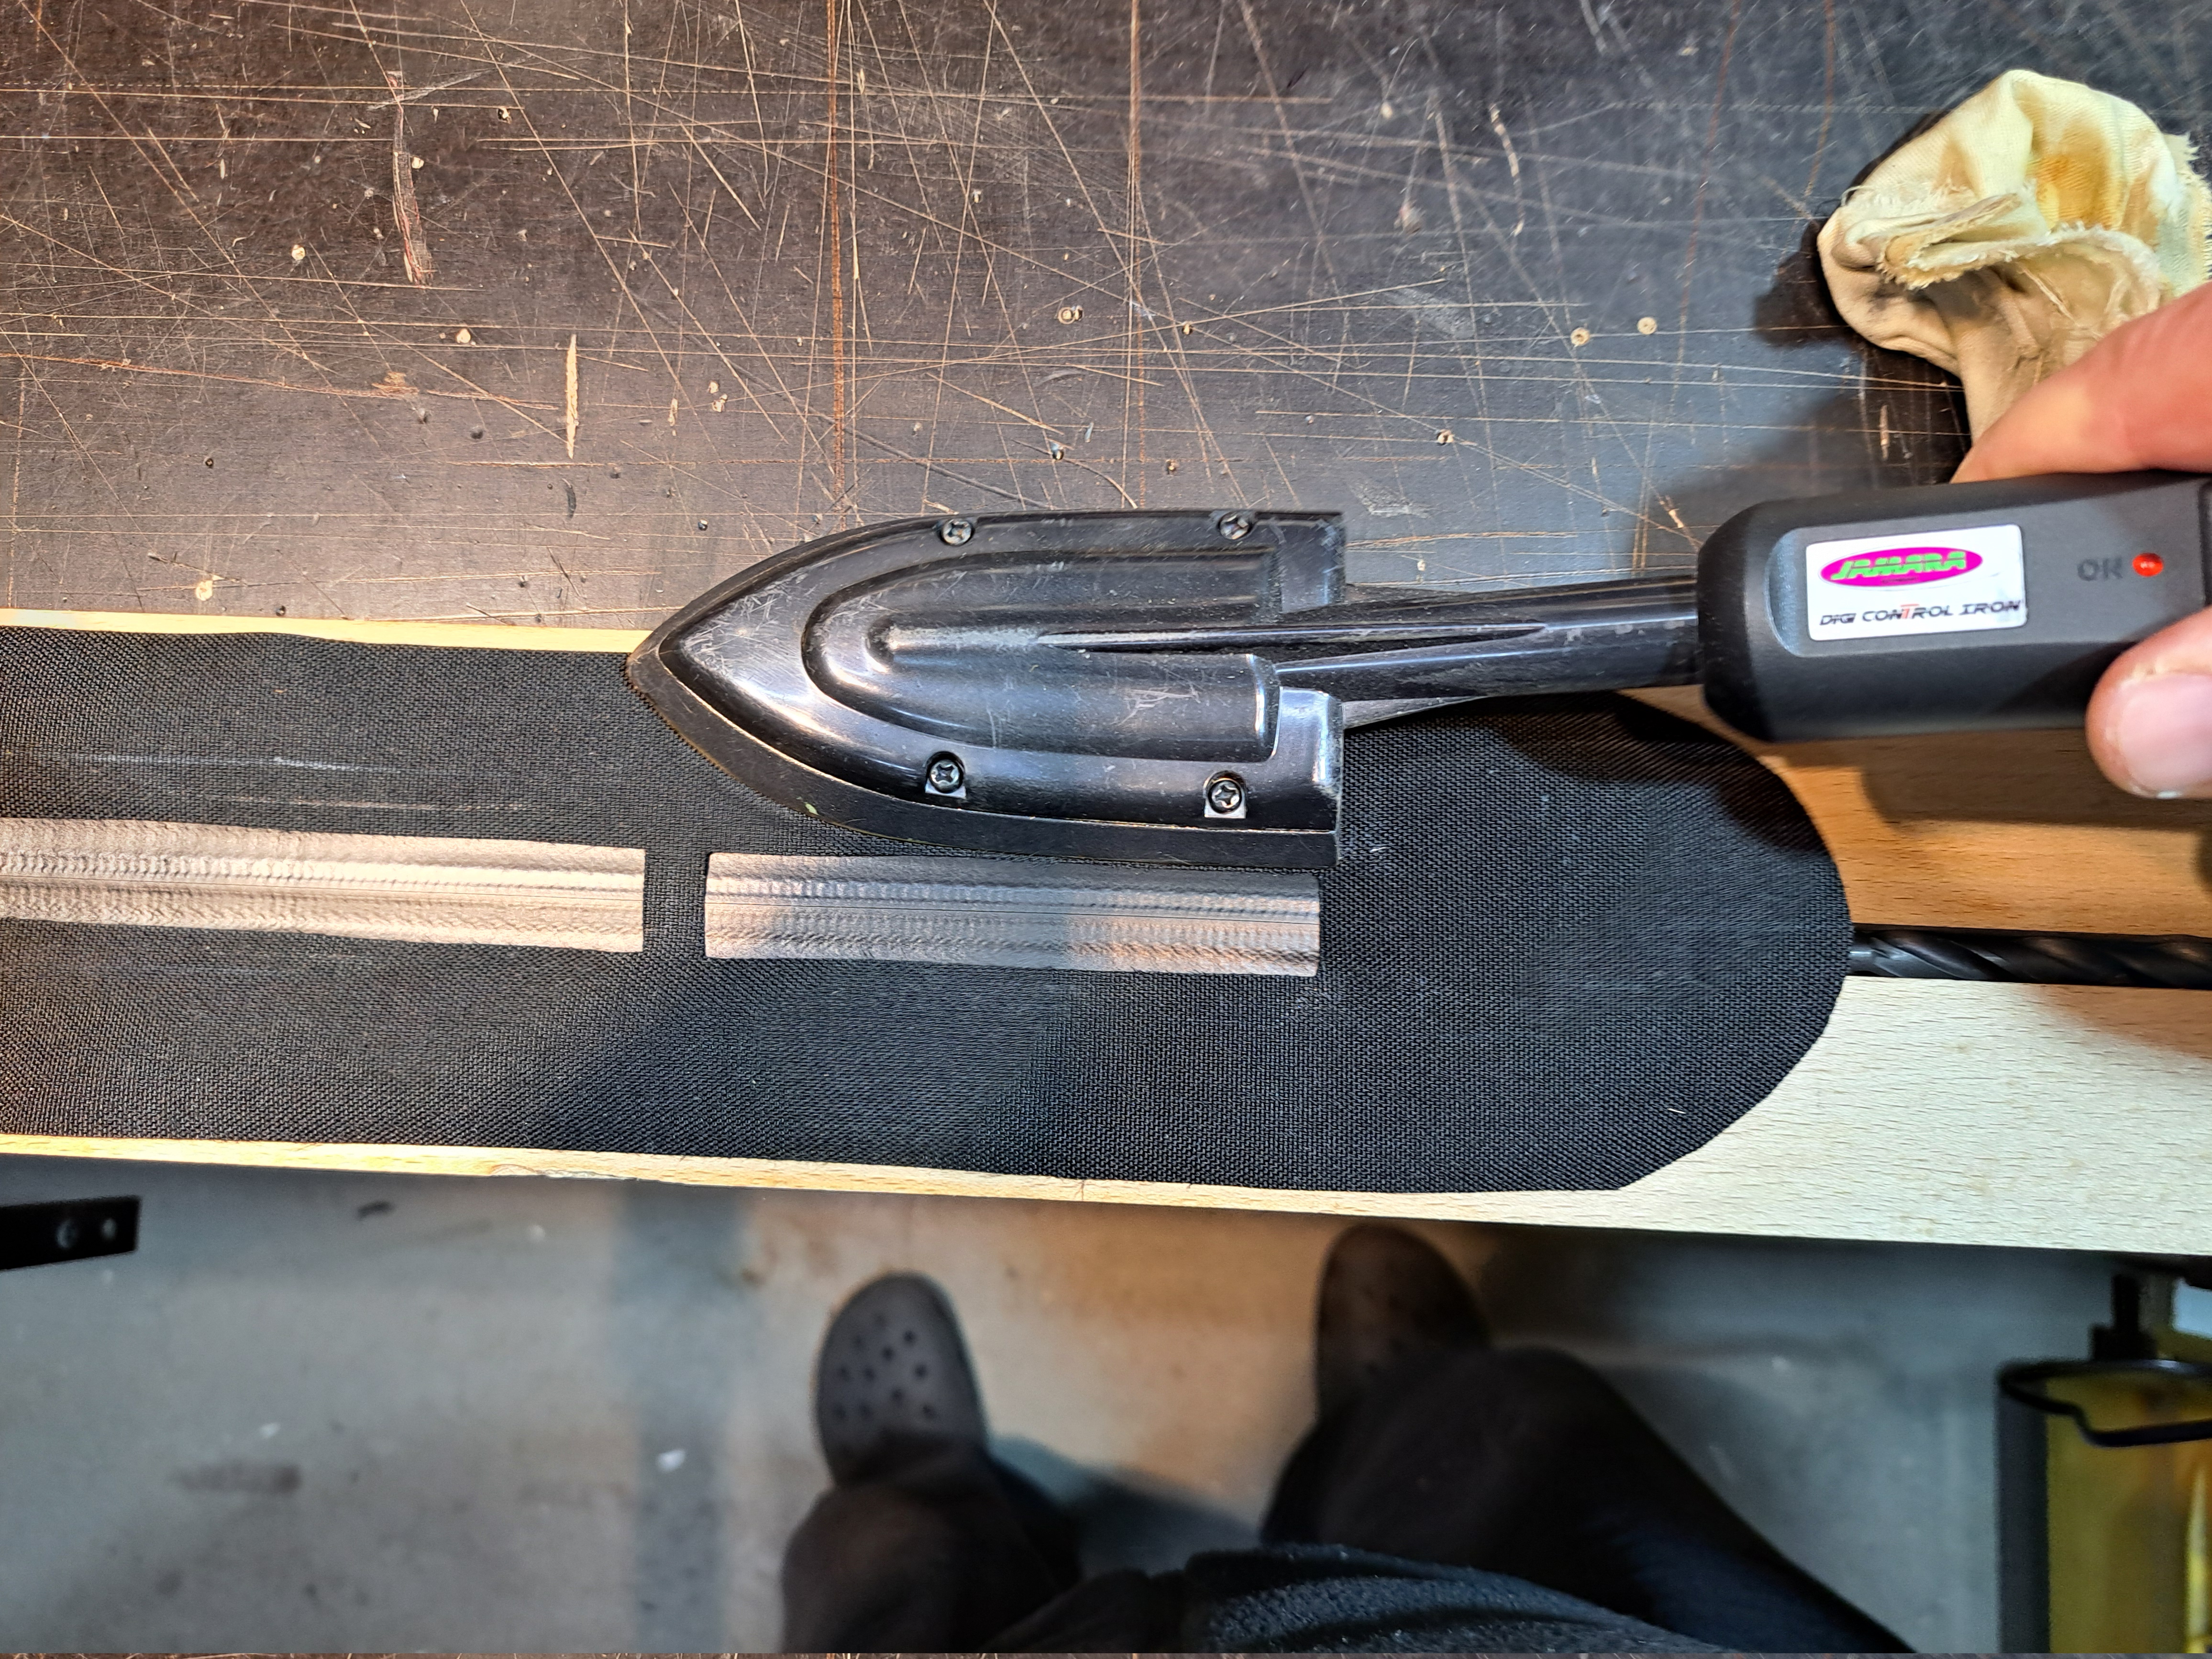
The long sides can now be welded together.
Once the long sides have been welded, we use an awl to check along the edges to ensure that the seam is well welded throughout.
Once the underside...
... then the top side. Also check the areas covered by the fabric.
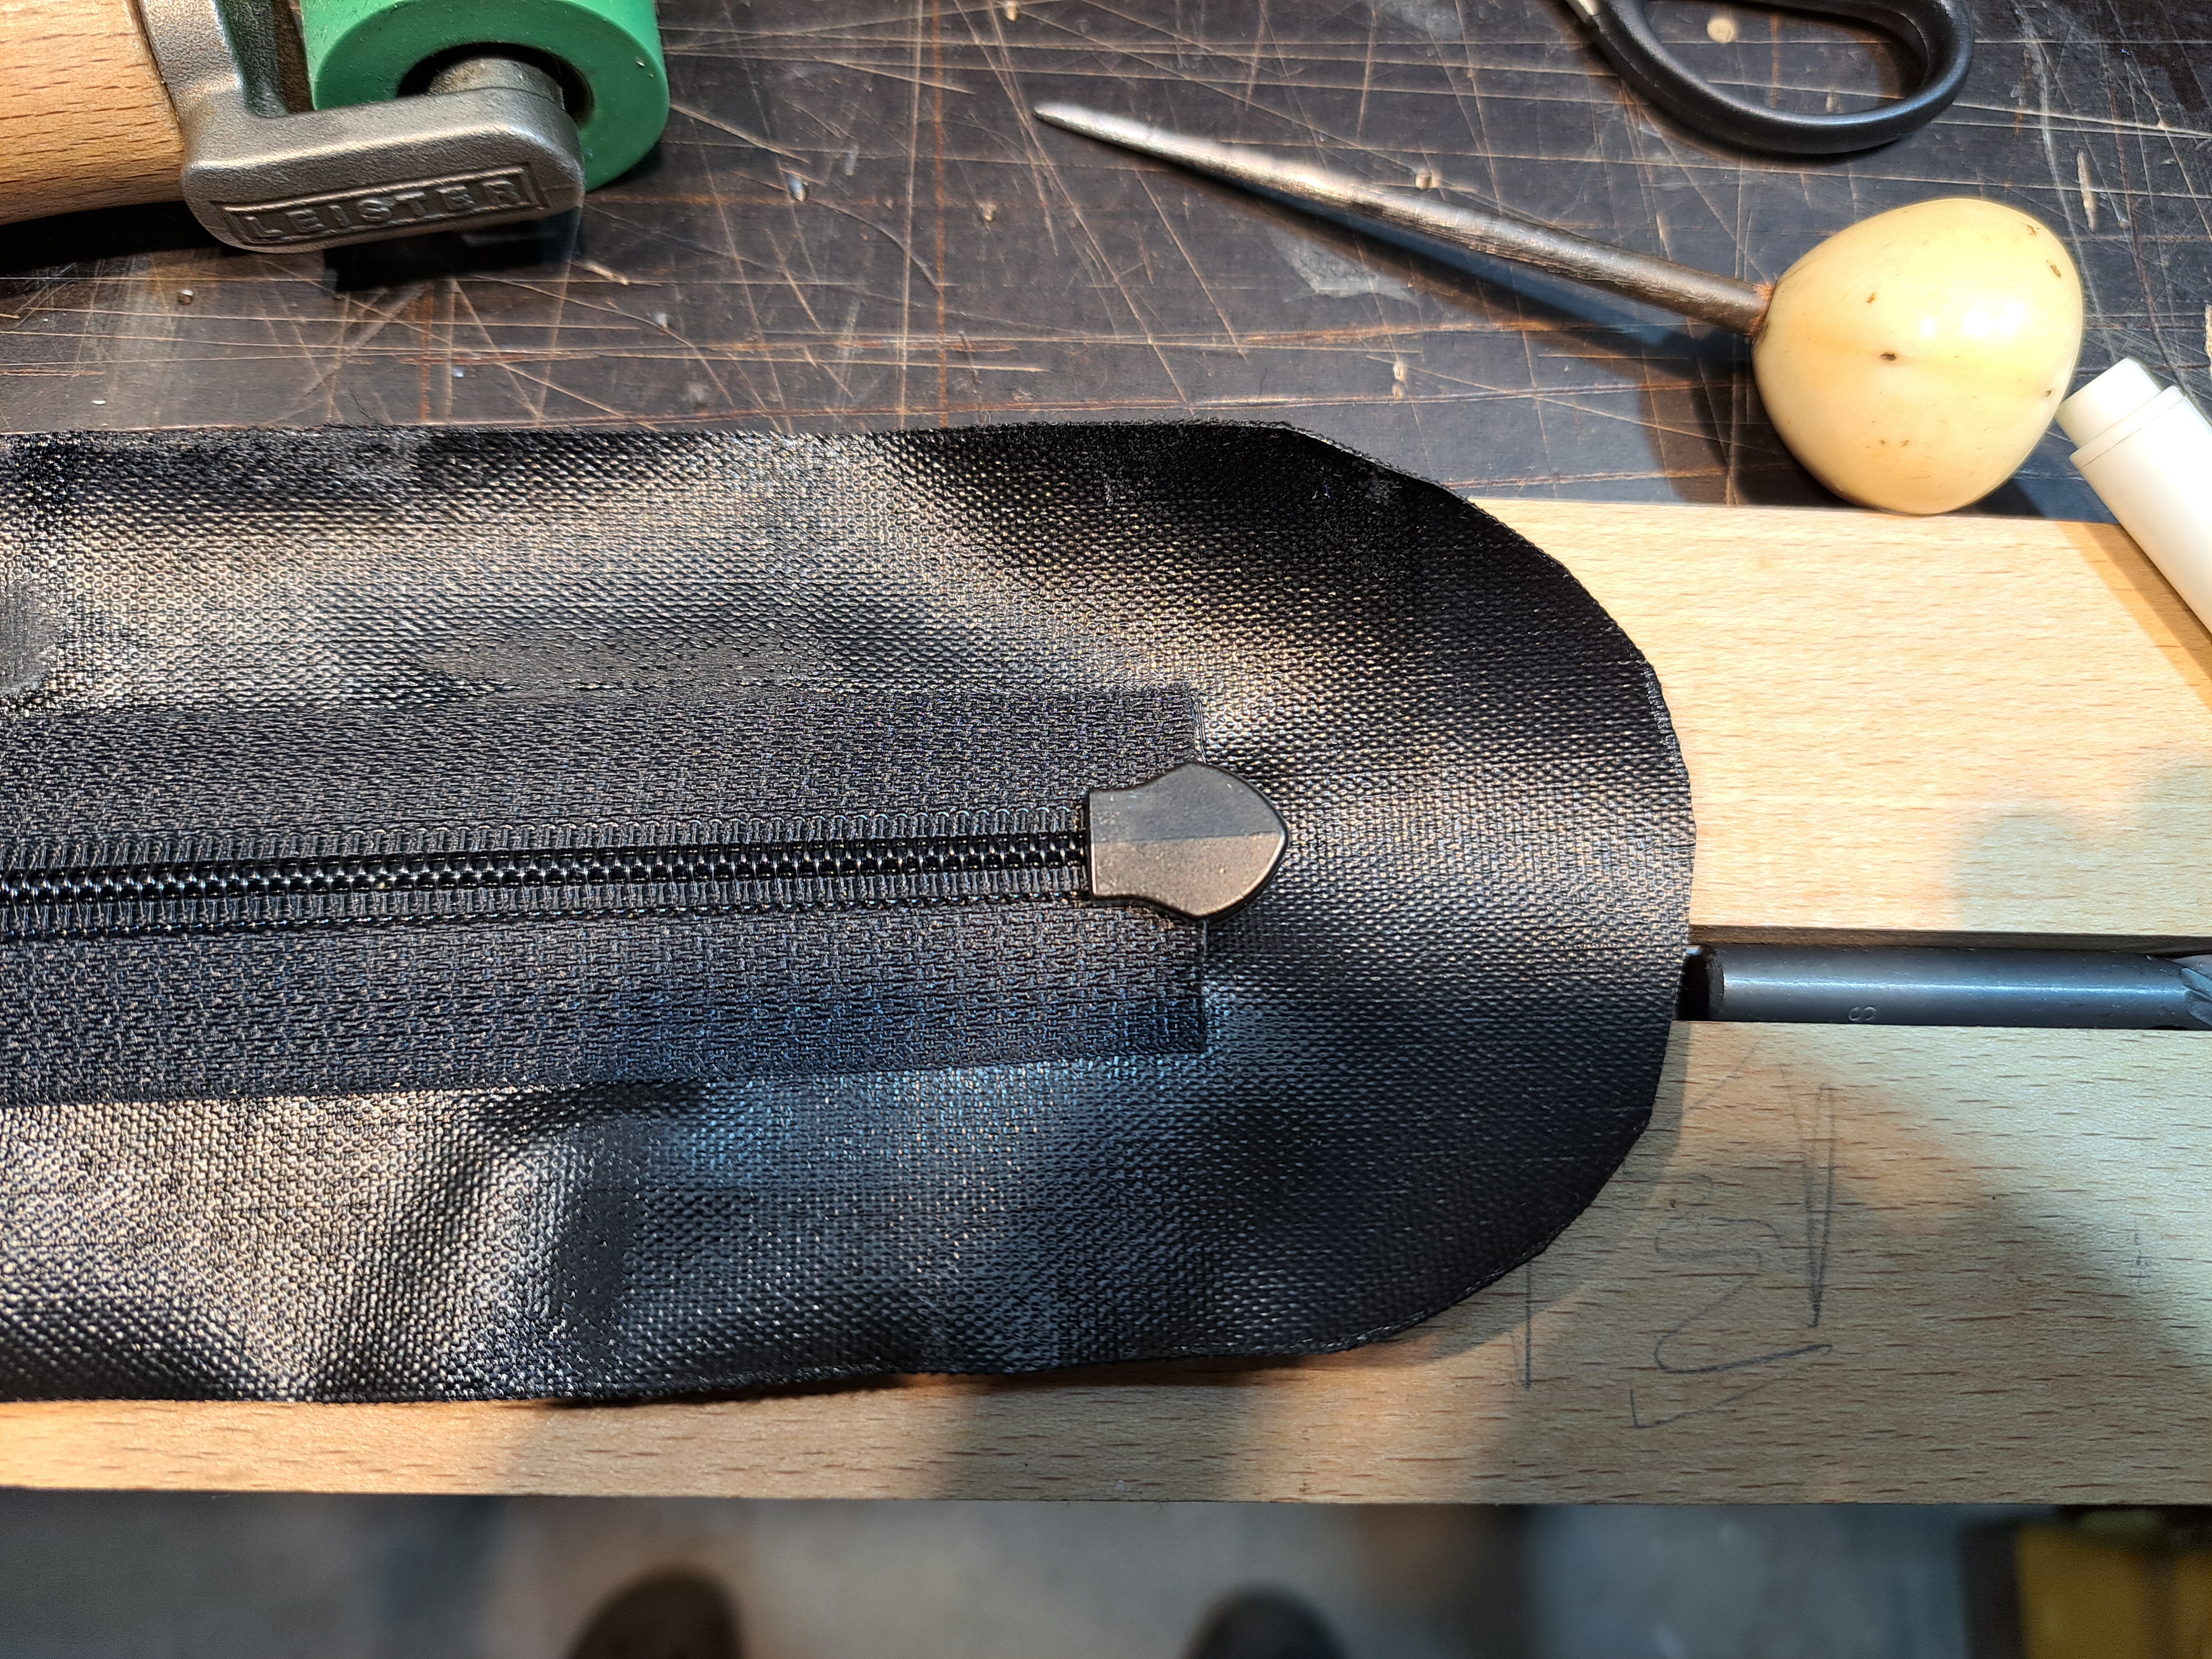
The slider is now placed on the stop section

Now pull the chain apart firmly, but carefully, and push the slider downwards.
This process requires a little dexterity. Strong tweezers or small, pointed pliers may help.

A small pair of pliers also helps to press the teeth (or spiral) back together after the slider is in.
This helps to seal this area when welding.
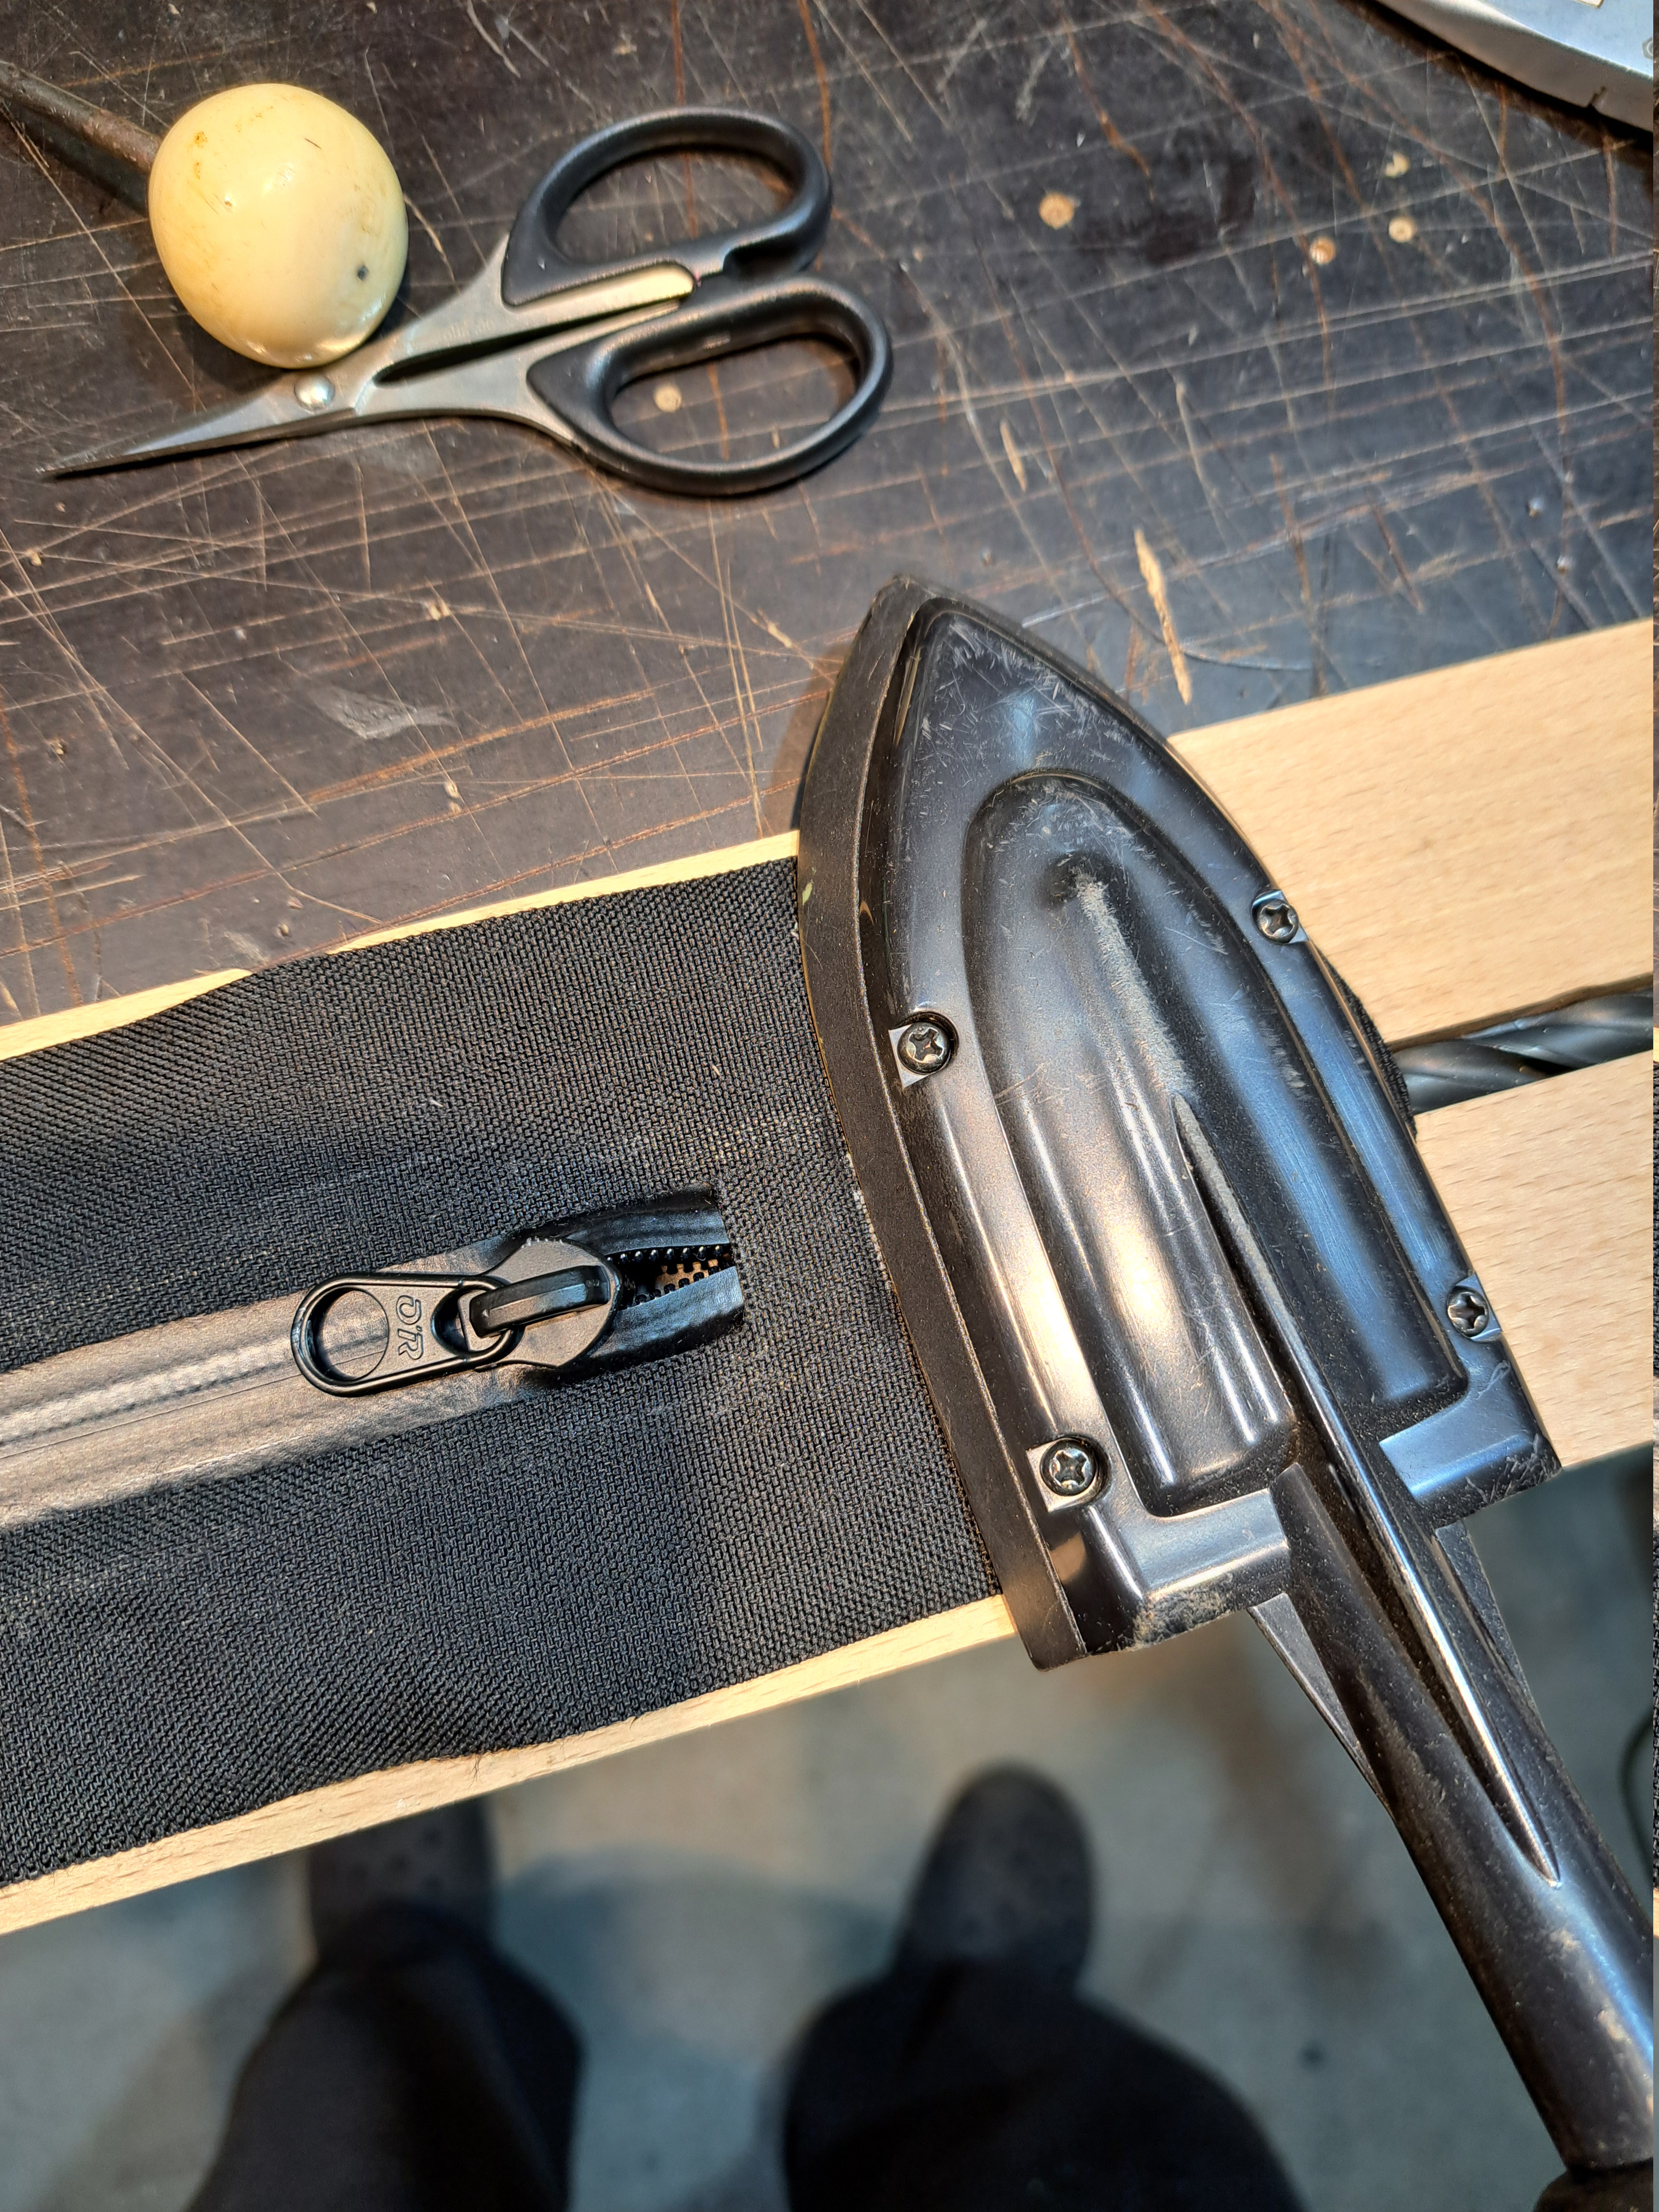
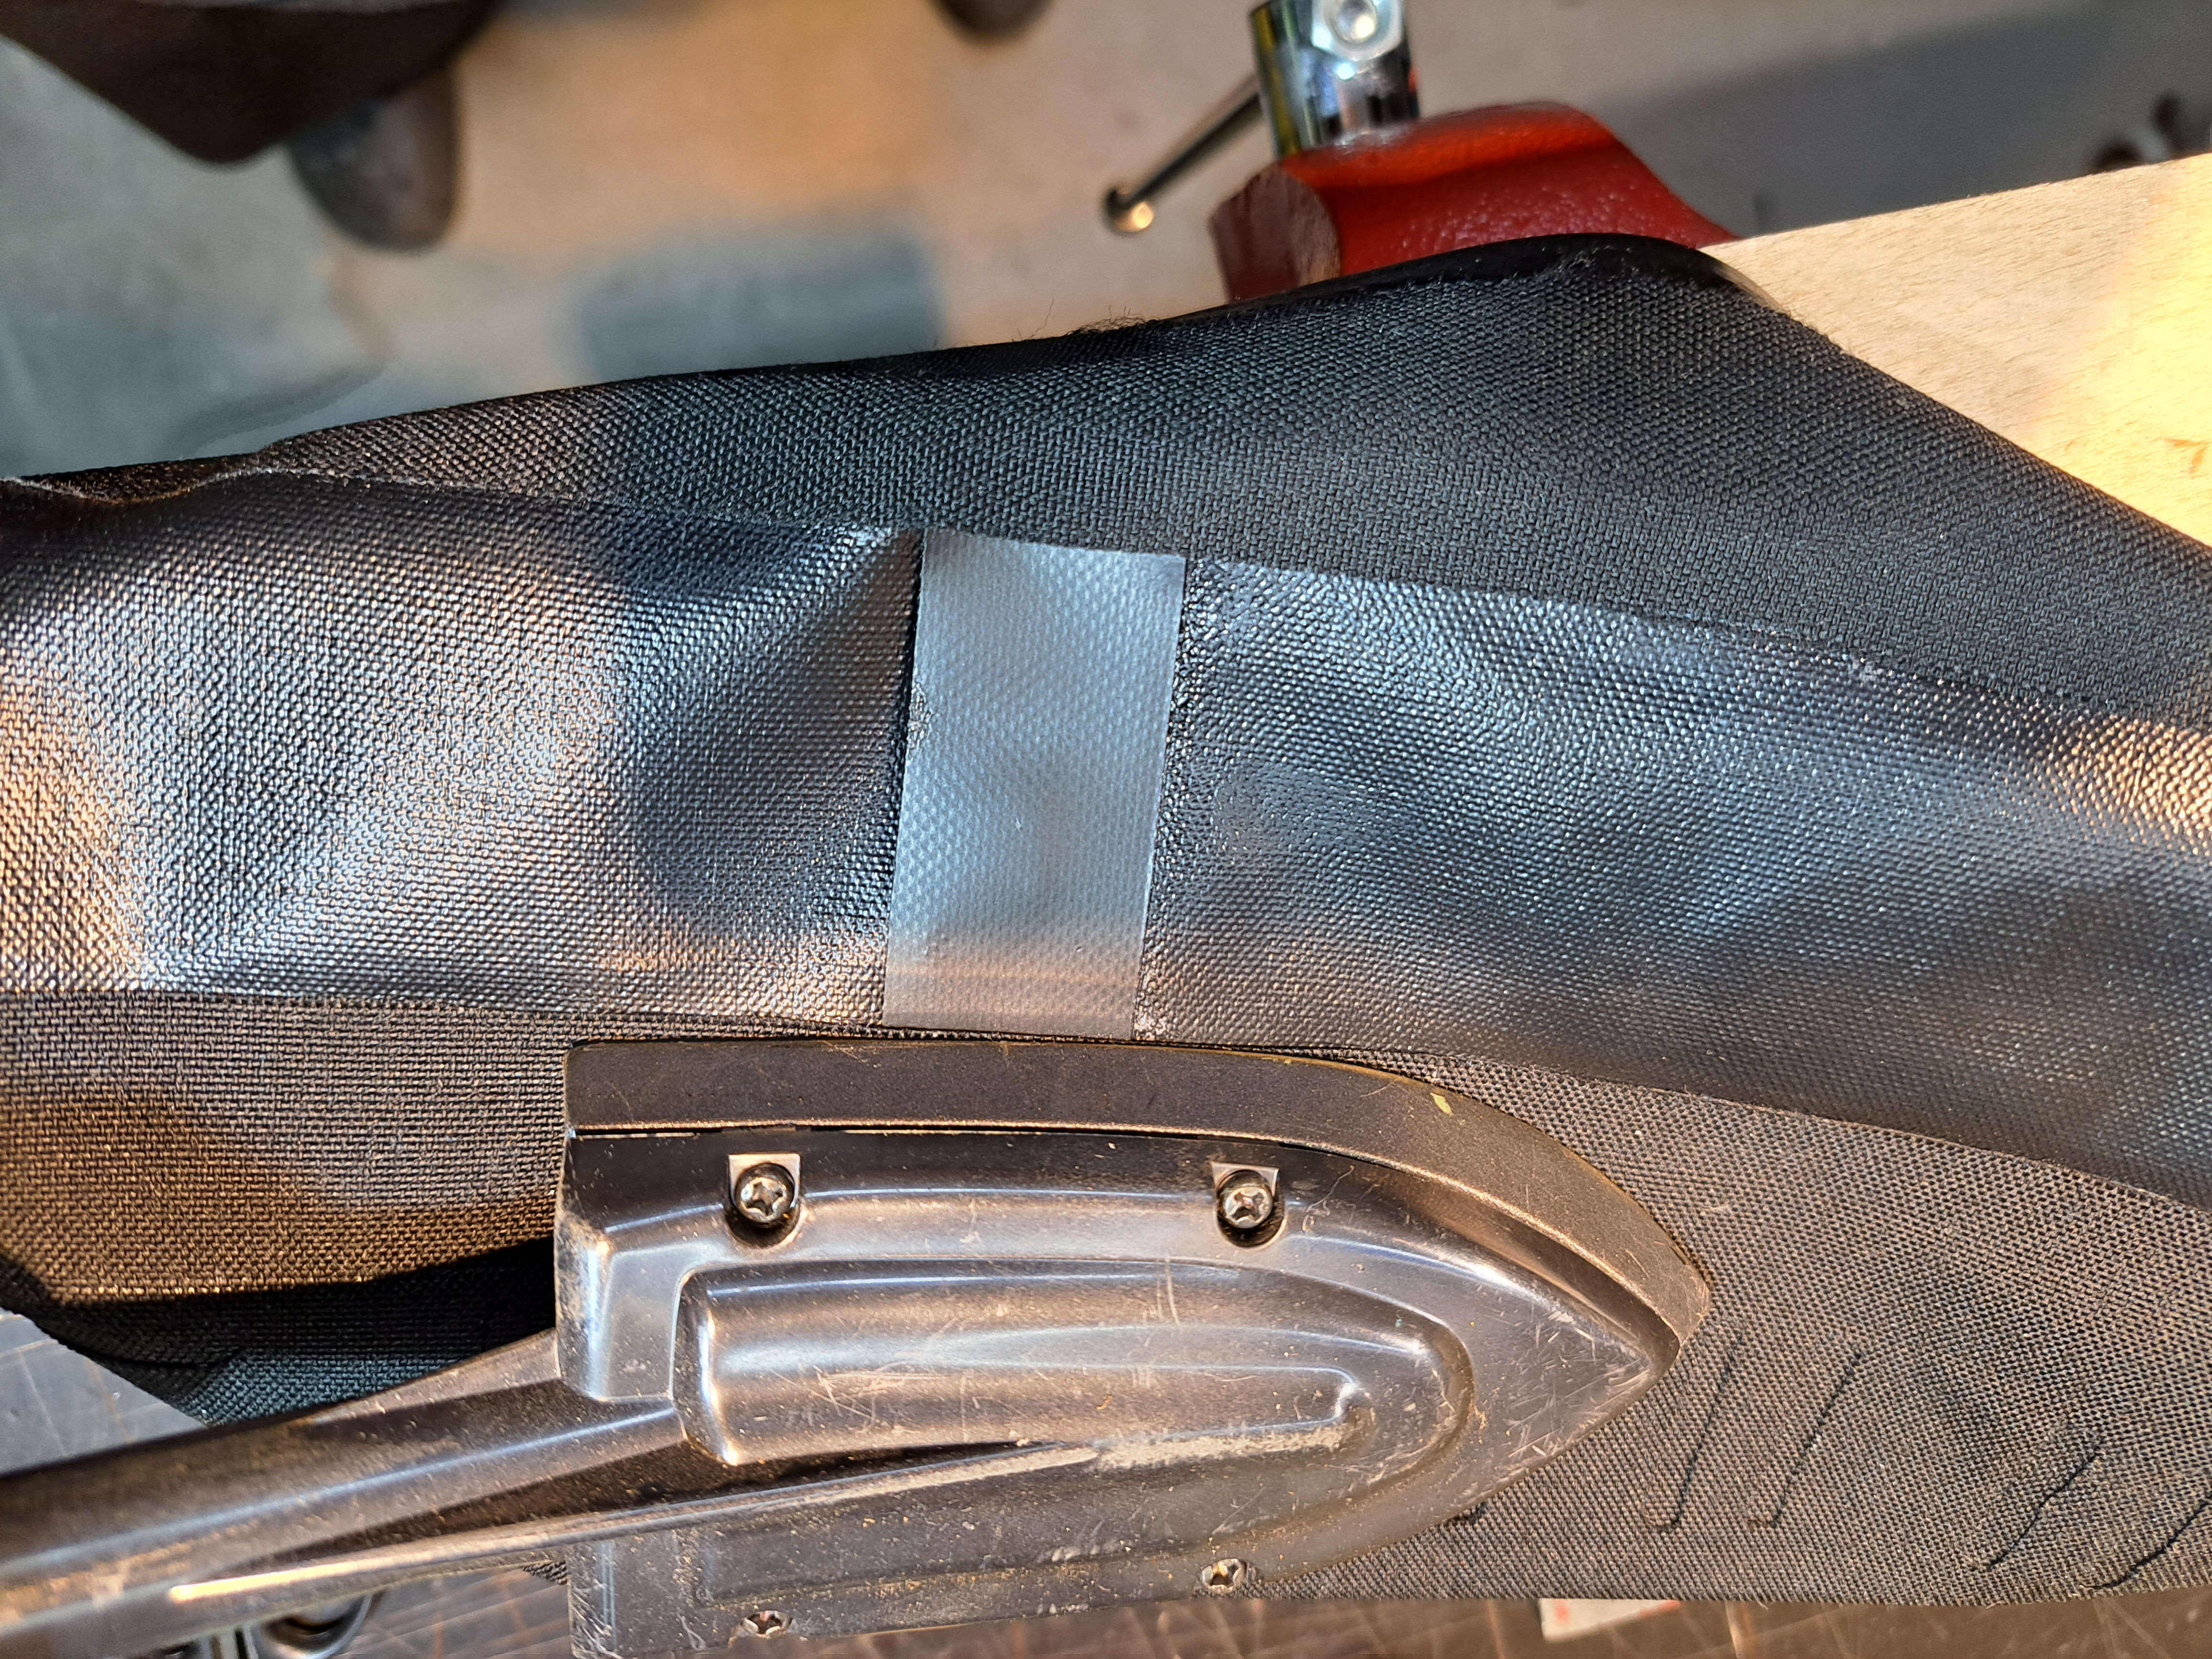
Turn everything round and weld firmly over the end.
Caution! Do not weld over the cover of the slider! This must remain free.
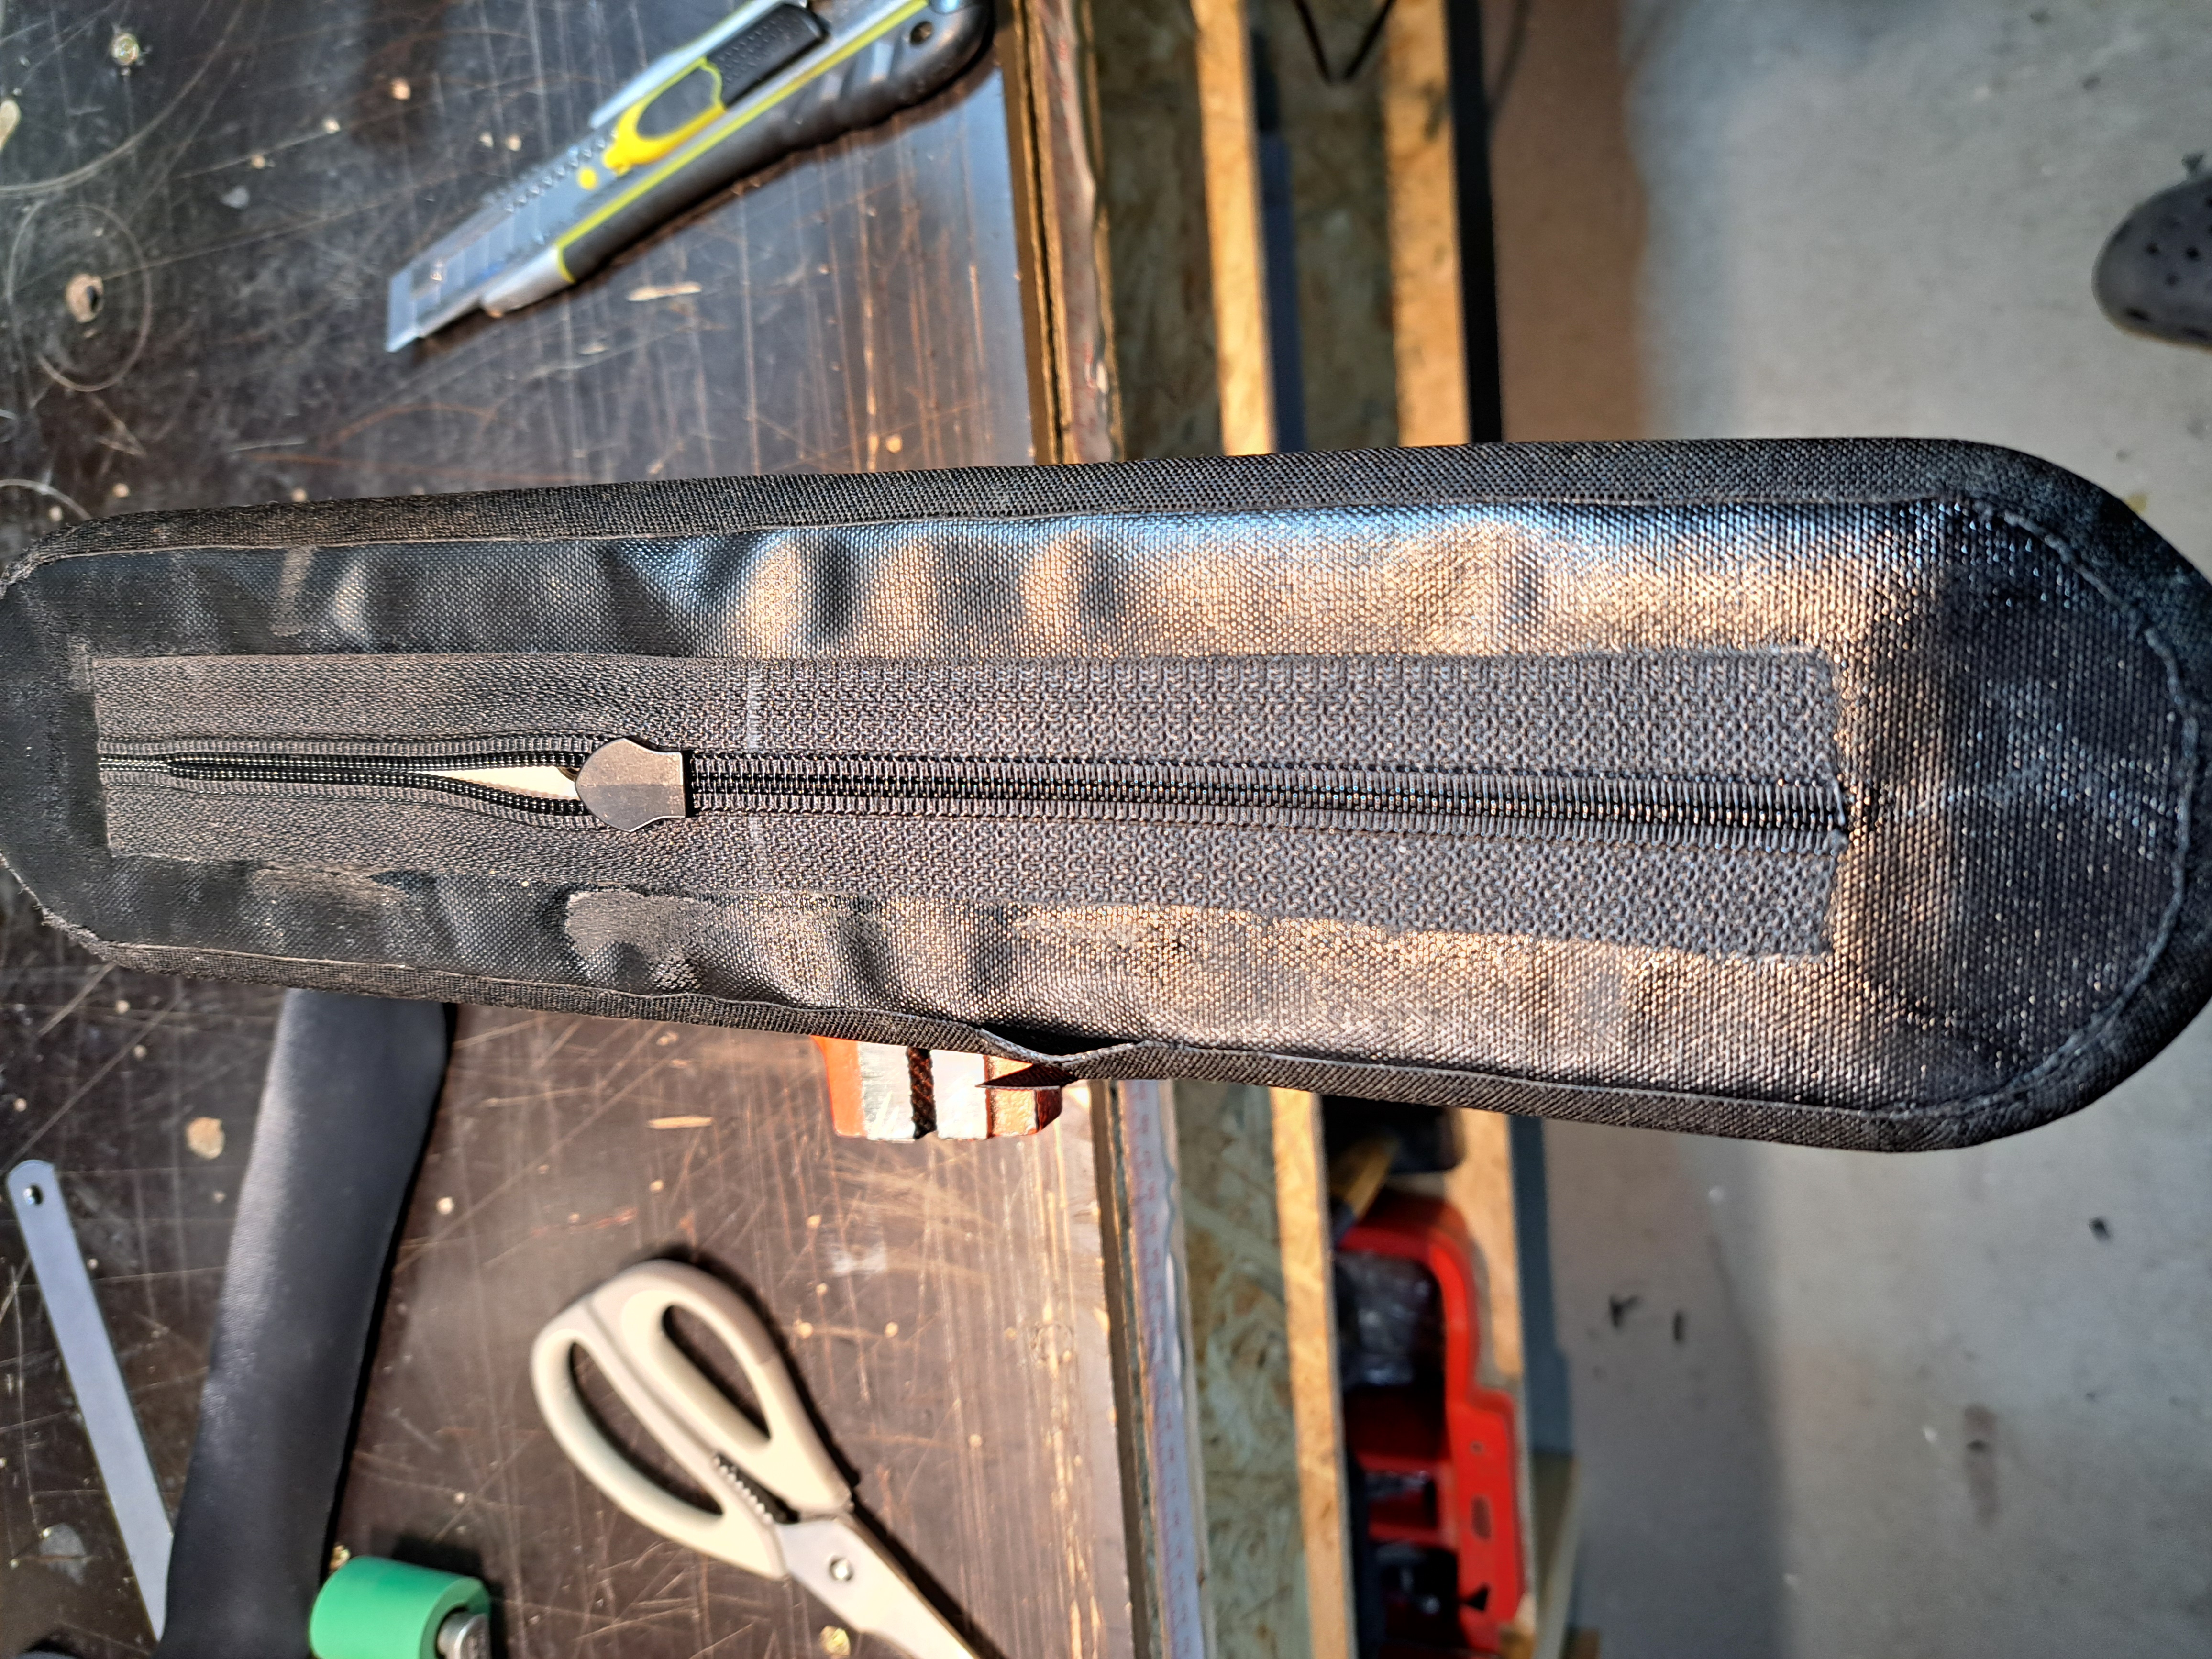
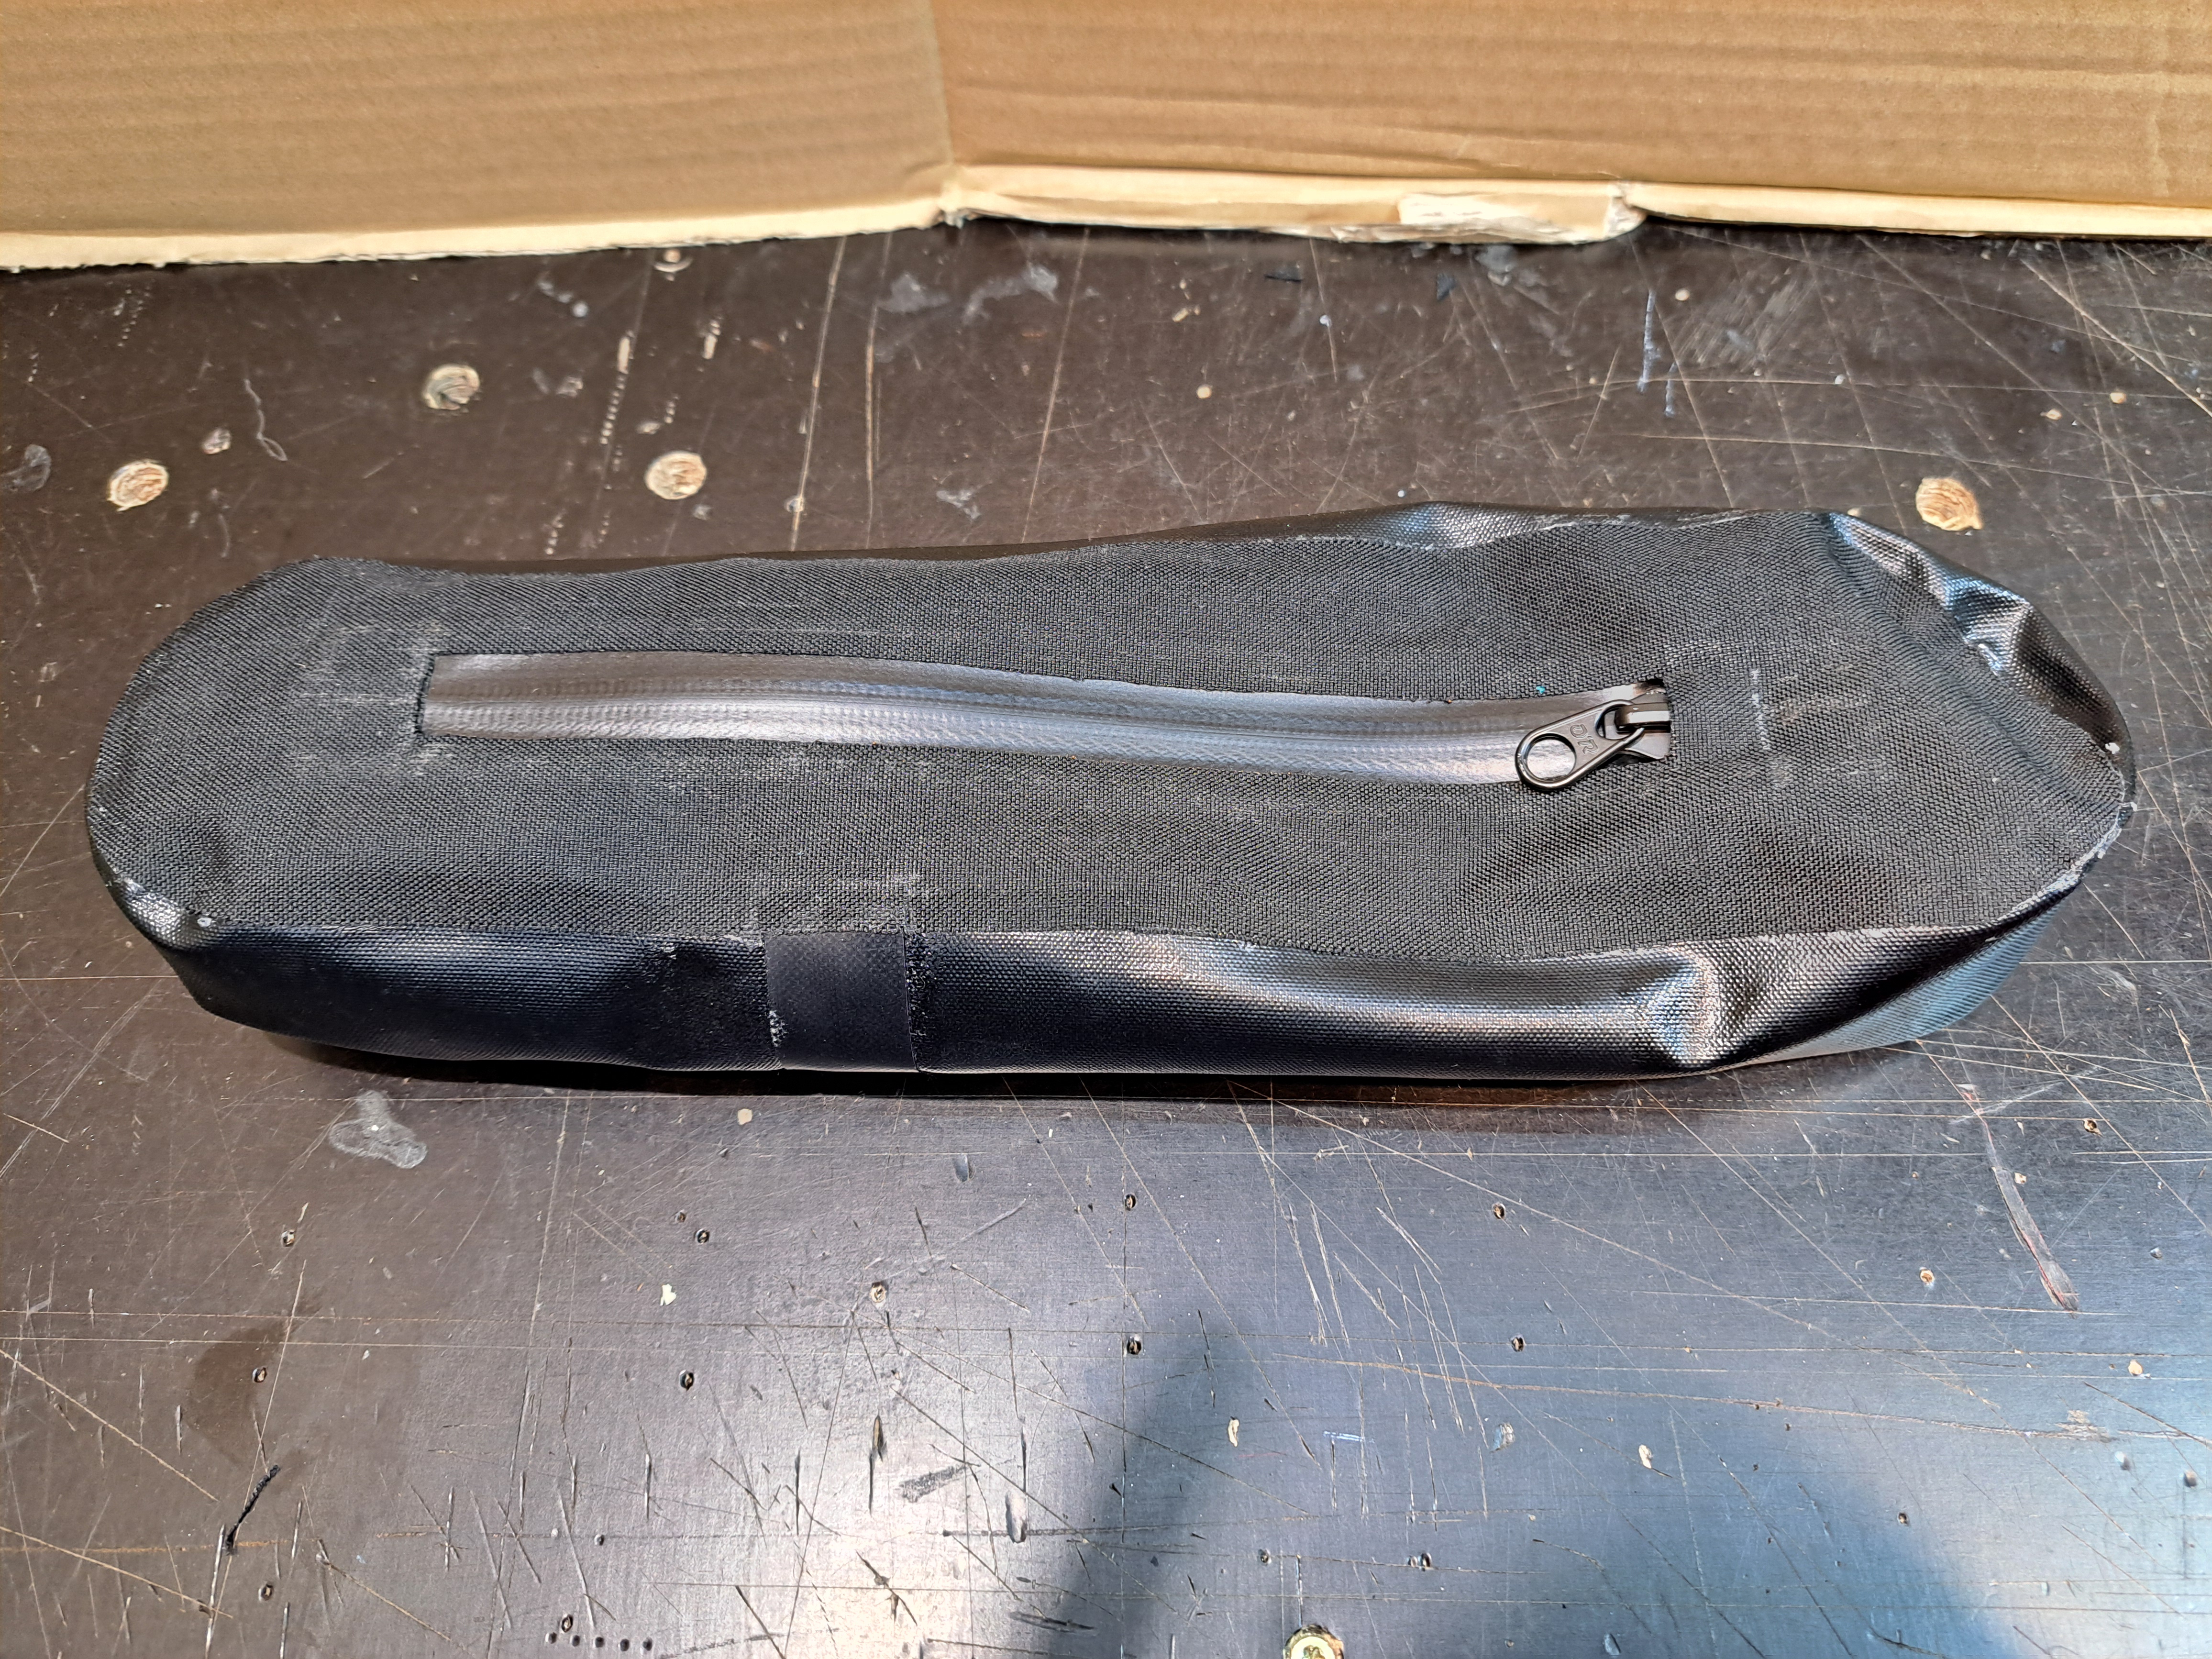
Finally, the top of the stop section should look like this...
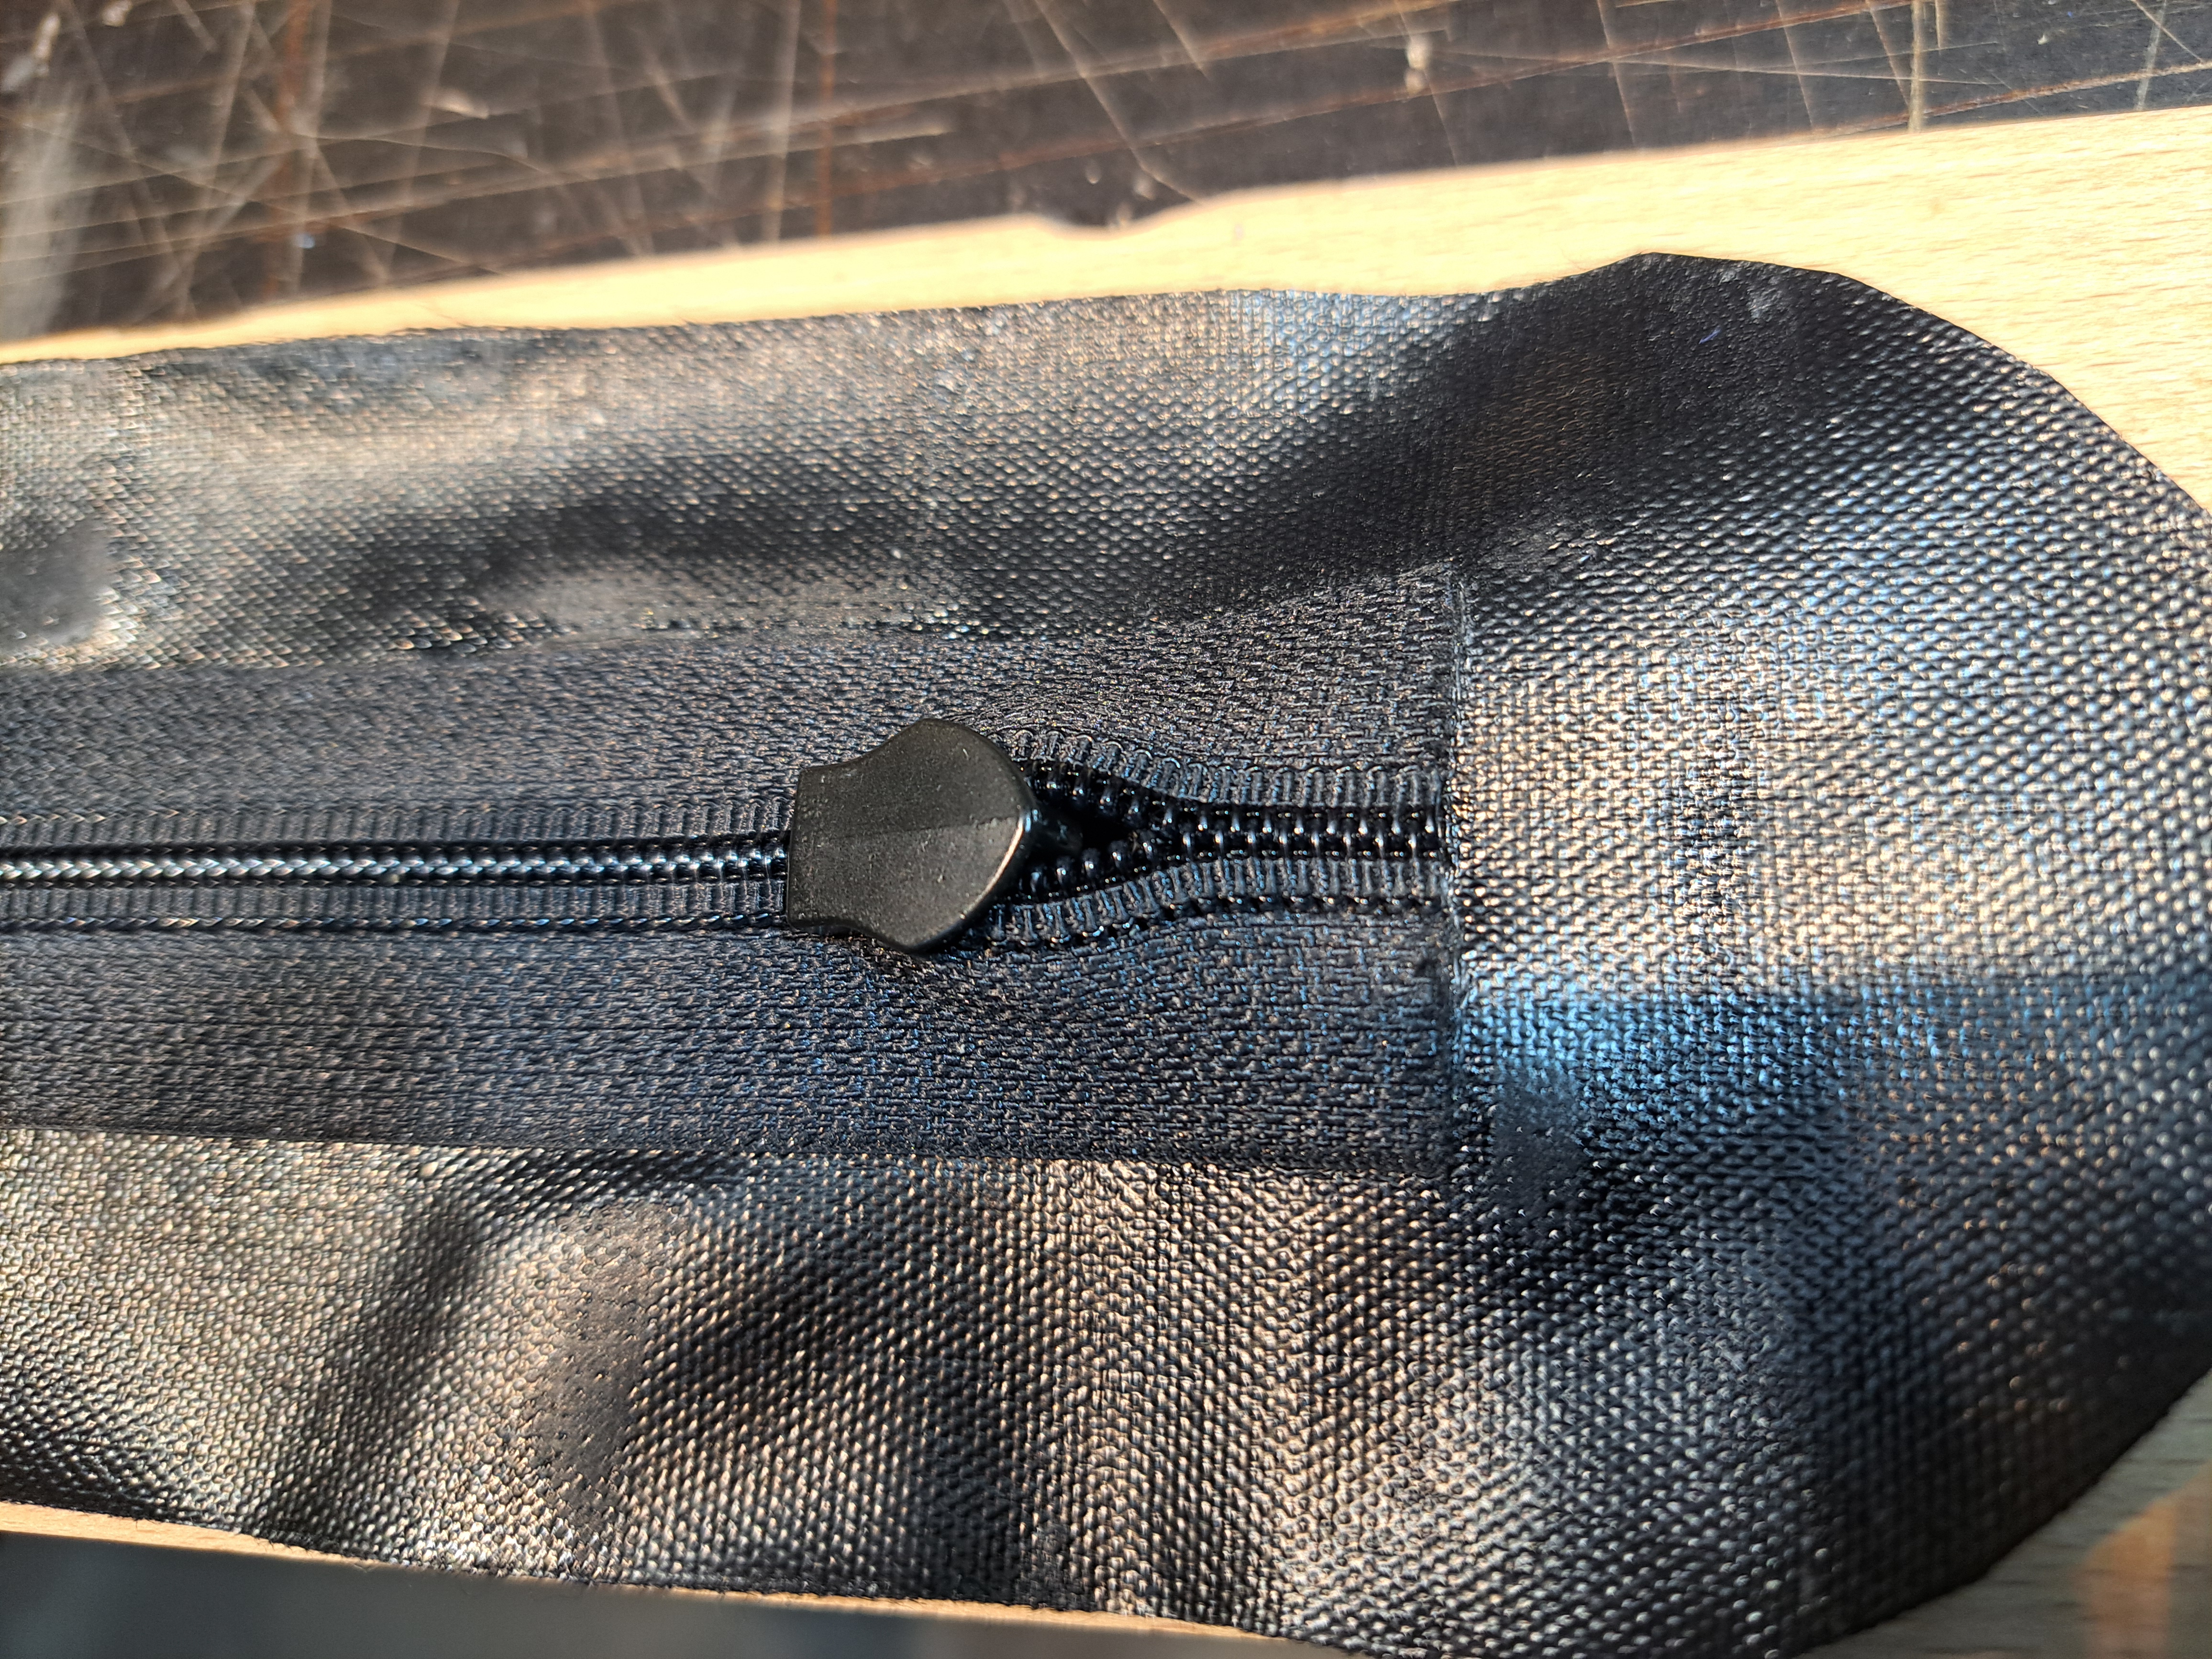
... and this is the underside.
The opening on the slider, which always remains with this type of zip, is clearly visible.
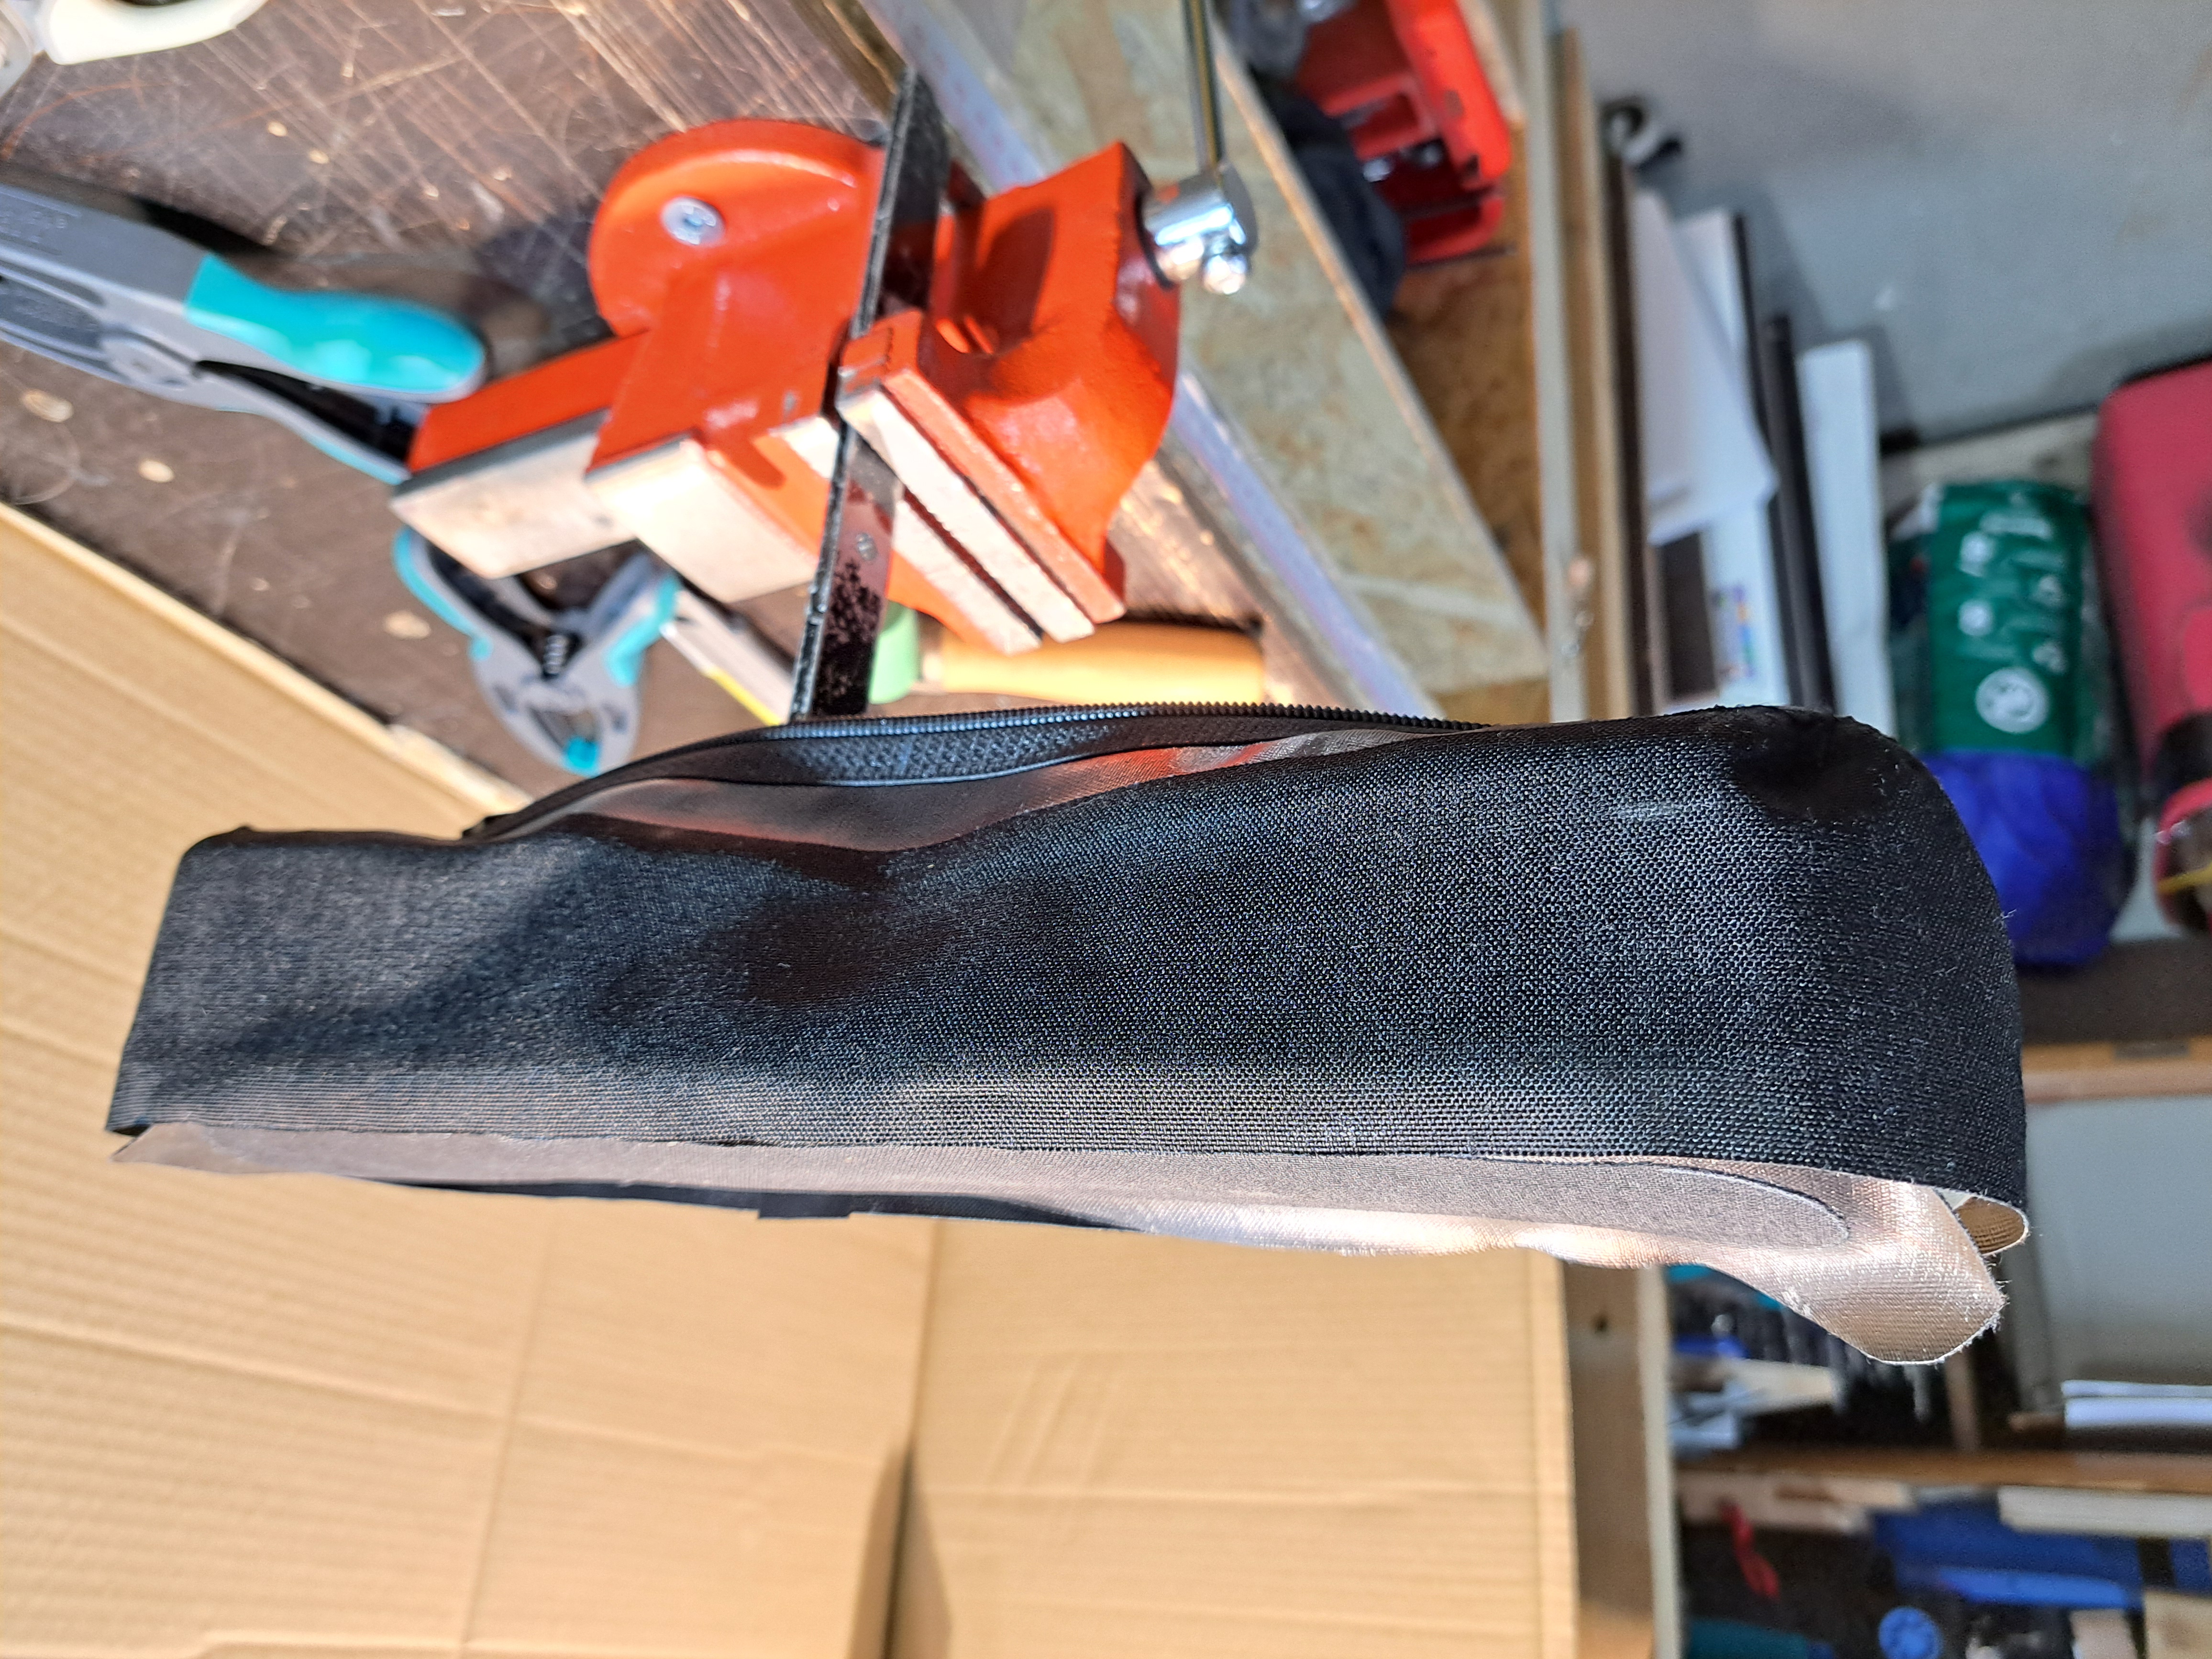
The end section can now also be welded well.
The zip is now fully installed.
This is followed by a description of how it can be fitted into a small pocket using a separable template.

For bags with small openings such as zips, it is necessary to be able to disassemble the template in order to get it out of the bag again after all the parts have been welded together.
Here is the one I made for myself.

Assembled, it looks like this.
This makes it easy to clamp the template in a vice and work comfortably.
To understand the following description, it is helpful to have read this howto.
It describes the basic structure and processes, which are not described in detail below.

As the two ends of the side strip of this pocket are brought back together, we must ensure that this area can also be welded tightly.
This applies to both ends of the strip as well as the connection to the top and bottom sections.
This is a little tricky in our case due to the process, as we can only ever weld the TPU sides of parts together.
The easiest and cleanest way is to weld a strip of fabric coated with TPU on both sides in between..
If you don't have this available, take some of the fabric coated on one side and make the strip so long that it overlaps at the top and bottom. You then fold the ends inwards and weld over them when joining the parts. This creates a small pocket on the inside, which you should fill with SeamGrip to be on the safe side.
You can find detailed instructions here.
The side strip and the top section with the zip are joined first.
To do this, everything is aligned on the template and fixed in place.
After everything is neatly welded...

... we carefully detach everything from the template...
...turn it over and fix it back onto the template together with the underside.

Once everything is welded, we can dismantle the template and shake it out of the bag.
Now we weld the connection of the side strip.
It is important that all the connections are particularly well fused together at this point.
First the connections to the top and bottom.
To do this, turn the bag to the right.
Then turn everything inside out again and weld on the end of the side strip.
Finished.
I used a toothed zip offered as waterproof for this bag.
A test in the shower was very successful.
As long as the water was able to run down from the top via the slider cover of the zip, the bag remained completely dry inside even when there was a lot of water.
If the water gets under the cover, the inside of the bag gets wet.
If the slider is difficult to move, a little silicone spray will help.
diy@einbeispiel.de