Tools and equipment
The second question, after that of the material used, which every budding DIY bag smith asks himself, is of course the question of tools.
Here you should first thoroughly analyse what you want and how far you want to take things.
If you are only planning to make one or two bags, then proportionality and quality requirements can quickly become irreconcilable.
Buying expensive tools is only really worthwhile if
a.) you don't have to watch the money,
b.) you only need one or two bags, but still of high quality or
c.) you want to build several bags or other things.
So it's almost always worth it ;-)
There are people who build new bags almost every season, just to know during production what they will do differently in the models for the season after next.
Better, cooler, lighter, more functional... ...no limit!
If you're like that, get good tools, everything else is no fun in the long run.
But if you're sensible, try out alternatives. They certainly exist. Be creative.
Which iron?
This is the most important question, without a doubt.
For me, the decisive criterion in this selection is the ability to set the welding temperature
a.) exactly
b.) in small steps
c.) can be changed quickly
d.) quickly and exactly reproducible
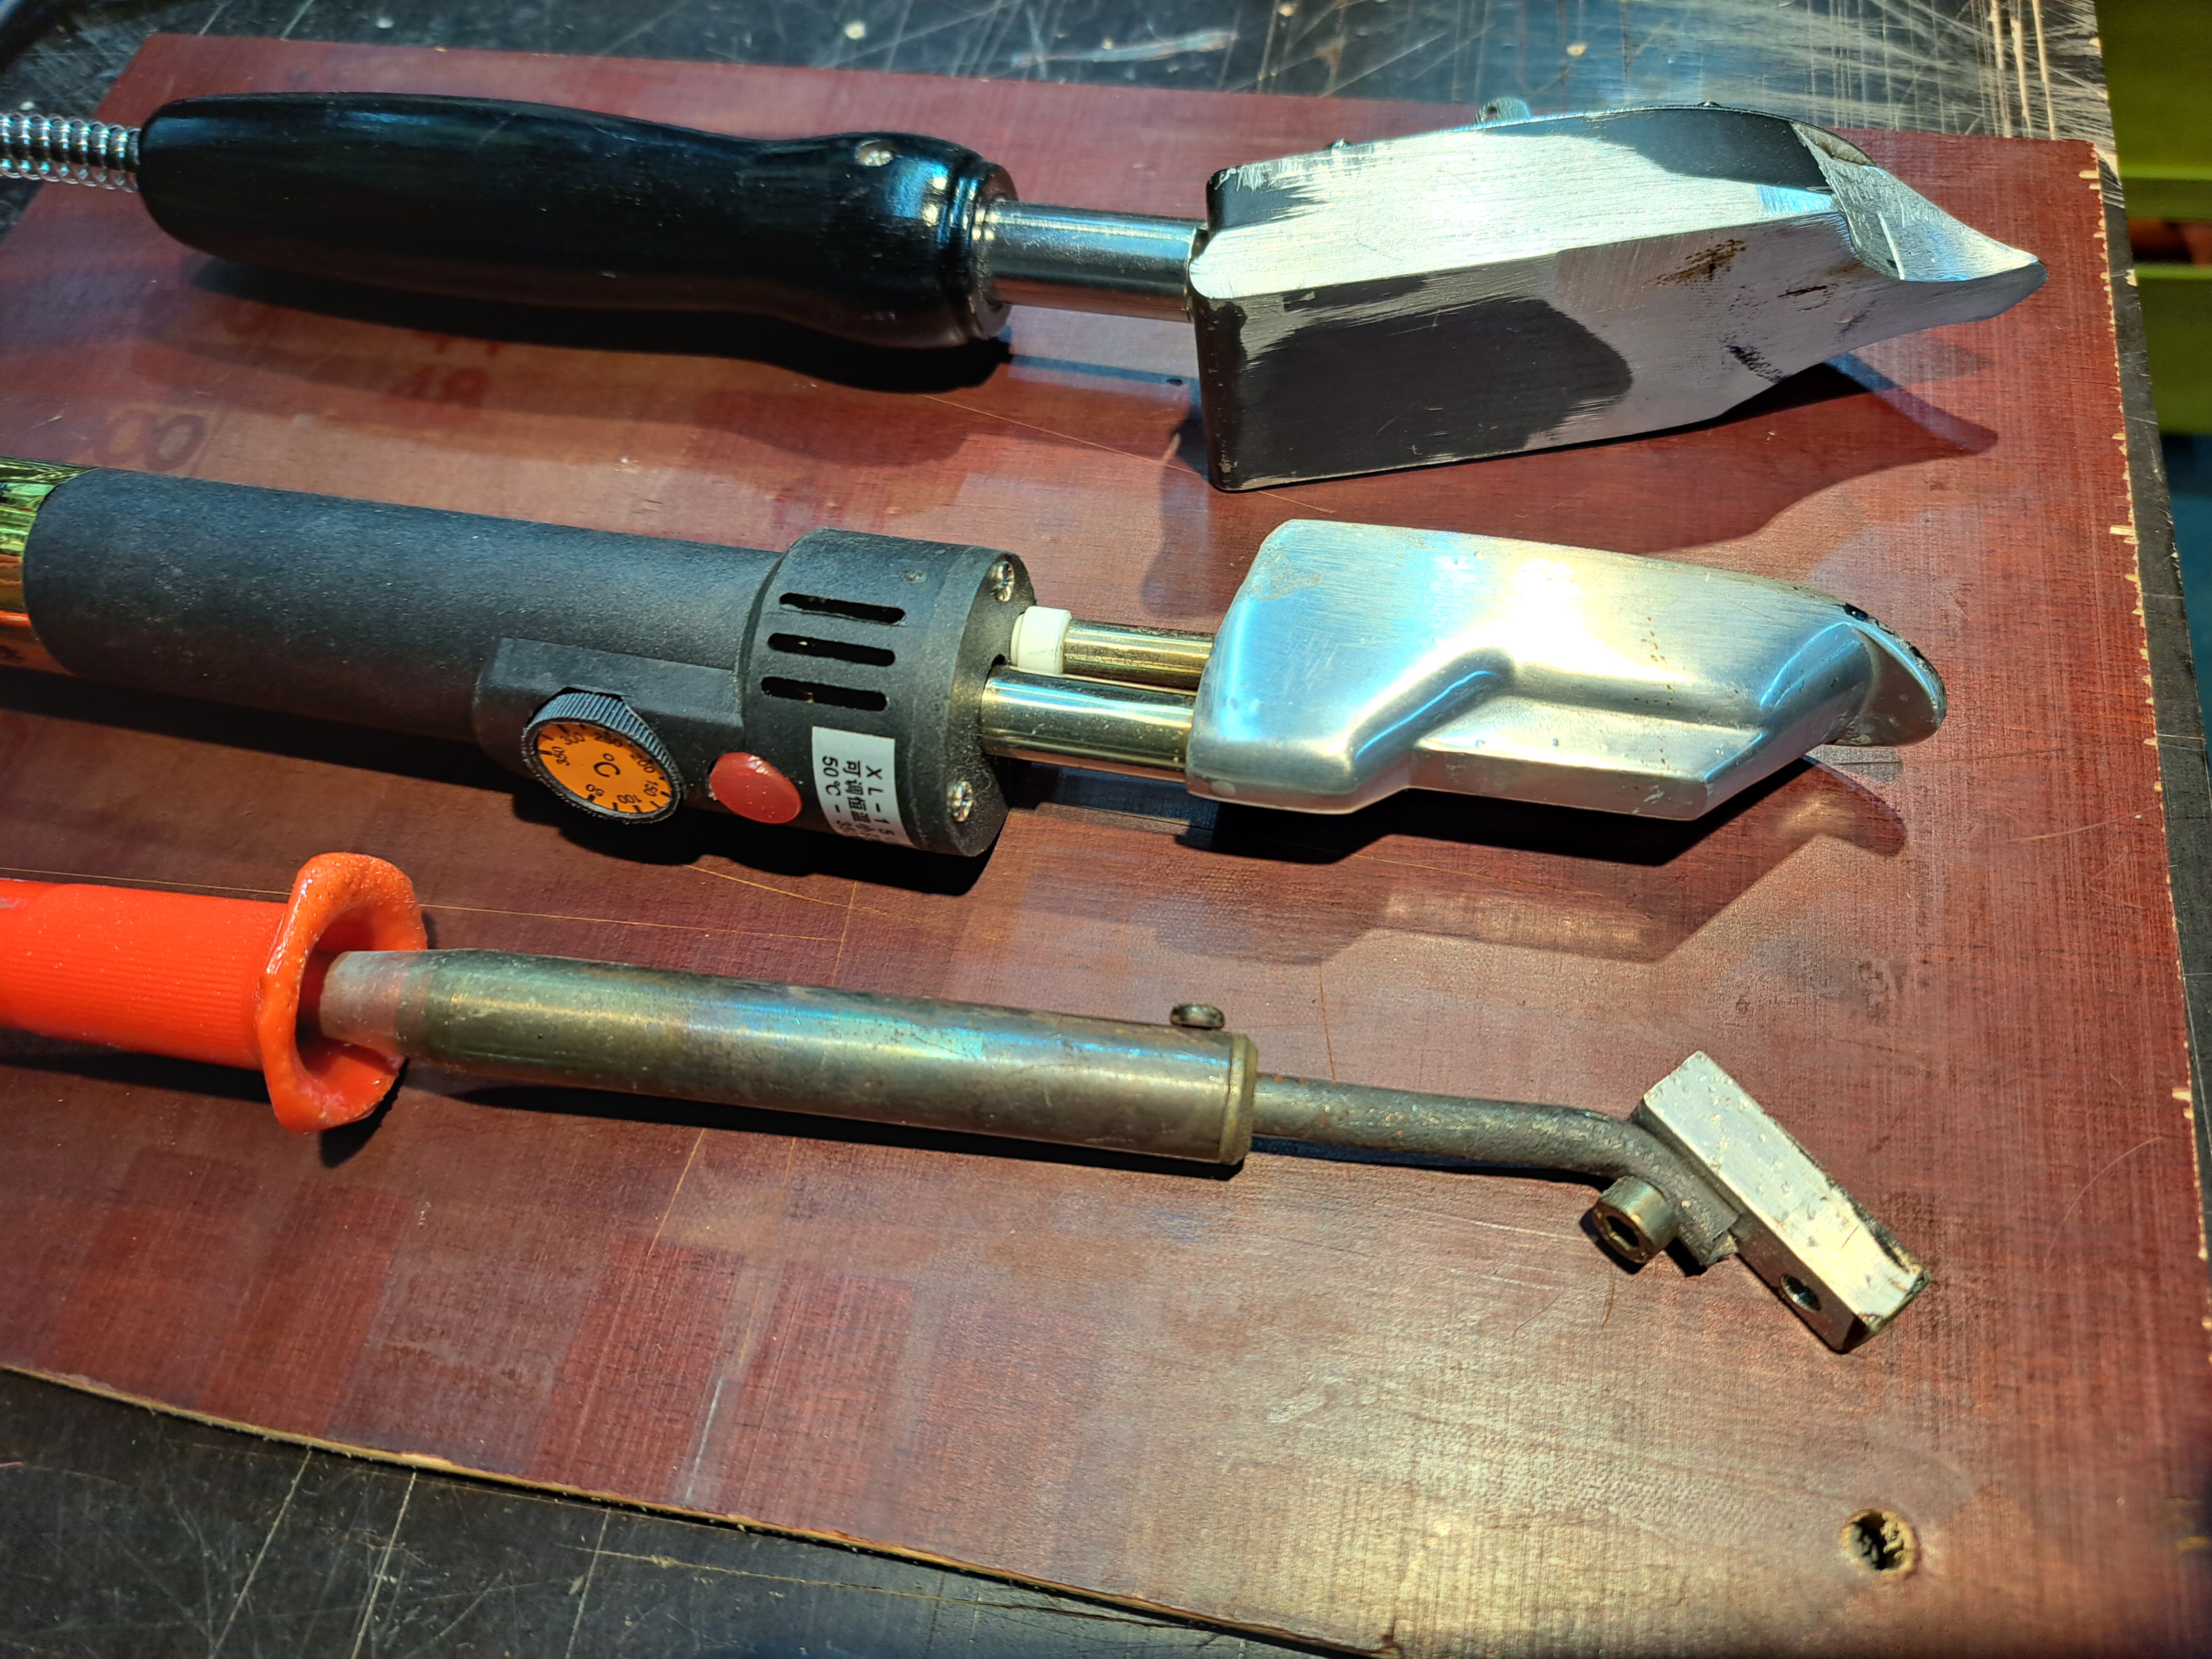
These three candidates, which I used from the bottom to the top of the timeline, had various shortcomings and are rarely if ever used.
That doesn't mean they don't work, but you spend a lot of time trying to find the optimum temperature. This, in turn, is essential for clean and relaxed working.

This is the model I ended up sticking with and I've been working with it a lot here for about a year.
You can regulate the welding temperature perfectly and the head is comparatively nice and flat.
If you search for "digital sealing iron", you will find various offers. They probably all use the same Chinese technology, so the manufacturer doesn't really matter.

This picture shows the benefits of not only knowing the optimum welding temperature, but also being able to set it very precisely.
This is the Teflon-coated underside of my iron after, as I said, about a year of use.
There is virtually no visible wear on the Teflon coating. Even deposits of melted material are hardly recognisable.
On the one hand, because the fabric side does not usually melt at the optimum temperature.
On the other hand, melted residues can be easily removed because they do not "burn in" at too high a temperature.
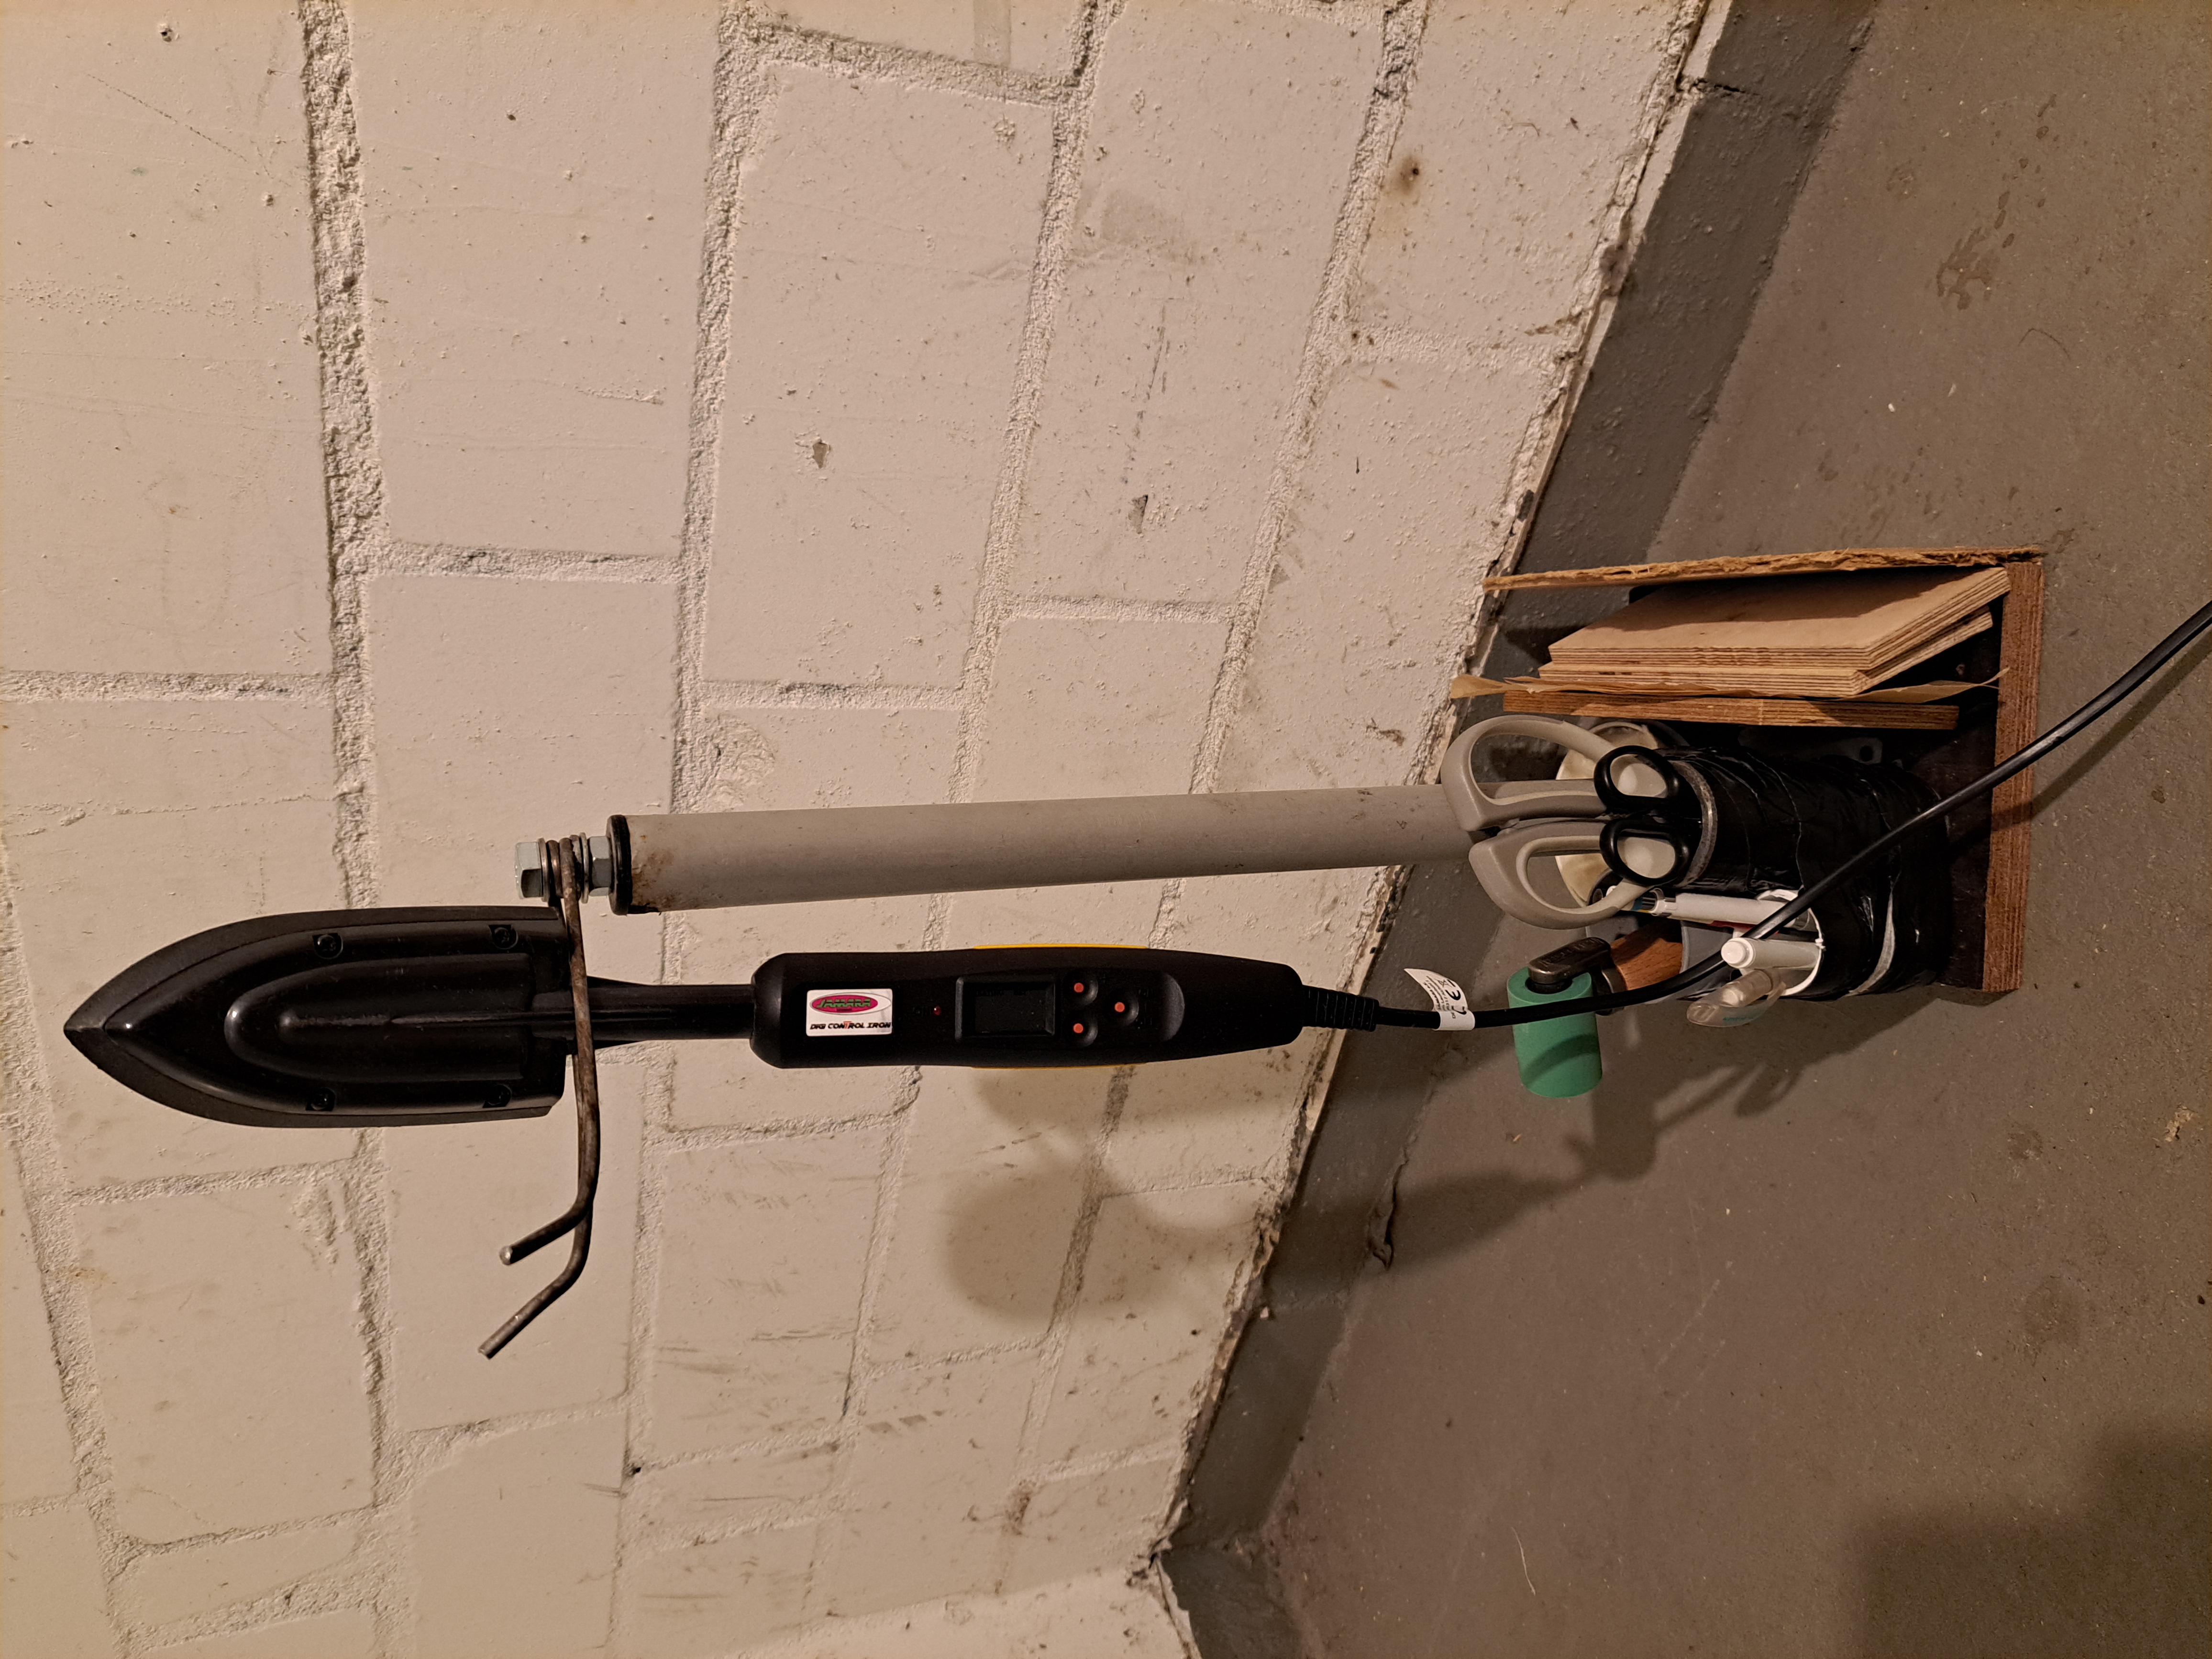
An iron like this is hot, of course.
That's why it's a good idea to position it at a safe distance from anything that could accidentally melt, including your skin.
At the same time, however, it should always be within easy reach and easy to put down again.
The solution was an old table leg, some thick wire and a few scraps.
The base plate should weigh something. I also attached a few pieces of pipe to hold the small tools. Small boards to put underneath and pieces of baking paper are always to hand.
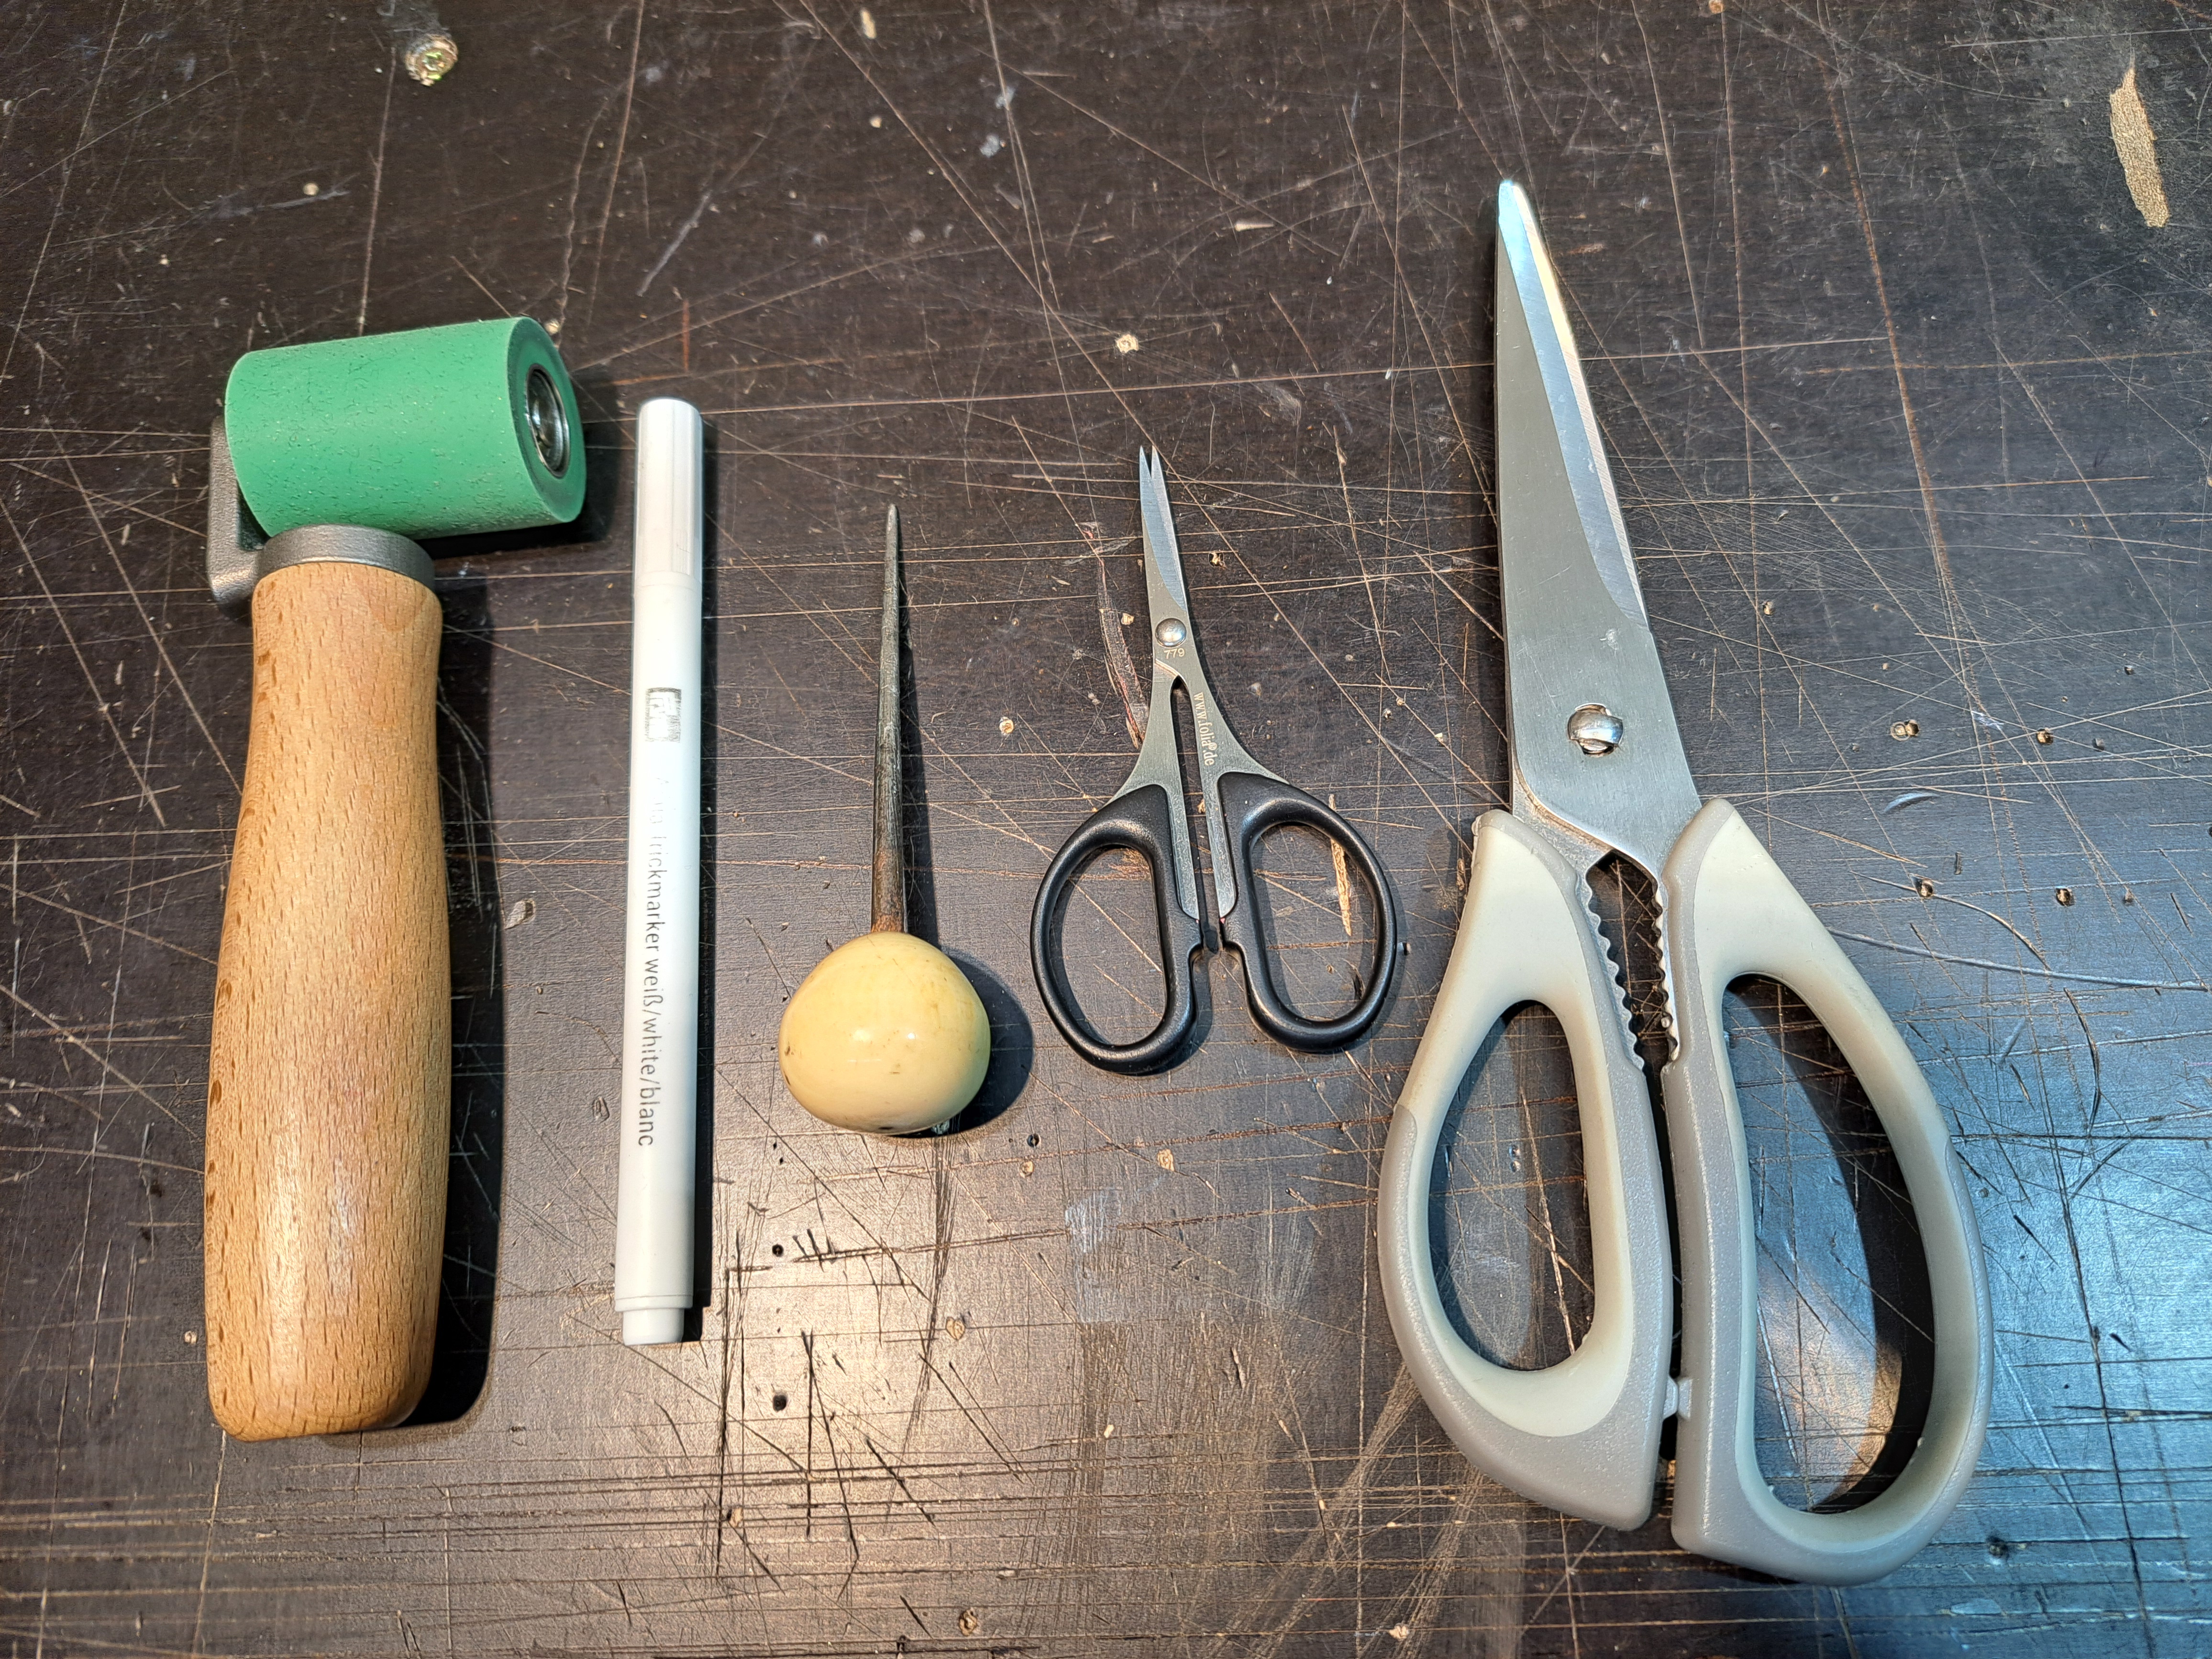
The most important tool after the iron is the pressure roller. Models with ball-bearing silicone rollers are expensive, but worth the money. What I said at the beginning about proportionality and quality standards applies. I cannot say whether and how you can work with cheaper solutions, I have never used a different roller for various reasons.
I use a Prym aqua trick marker in white for marking and labelling. You have to get used to the fact that it takes a few seconds for the line to appear. But you can easily remove all the markings with water. A great advantage if you mainly use black fabrics. Caution: always put the cap back on straight away, otherwise it will dry out quickly. And store with the cap facing downwards!
An awl is helpful and normal household scissors are sufficient. They should just be sharp and clean. As long as they cut the cloth easily and cleanly, any model will do.

Such templates are very suitable if you want to produce simple cylindrical shapes.
If the shape of the bag is mirror-symmetrical, one board with a bevelled edge all around is sufficient. For non-mirror-symmetrical shapes, two boards are required, which should ideally be glued together.
The edges are made with a router, but you can also help yourself with a wood rasp.
For pockets that only have a small opening such as a zip, the template should be separable to make it easier to remove. This can easily be achieved with a milled groove, a piece of aluminium profile, a few threaded sleeves and screws.

Double-sided adhesive tape and masking tape help to position the parts without slipping.
Be careful not to let the adhesive tape get hot and melt on the fabric, as this will leave unsightly marks.
Masking tape is more forgiving, it can withstand more heat and any adhesions can be removed relatively easily.
Various supports that can be firmly fixed in a vice with a wooden block screwed on are also helpful. If they have holes of a suitable size, decompression valves, for example, are easier to install.
Wooden strips and aluminium profiles are helpful both for marking and for clean welding.
You can see an aluminium square tube on the two wooden strips. This is covered with double-sided adhesive tape, on which masking tape is stuck (adhesive side up). This setup is very suitable for welding hoses (without a template).
Not shown in the picture are various clamps and weights that help to fix the parts to be welded and, if necessary, keep them out of the danger zone of the iron.
diy@einbeispiel.de